Adding a New Collection
-
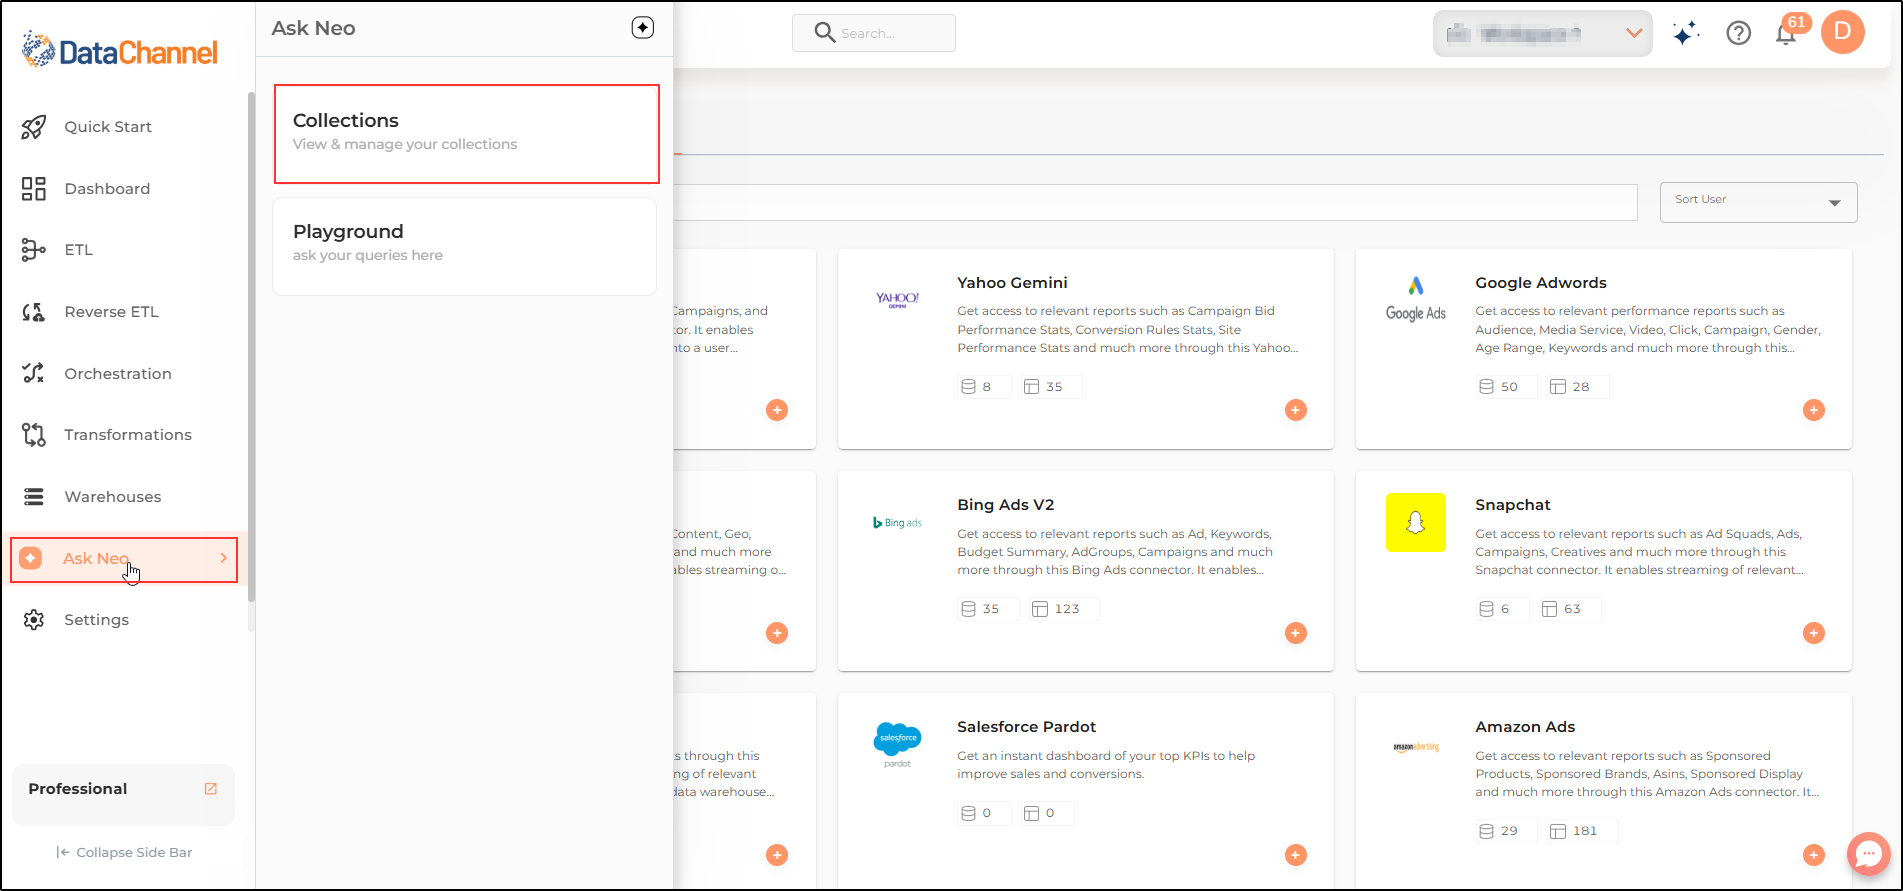
Go to the Ask Neo tab, the second last icon on the sidebar, right above the Settings Tab.
-
Go to the Collections option, and it opens a list of all the collections previously added by you.
-
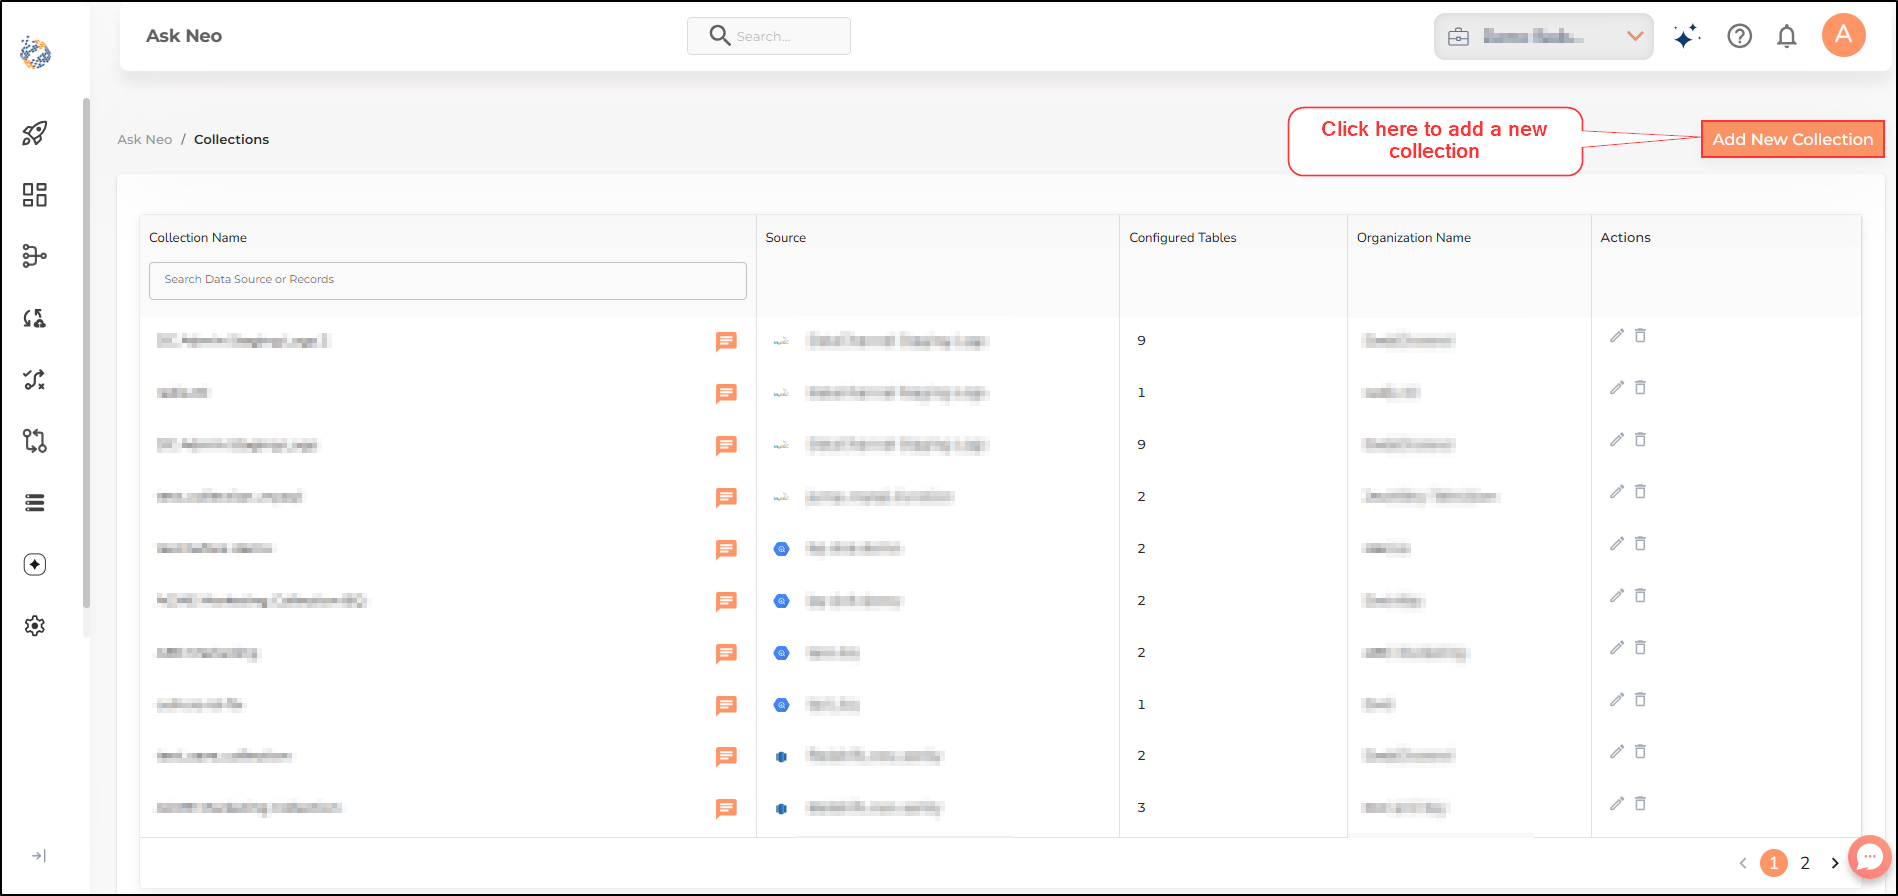
Clicking on the Add New Collection button, located below the Top Banner, on the top right corner of the UI Screen, allows you to create a new collection.
Step 1: Choose your source
-
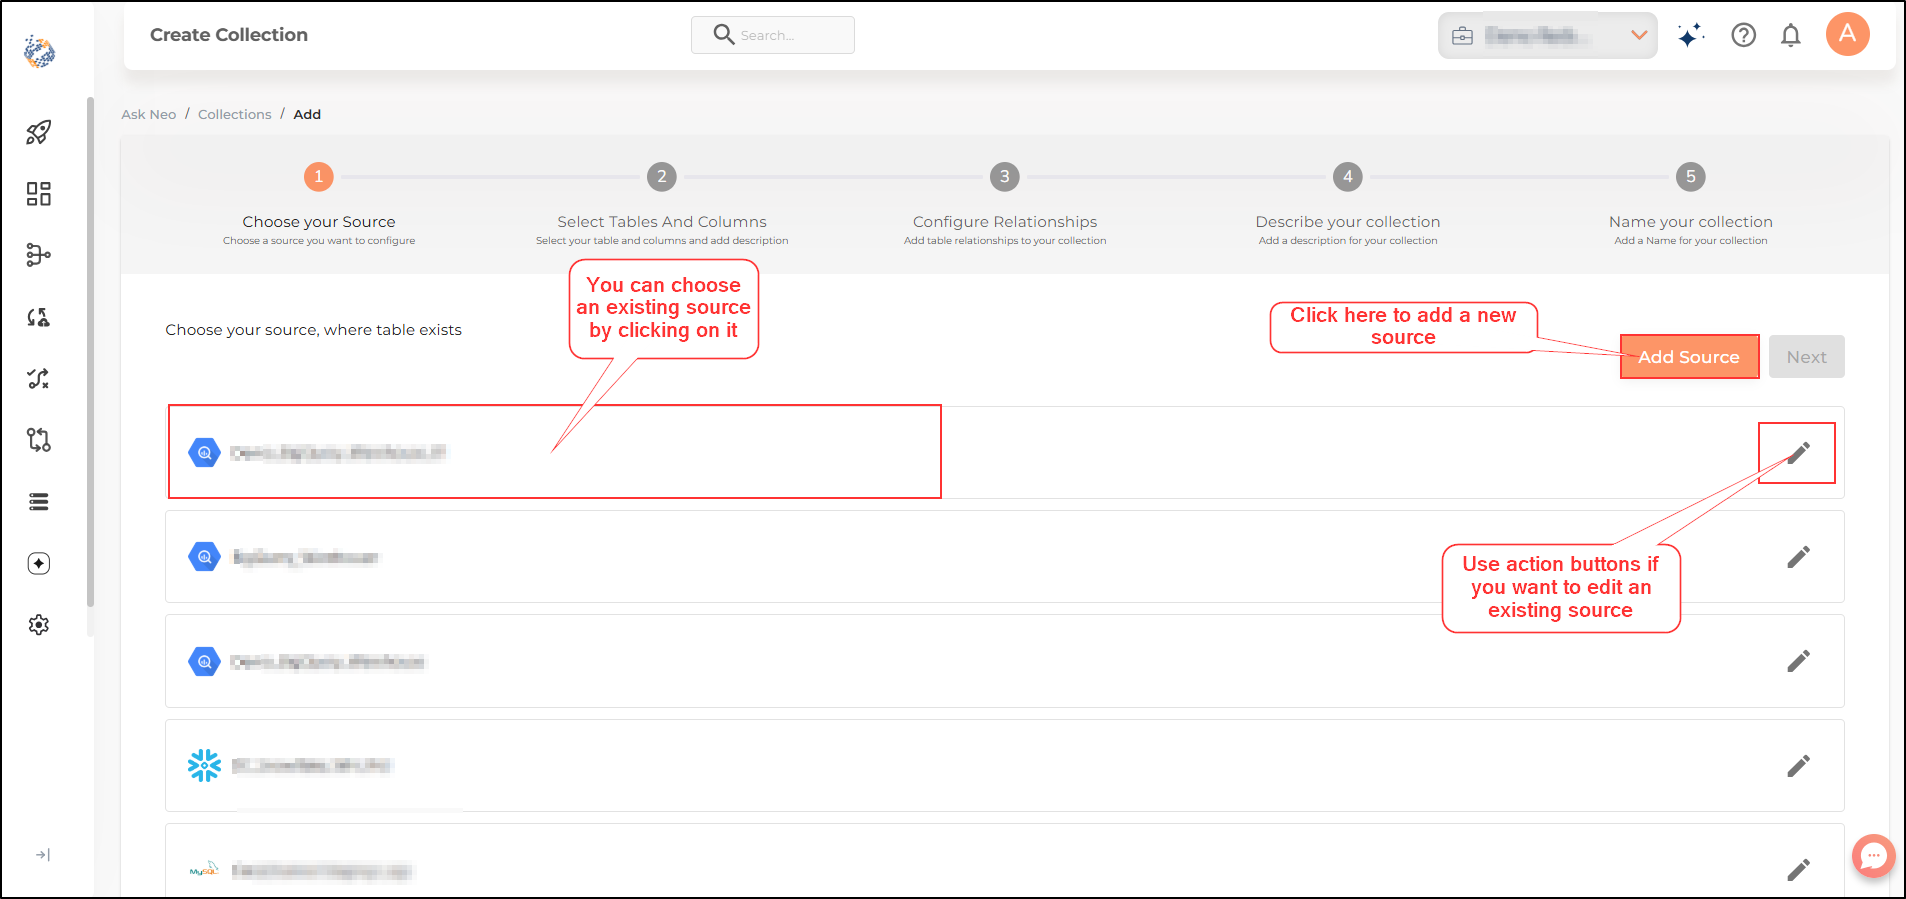
The source (where the desired table(s) exist) serves as a repository of information which Ask Neo will utilize to answer your queries. You may add a new data warehouse here. Alternatively, you can use an existing data warehouse. When using an existing warehouse, do bear in mind that it is advisable to create a separate service account with read only permissions.
-
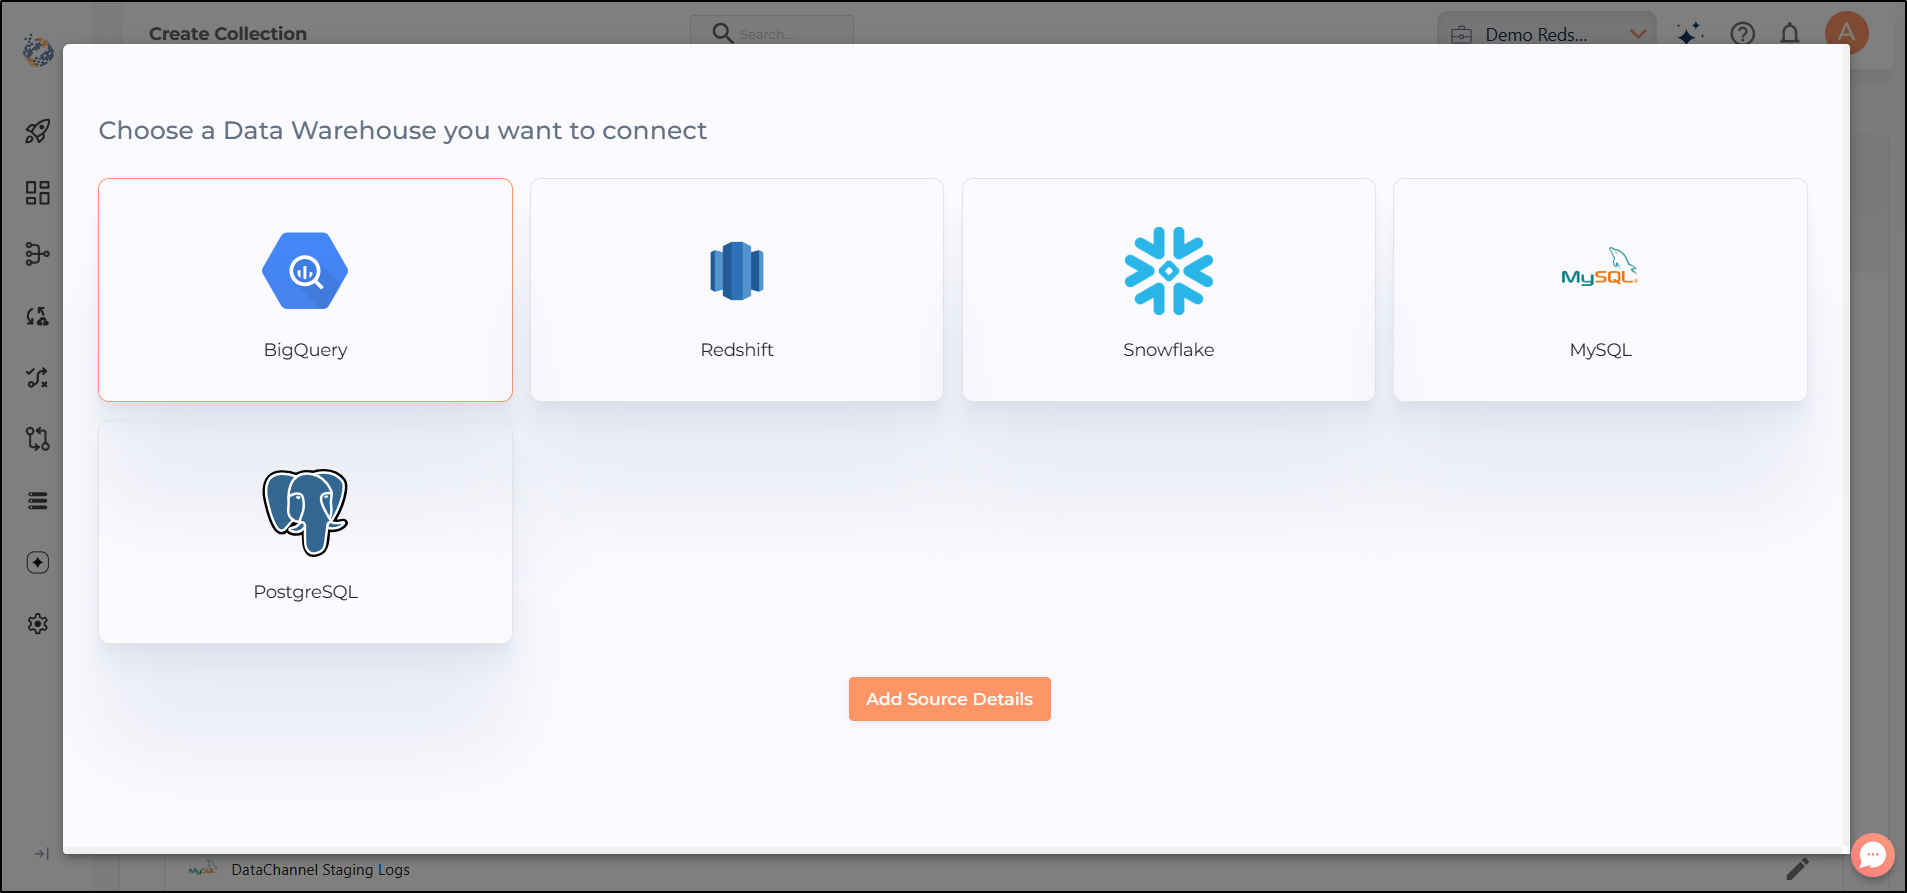
Presently you have the option of selecting among BigQuery, Redshift, Snowflake, MySQL and PostgreSQL warehouses.
-
Once selected, you will be required to enter the details of the data warehouse. Please refer to detailed documentation in the Data warehouses section to know more about each field.
-
Click Next.
Step 2: Select Tables and Columns
-
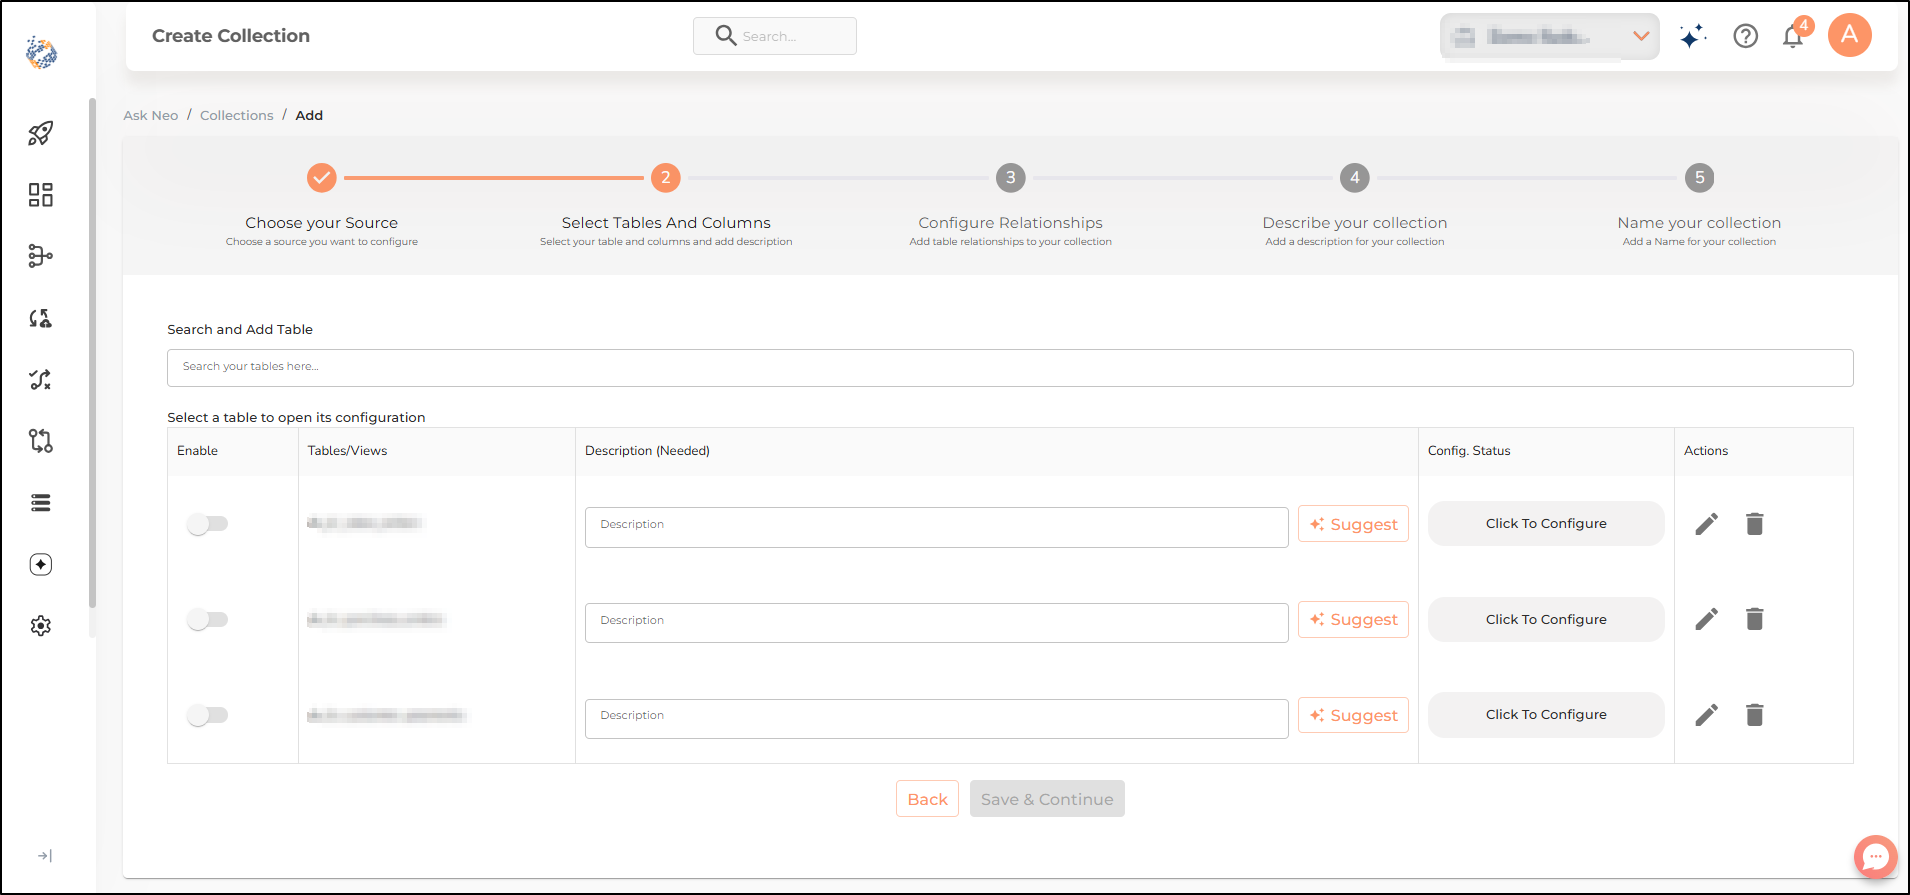
Use the search bar to locate the table where the data resides.
-
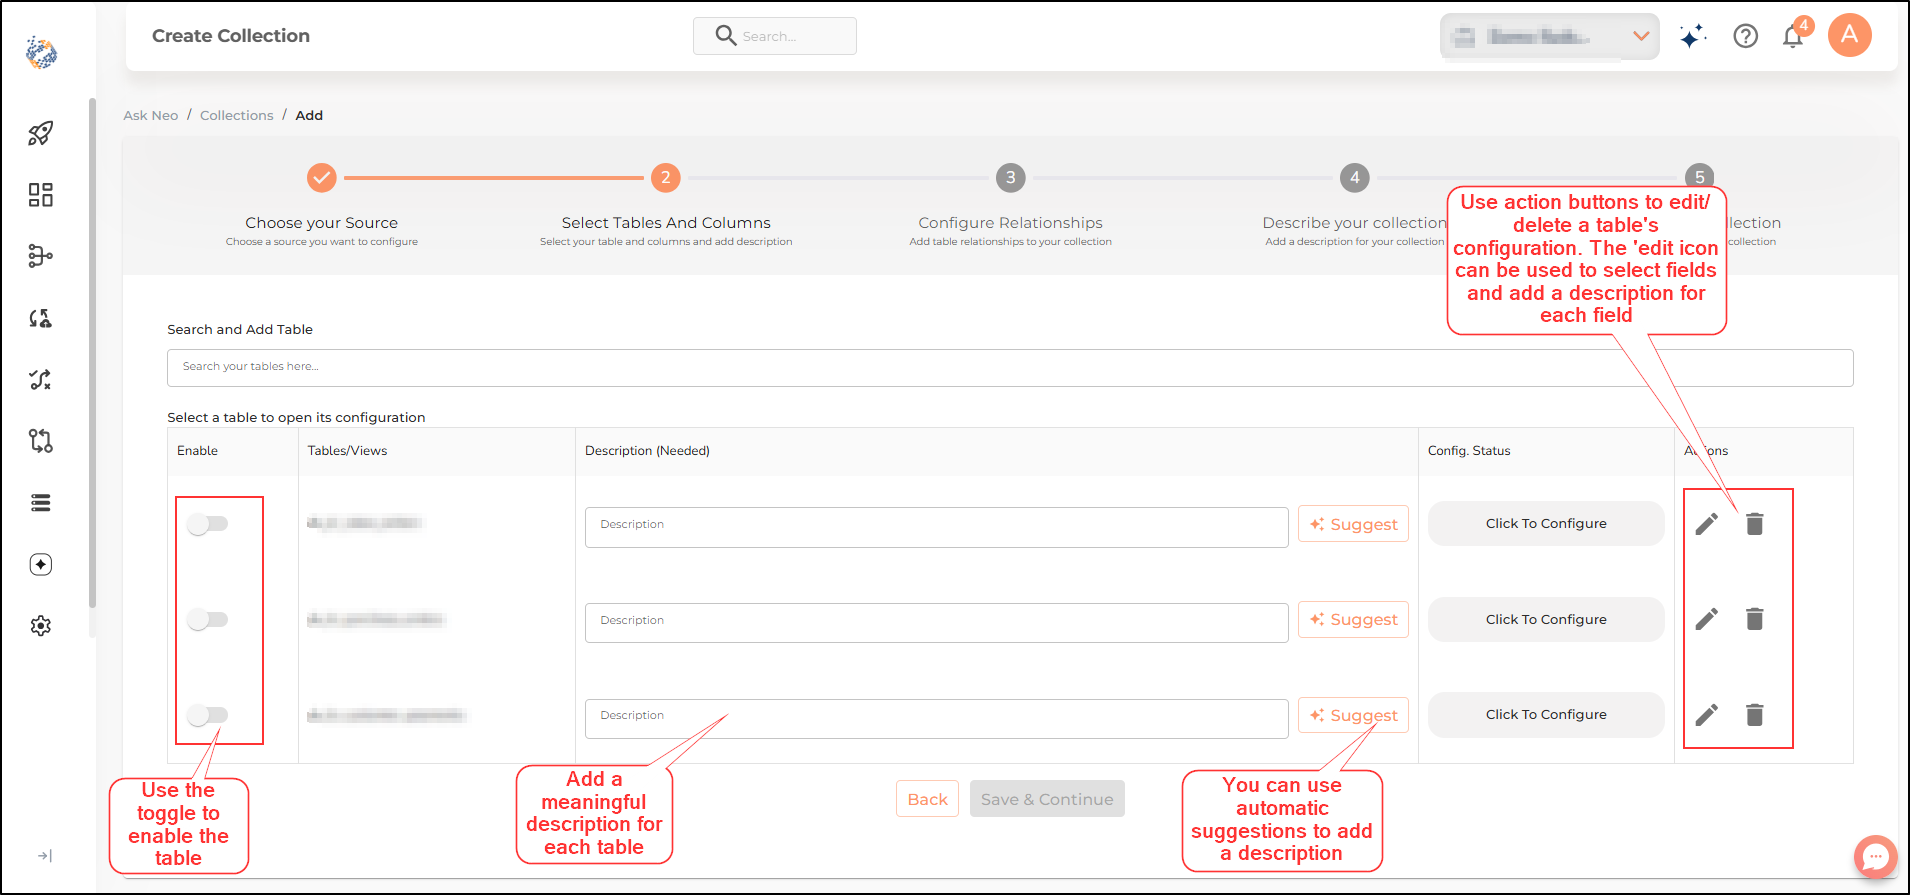
You need to add a description about each of the tables added. You can key in the description yourself or ask AI to suggest a description based on the field names.
-
Please go through each of the descriptions to make sure that it is relevant. Remember the more accurate the table descriptions, the better the query results generated.
-
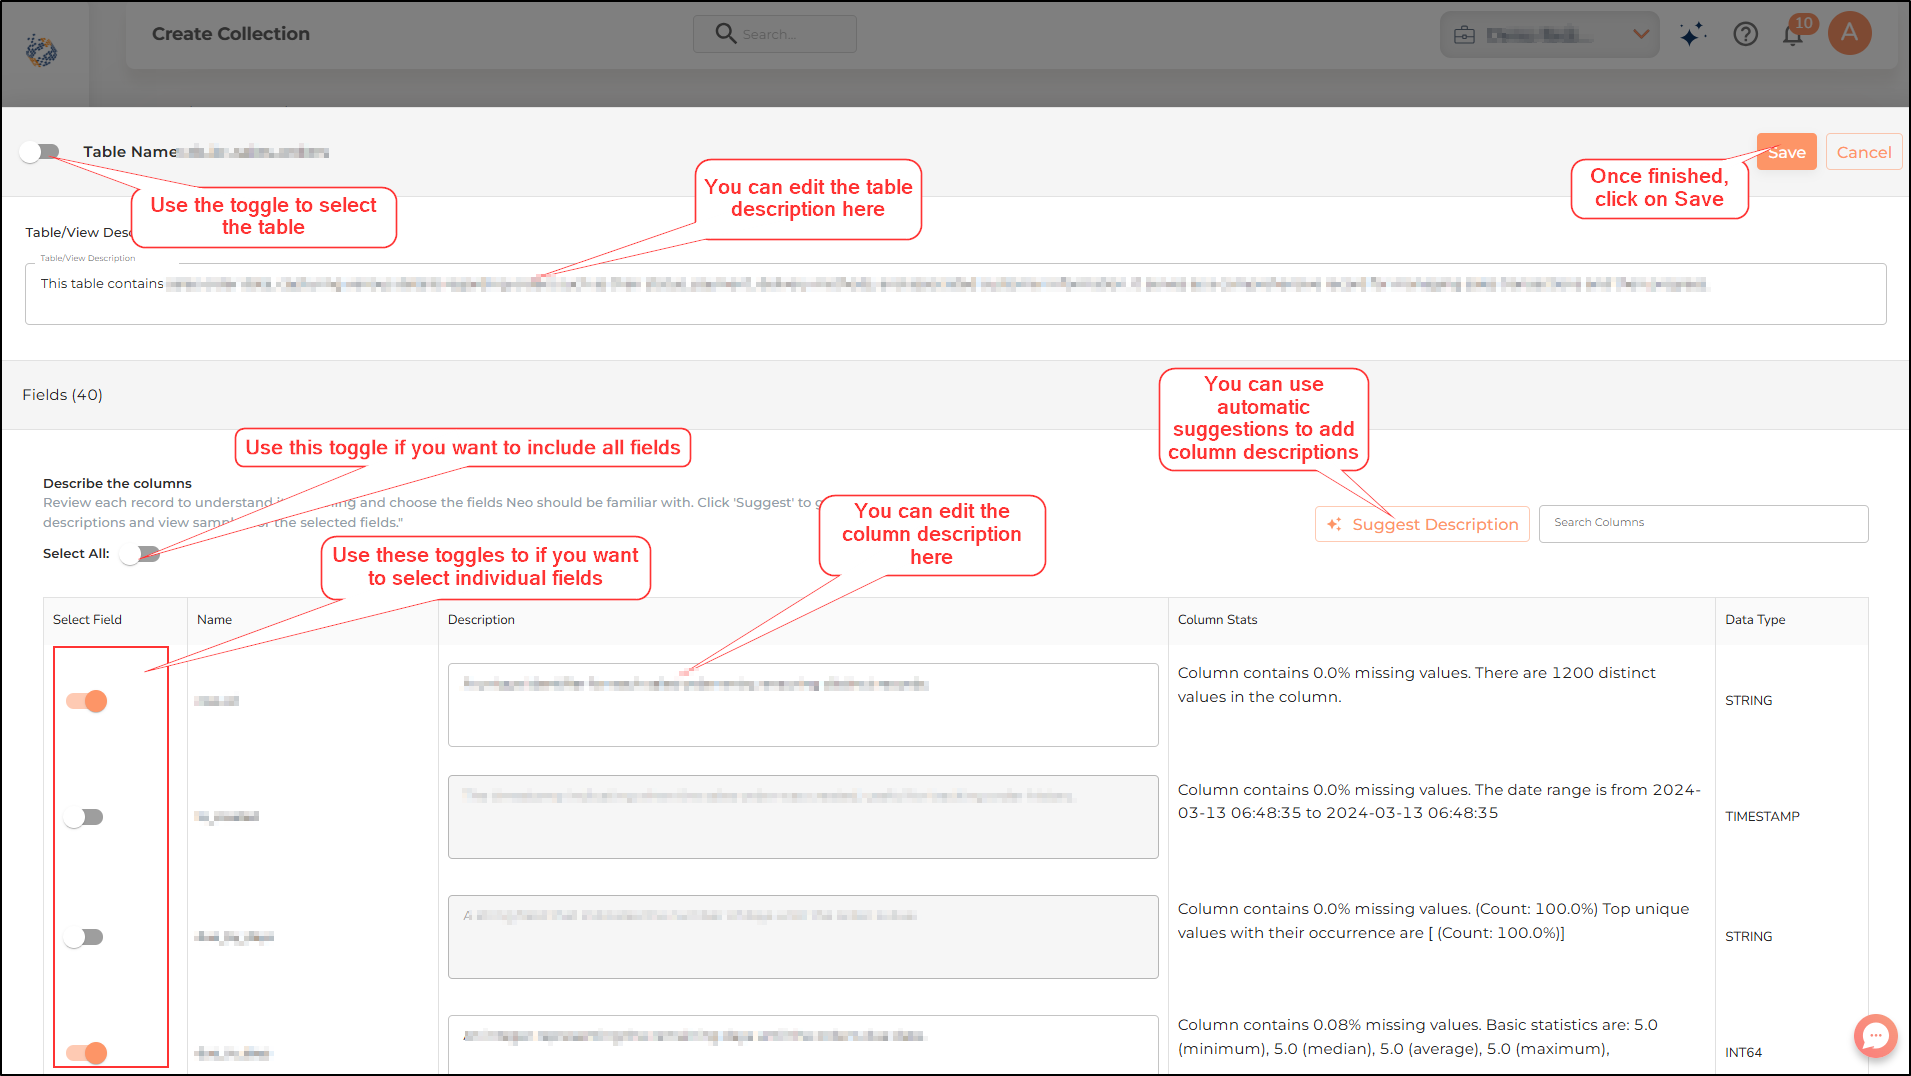
Use the respective edit icons to configure each of the table(s) added. Configuring a table involves selecting relevant fields using the toggle(s) next to the field name(s).
-
Add a relevant description for data contained in each field. Remember the more accurate the field descriptions, the better the query results generated.
-
Once the tables are configured use the toggle to enable them.
-
Once finished click on Save and continue.
Step 3: Configure Relationships
-
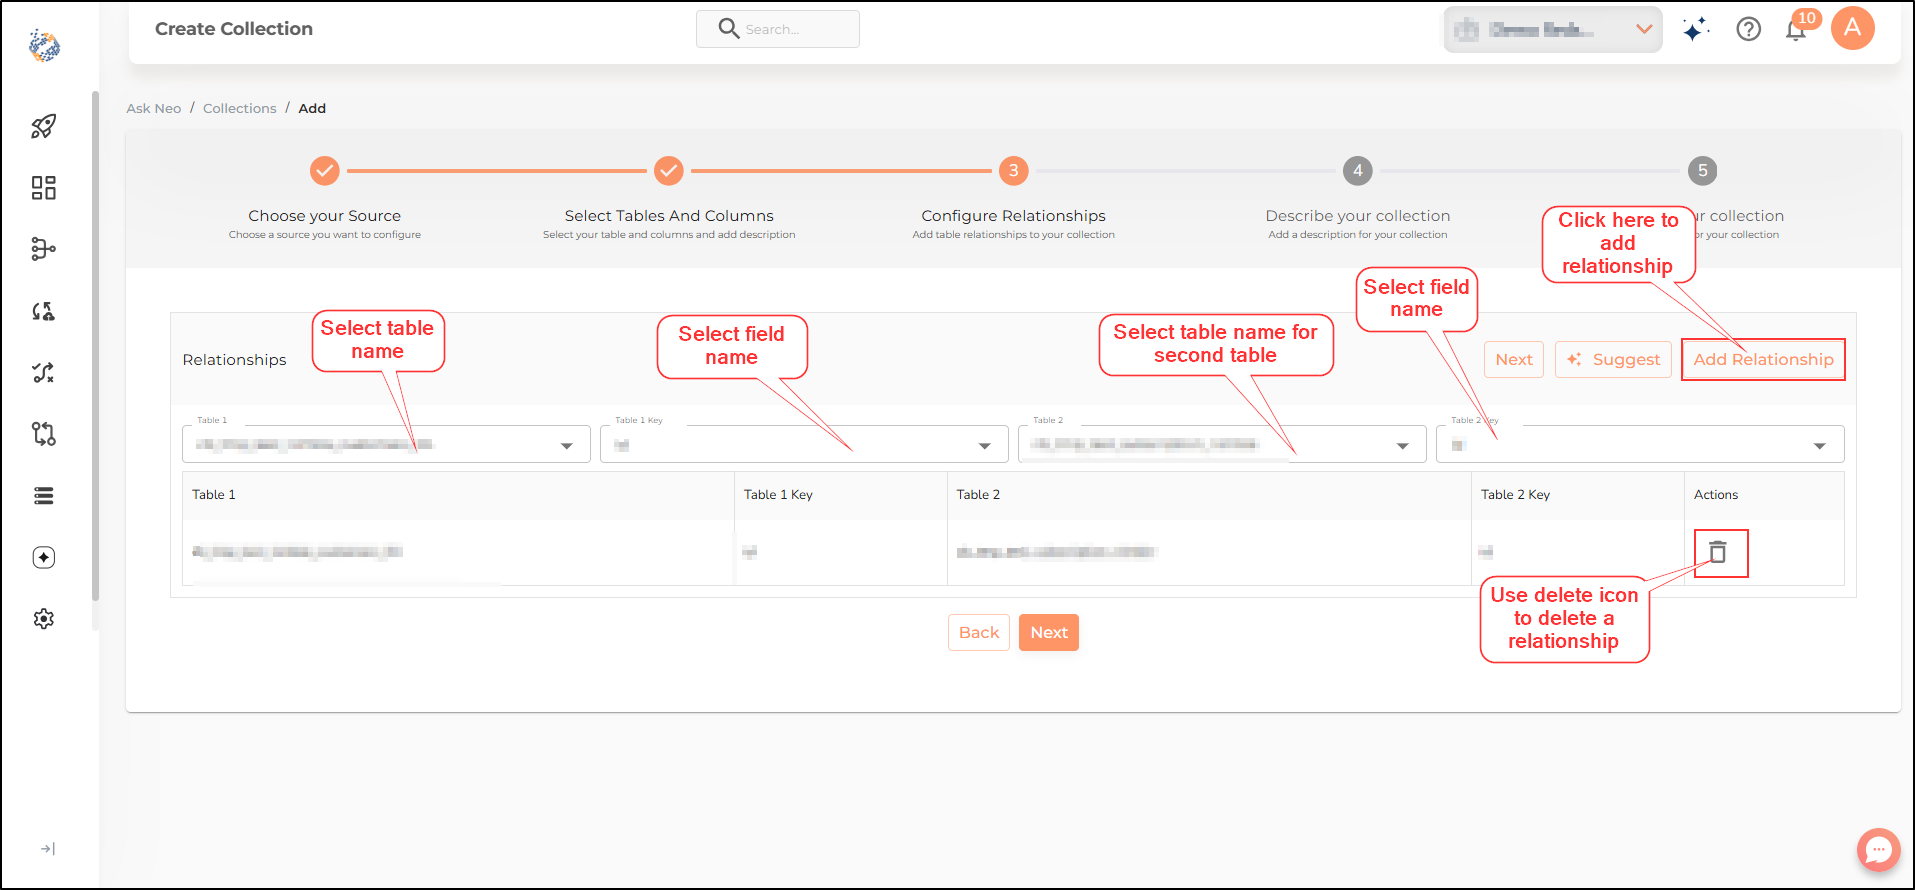
When we have more than one table as part of a collection, it is important to configure relationships among them. A relationship links the data in one table to data in another table. This creates a way to cross reference the two tables. For eg: lets say we have two tables called orders and products. We may use the
product_idto link the two tables. -
You may add one or more relationships between two tables. However, you must note that with the addition of more tables and more keys, the inter-relationships among tables will become increasingly complex. Including all the data from a warehouse/ too many tables is likely to needlessly complicate the analysis/ query results. Hence, it is advisable to be selective and include only those tables in a collection which are required by the user to carry out the analysis.
-
To add a relationship, select a field from table 1 and its corresponding field from table 2. Then click on the Add relationship button.
-
If you want to delete an existing relationship, you can do so using the delete icon.
-
Once finished click on Next.
Step 4: Describe your collection
-
Adding relevant descriptions is crucial at this step as it provides the context to Neo to return relevant answers to your queries.
-
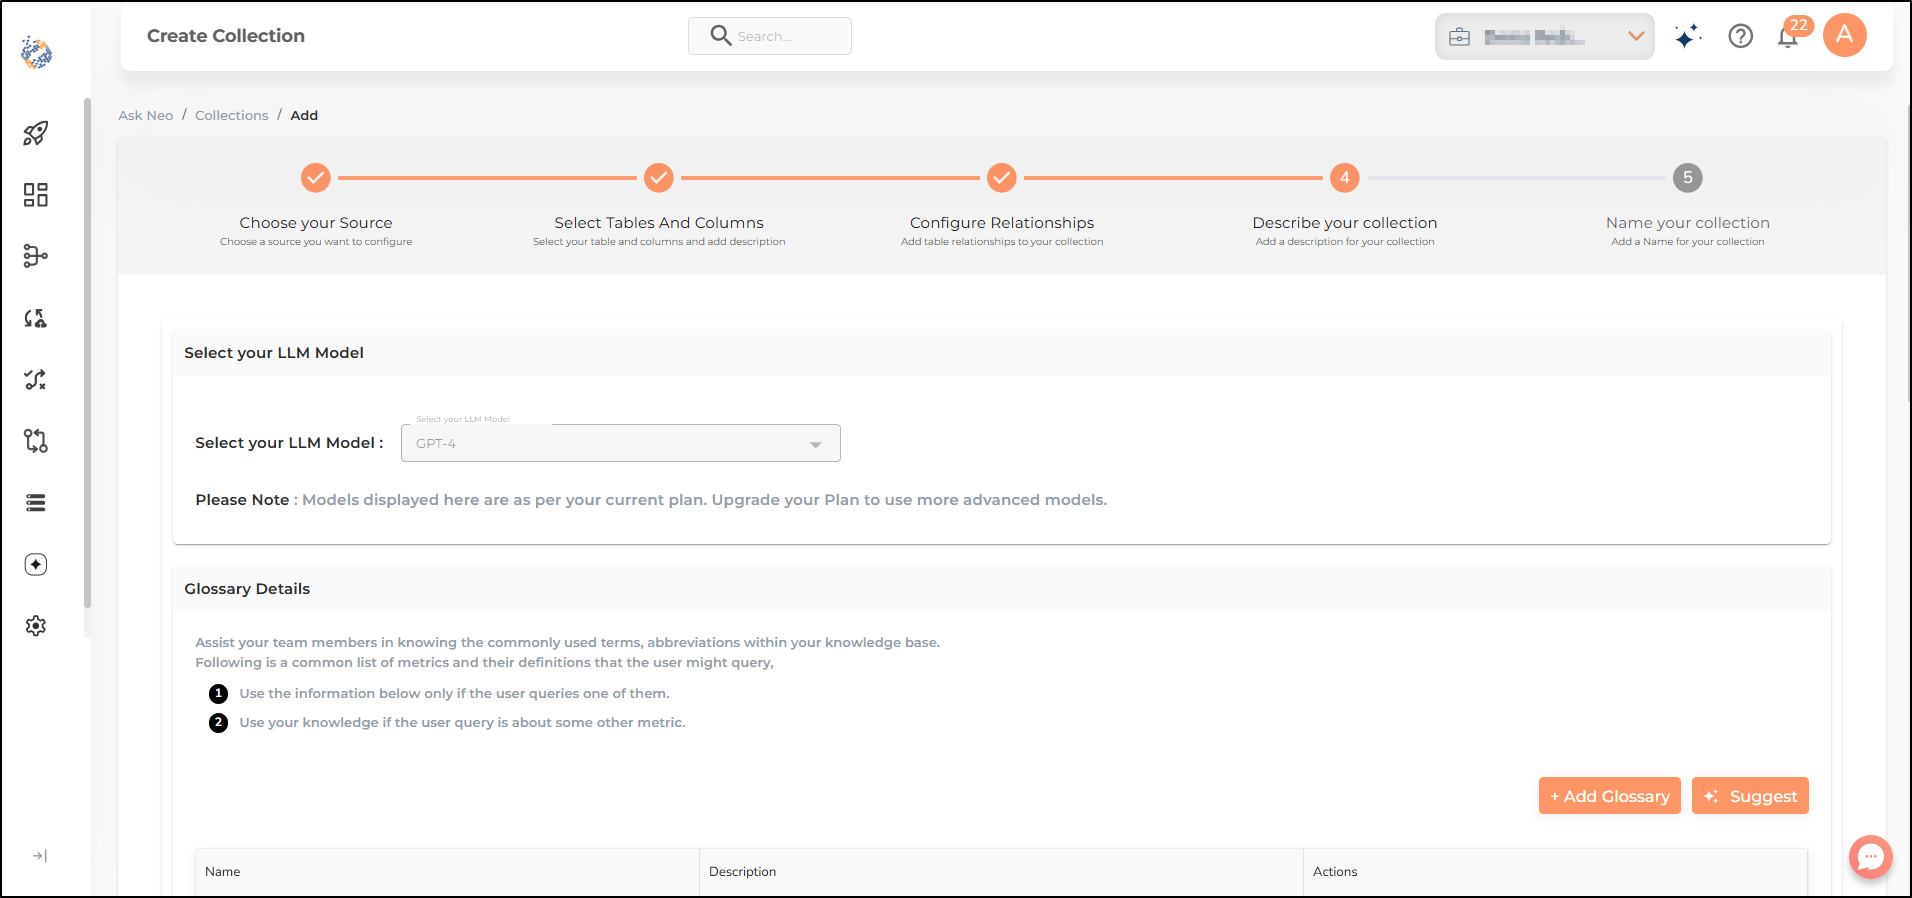
First, you will be asked to select the LLM model. The default model used is GPT-4. Please note that models displayed here are as per your current plan. If you wish to use more advanced models, you can upgrade your plan. Please reach out to us on support@datachannel.co if you wish to do so.
-
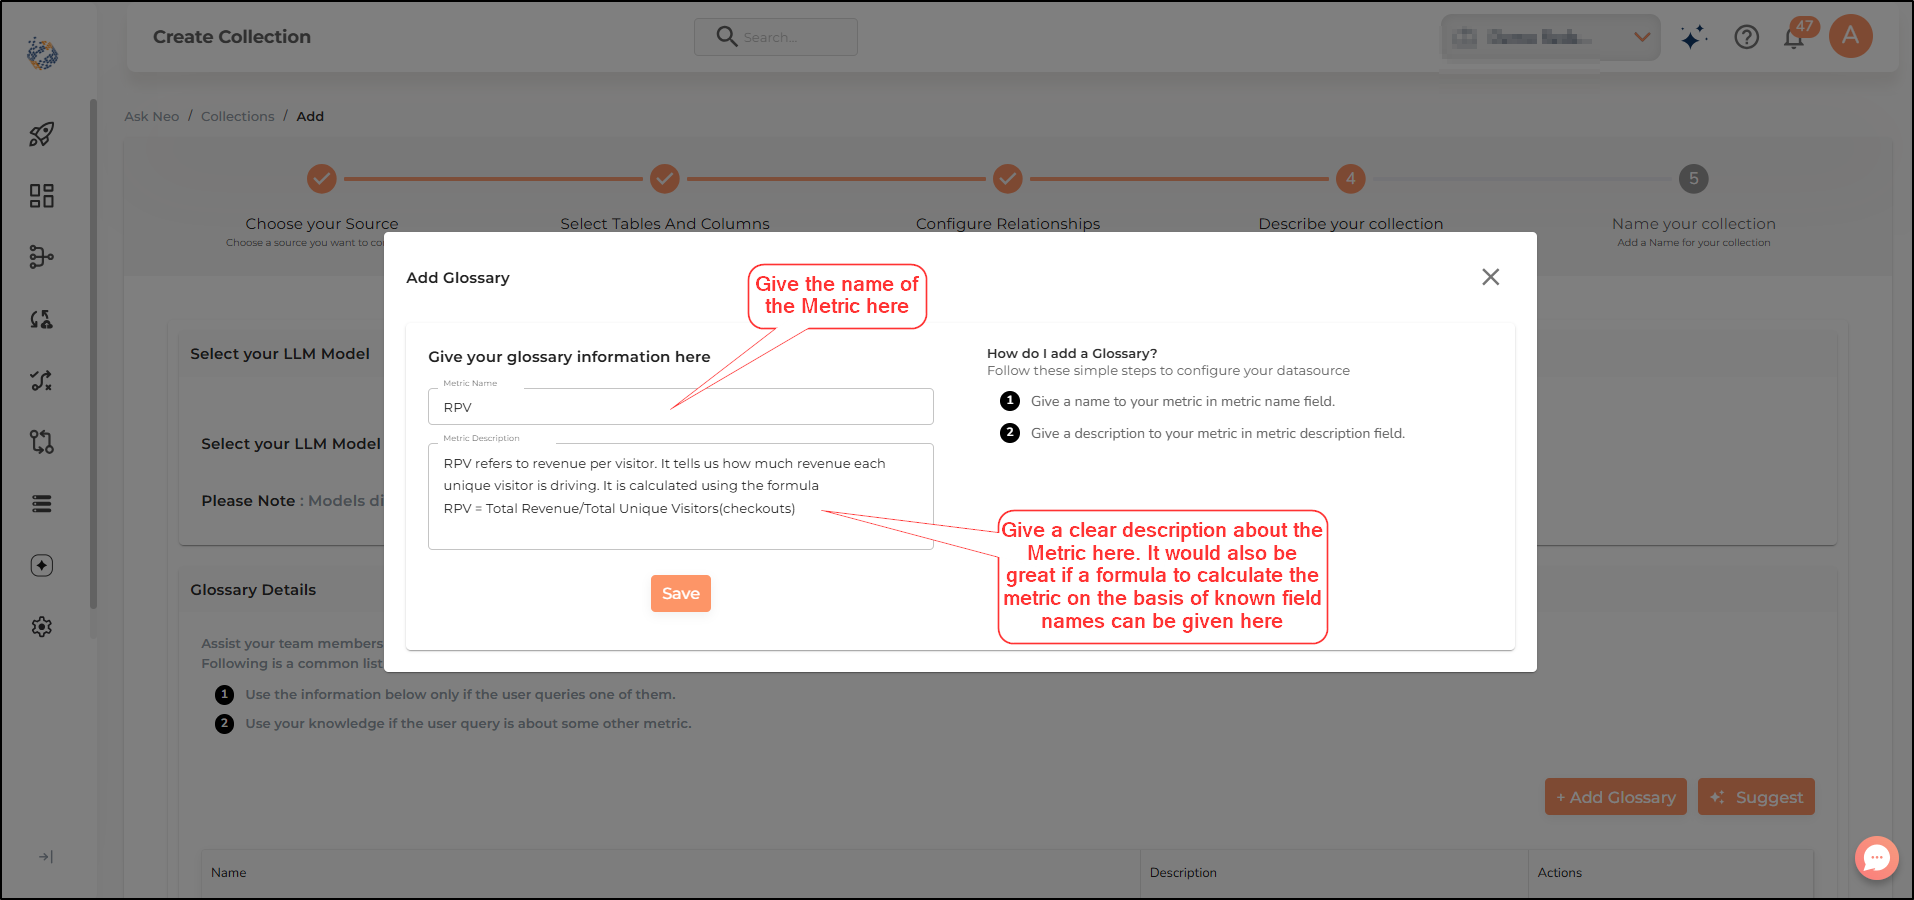
You need to add a glossary (definition) about each of the metrics that you are likely to query Neo about.
-
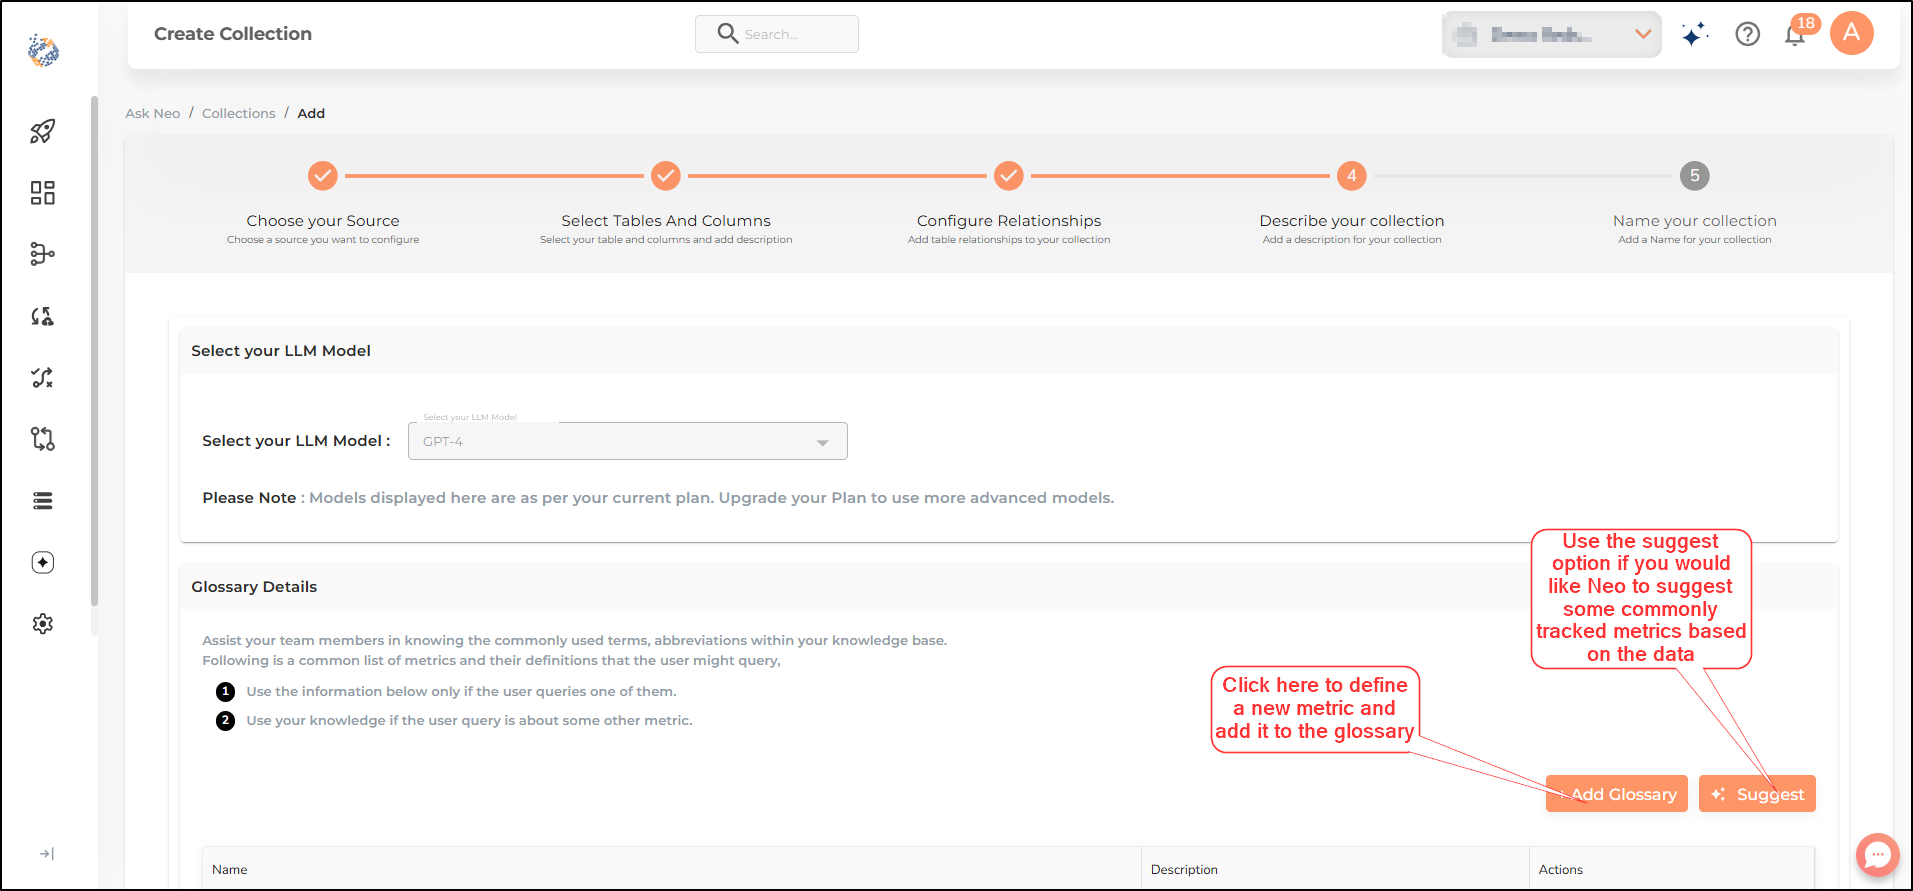
You can key in the glossary yourself. Alternatively, you can ask AI to suggest meaningful metrics (based on the frequently tracked metrics) for table descriptions added earlier.
-
However, please note that the glossary suggested by Neo may/may not be relevant in the context of your organization. Hence, it is of utmost importance to go through each definition and validate its accuracy. Remember the more accurate and elaborate the glossary, the better the query results generated. Also, if you can provide a formula to calculate the metric, it would be best to do so here.
-
Use the respective delete icons to delete any glossary item from the list.
-
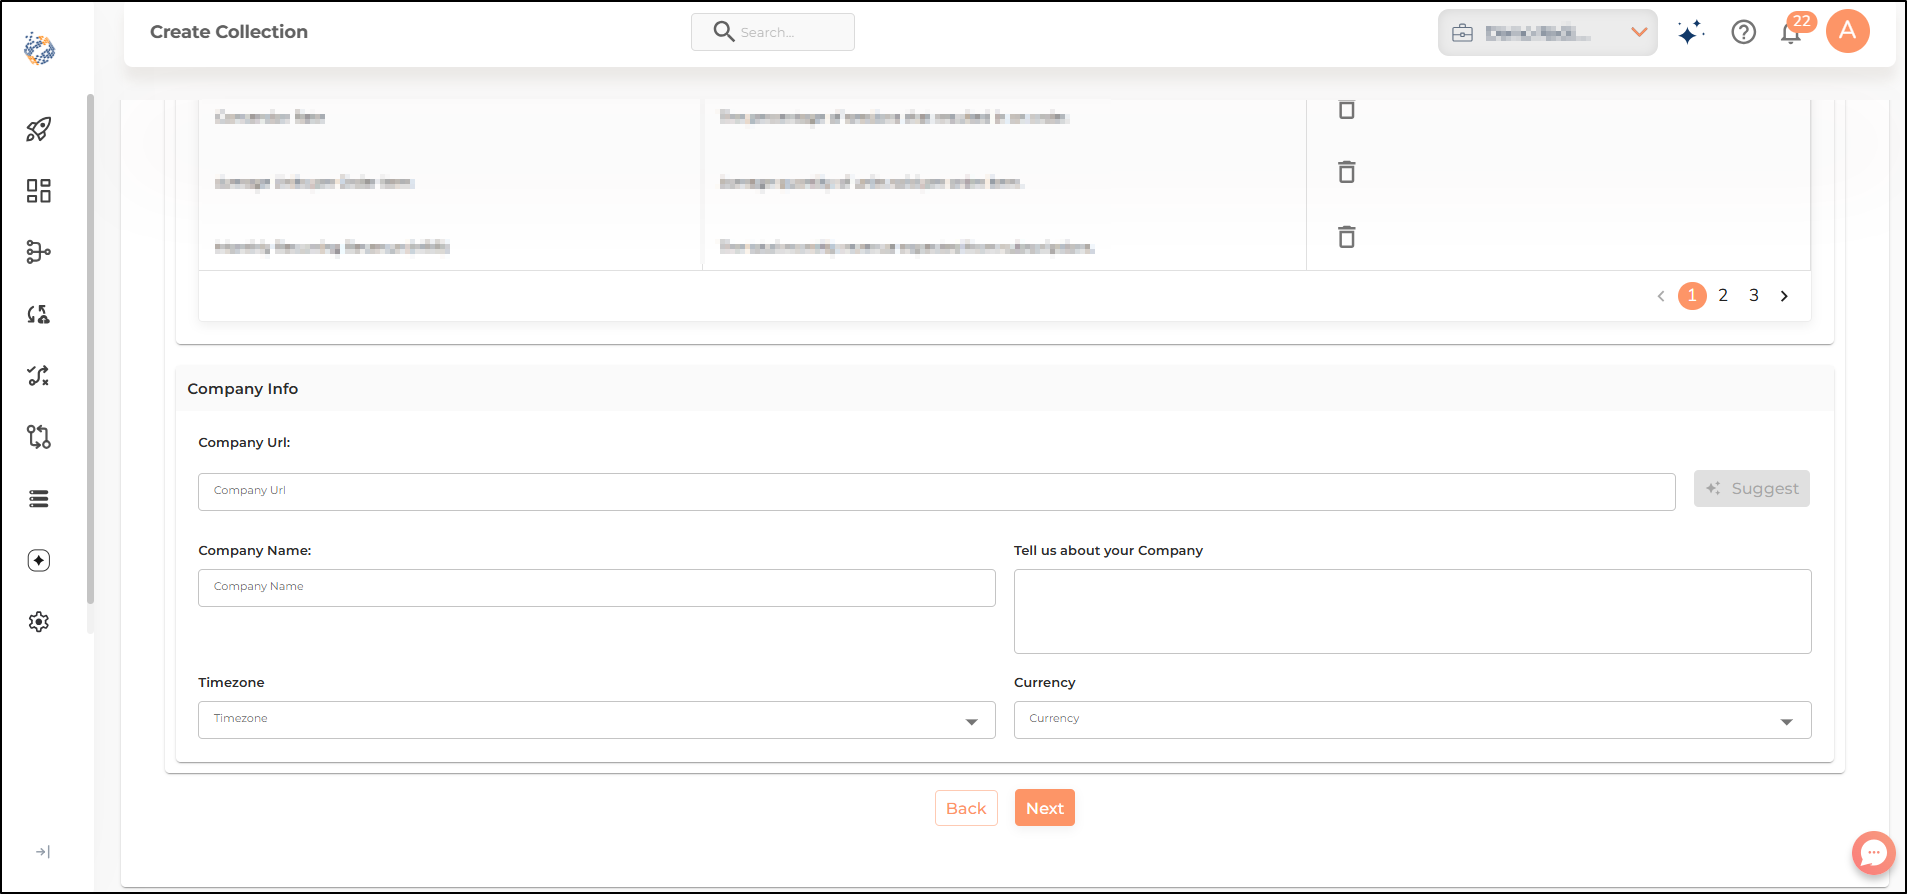
Once the glossary is added, you will be prompted to add your company information like company name, company url, a brief description about the nature of work your company does, the currency and timezone you want Neo to use when generating your dashboards.
-
It is important that this information is as accurate and detailed as possible. These will help Neo by providing context for the queries and help by improving the recommended follow up queries for better insights.
-
Once finished click on Next.
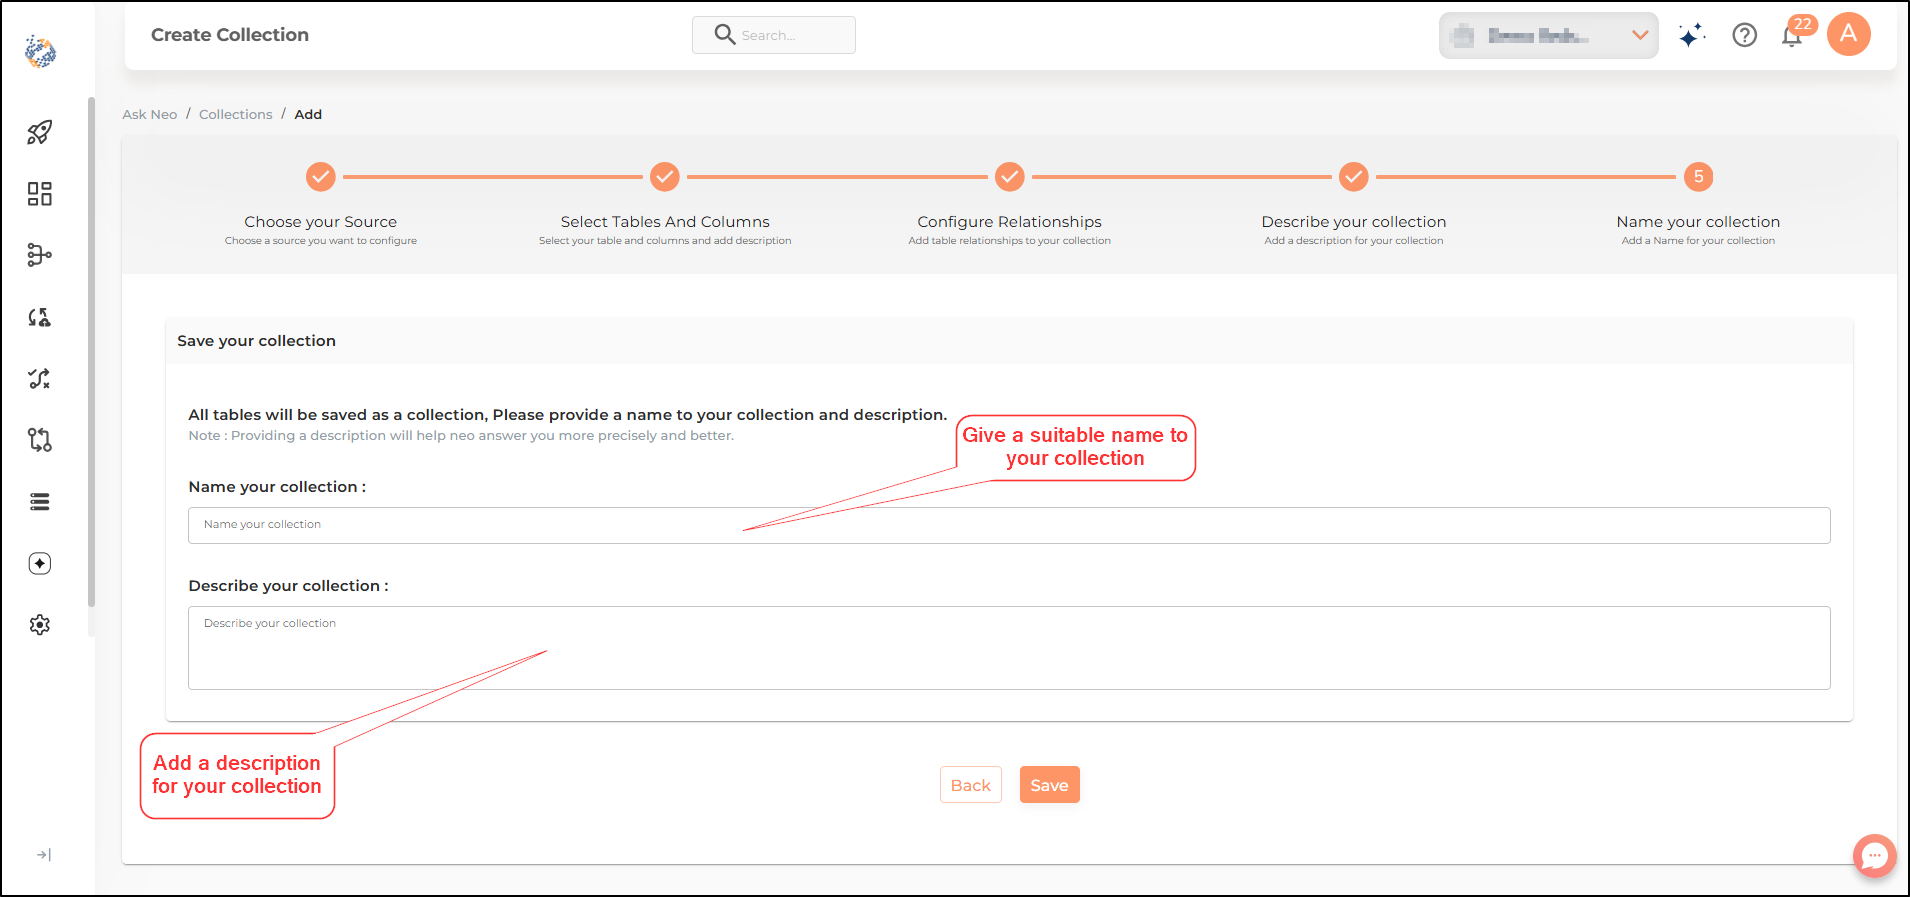
Step 5: Name your Collection
-
Provide a suitable name for your collection.
-
You also need to add a description about the collection. These descriptions help Neo to understand the context and use cases for the collection, such that it can give more relevant answers to your queries.
-
Once finished click on Save.
Still have Questions?
We’ll be happy to help you with any questions you might have! Send us an email at info@datachannel.co.
Subscribe to our Newsletter for latest updates at DataChannel.