Familiarisation with the User Interface
ETL
Overview
This section will help to familiarize you with the menu options of the ETL tab on the DataChannel Console.
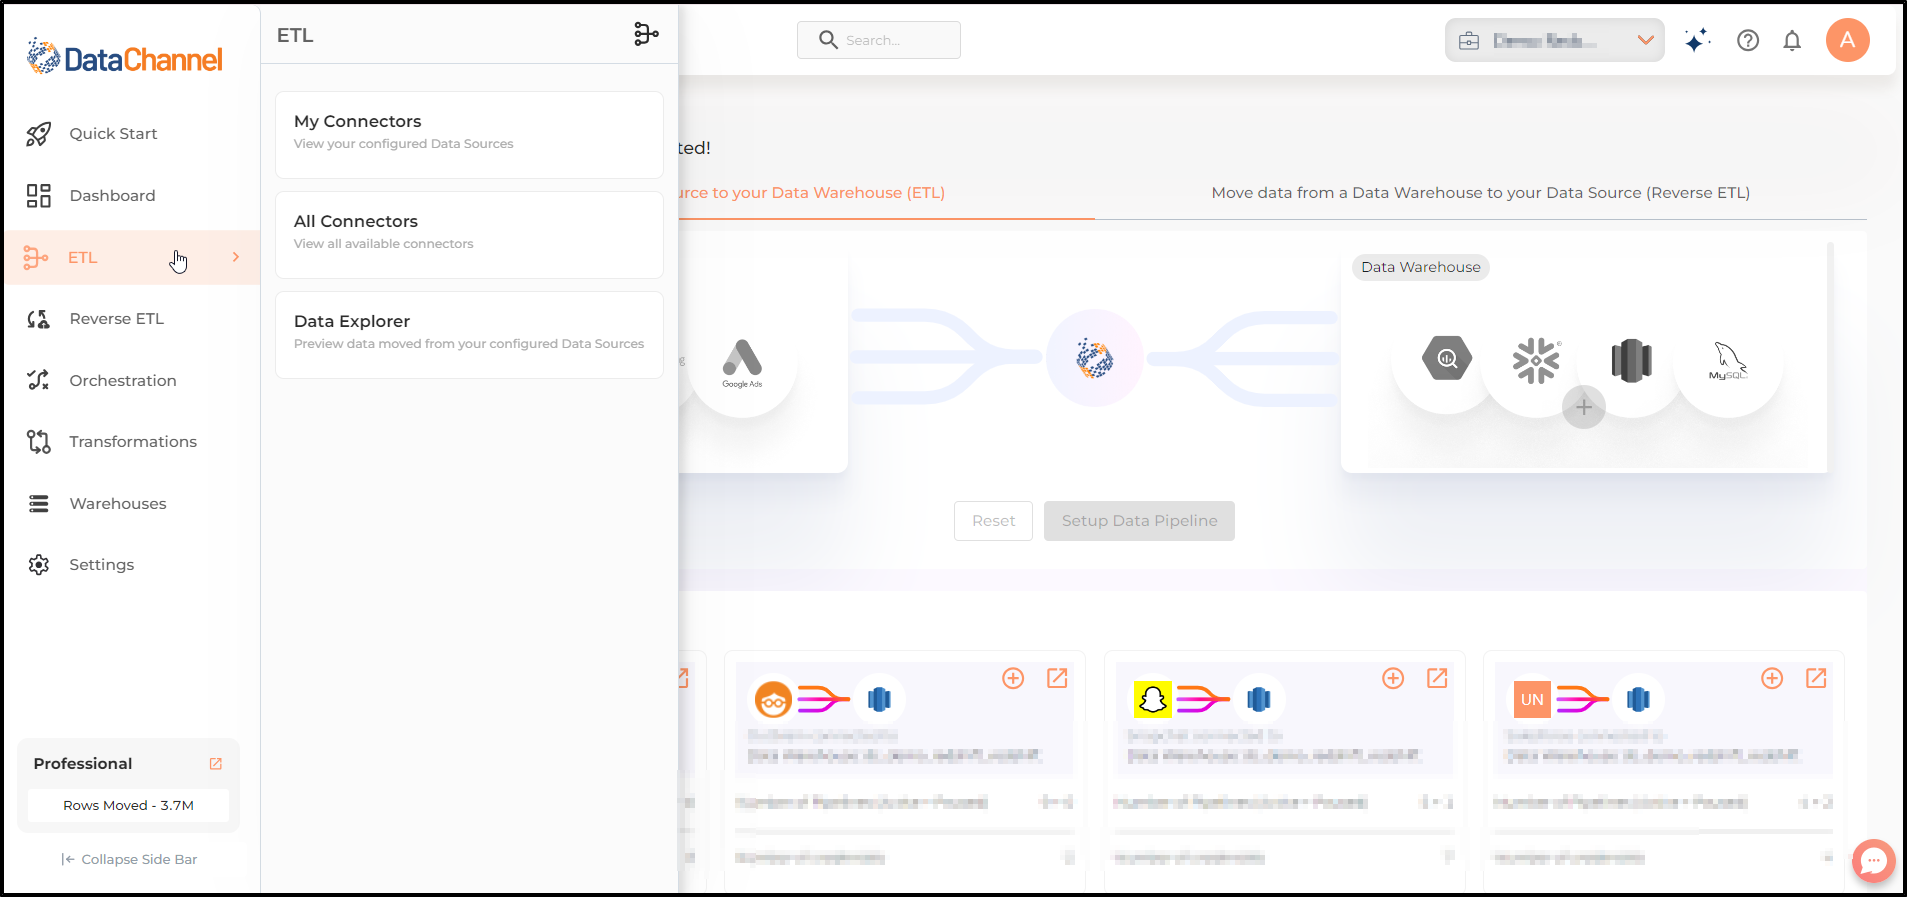
My Connectors
-
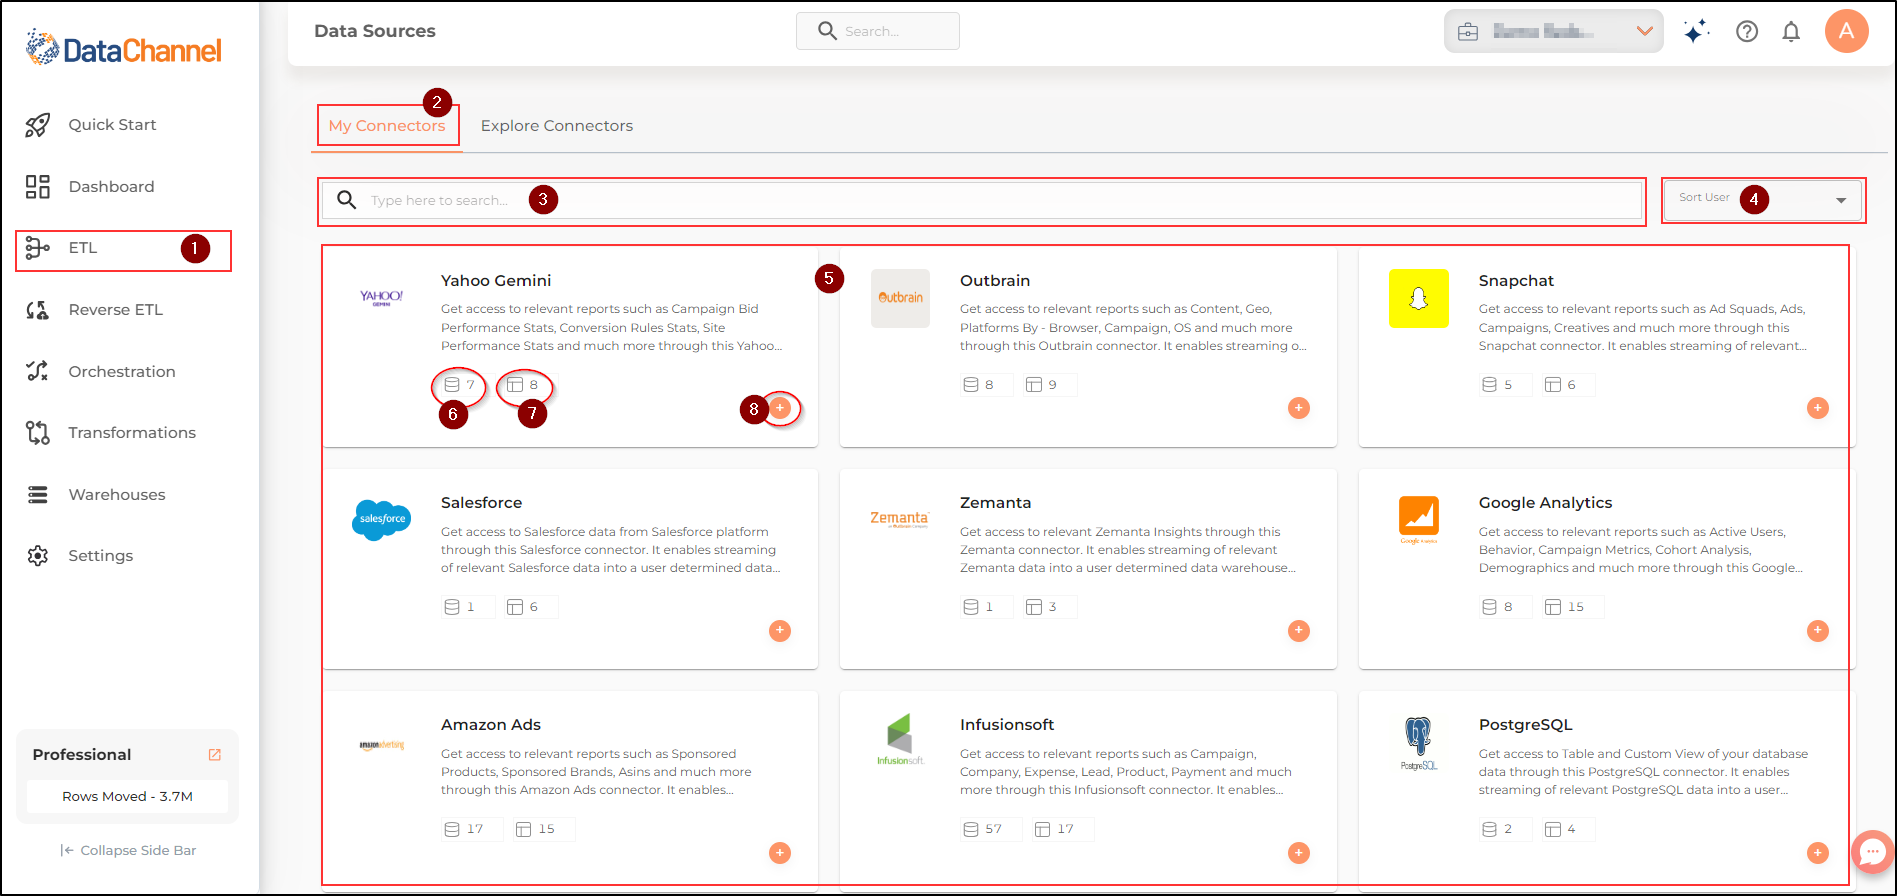
Go to the ETL tab, third icon on the sidebar, right below the Dashboard Tab.
-
Go to the My Connectors option, and it opens a carousel of all the forward connectors configured by you so far.
-
The search box inside the My Connectors page allows you to quickly find a specific forward connector configured by you.
-
The sort dropdown inside the My Connectors page allows you to quickly sort the forward connectors configured by you alphabetically.
-
Below the search and sort boxes the main UI screen inside the My Connectors page contains a carousel of individual cards for each of the forward connectors configured by you. Each card gives a brief description of the data source it pertains to.
-
There are two icons on each connector card: the first icon represents the total different types of data pipelines available on DataChannel to connect to different API End points in the Data Source.
-
The second icon icon on each connector card represents the number of data pipelines configured by you for that particular Data Source.
-
The + icon on each connector card allows you to add new pipelines for that particular Data Source.
Explore Connectors
-
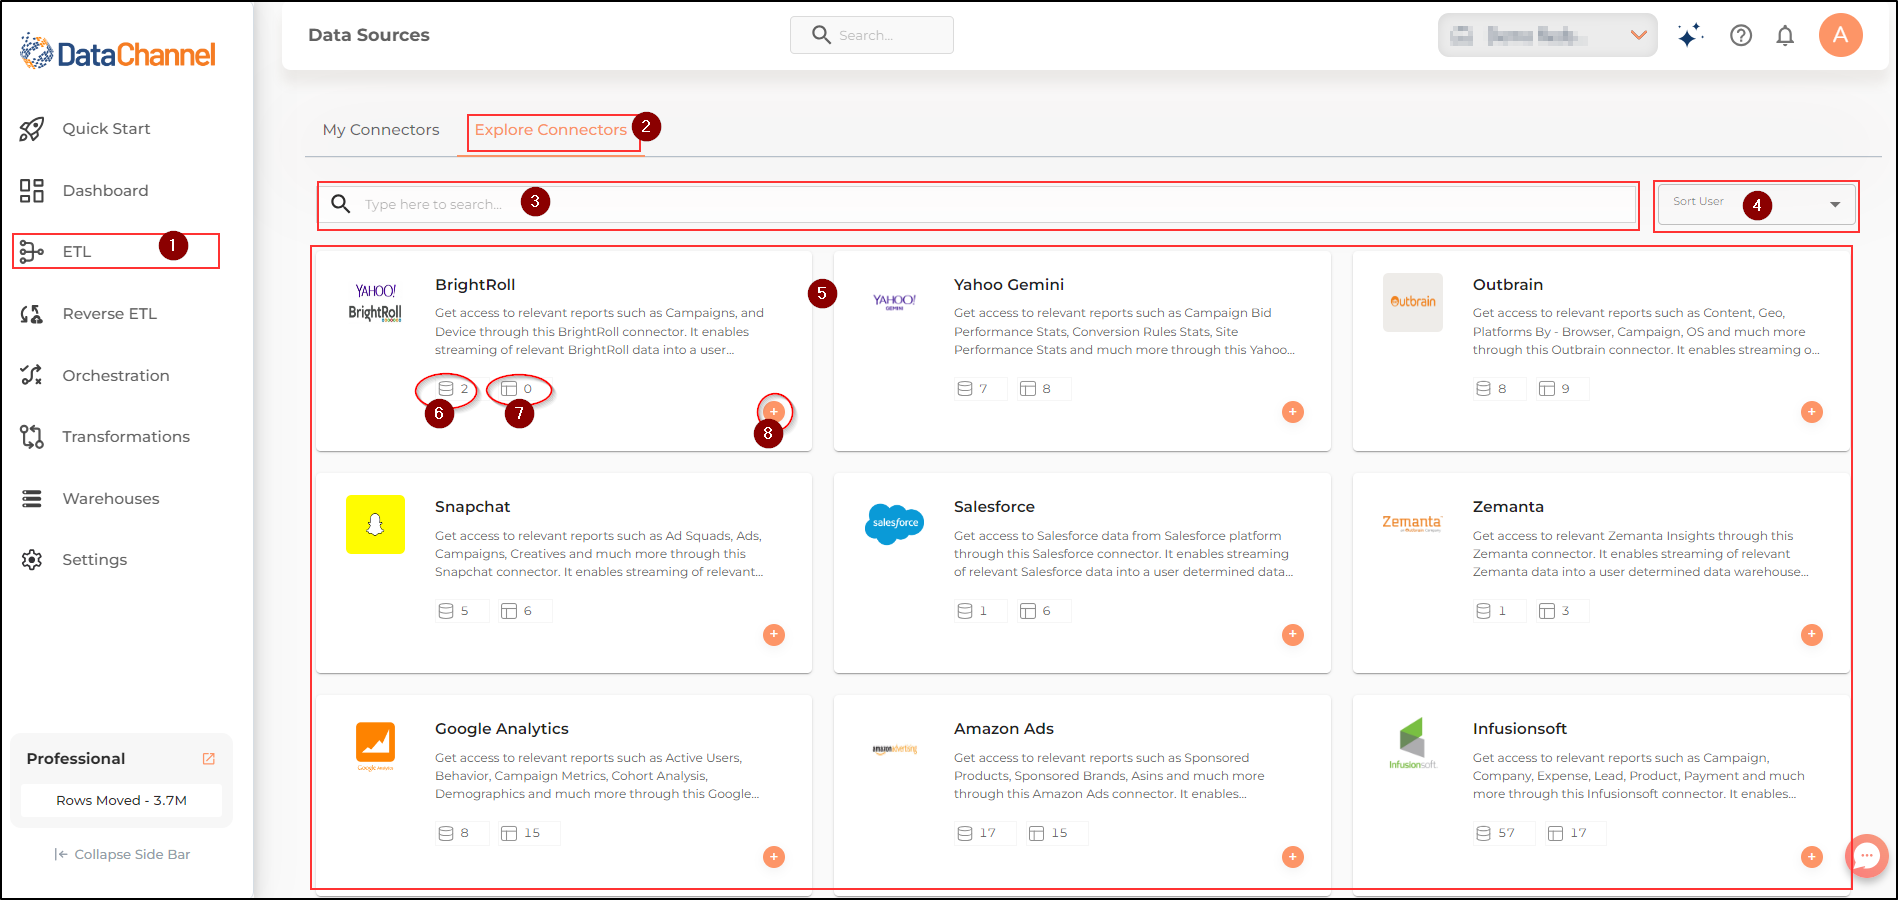
Go to the ETL tab, third icon on the sidebar, right below the Dashboard Tab.
-
Go to the Explore Connectors option, and it opens a carousel of all the connectors configured by you as well as new Data Sources that you can explore and add.
-
The search box inside the Explore Connectors page allows you to quickly find a specific forward connector.
-
The sort dropdown inside the Explore Connectors page allows you to quickly sort the forward connectors alphabetically.
-
Below the search and sort boxes the main UI screen inside the Explore Connectors page contains a carousel of individual cards for each of the forward connectors. Each card gives a brief description of the data source it pertains to.
-
There are two icons on each connector card: the first icon represents the total different types of data pipelines available on DataChannel to connect to different API End points in the Data Source.
-
The second icon icon on each connector card represents the number of data pipelines configured by you for that particular Data Source.
-
The + icon on each connector card allows you to add new pipelines for that particular Data Source.
To familiarize yourself with the complete process of adding a new pipeline on the DataChannel Console, it is recommended that you watch the video Tutorial-Steps to configure a Data pipeline.
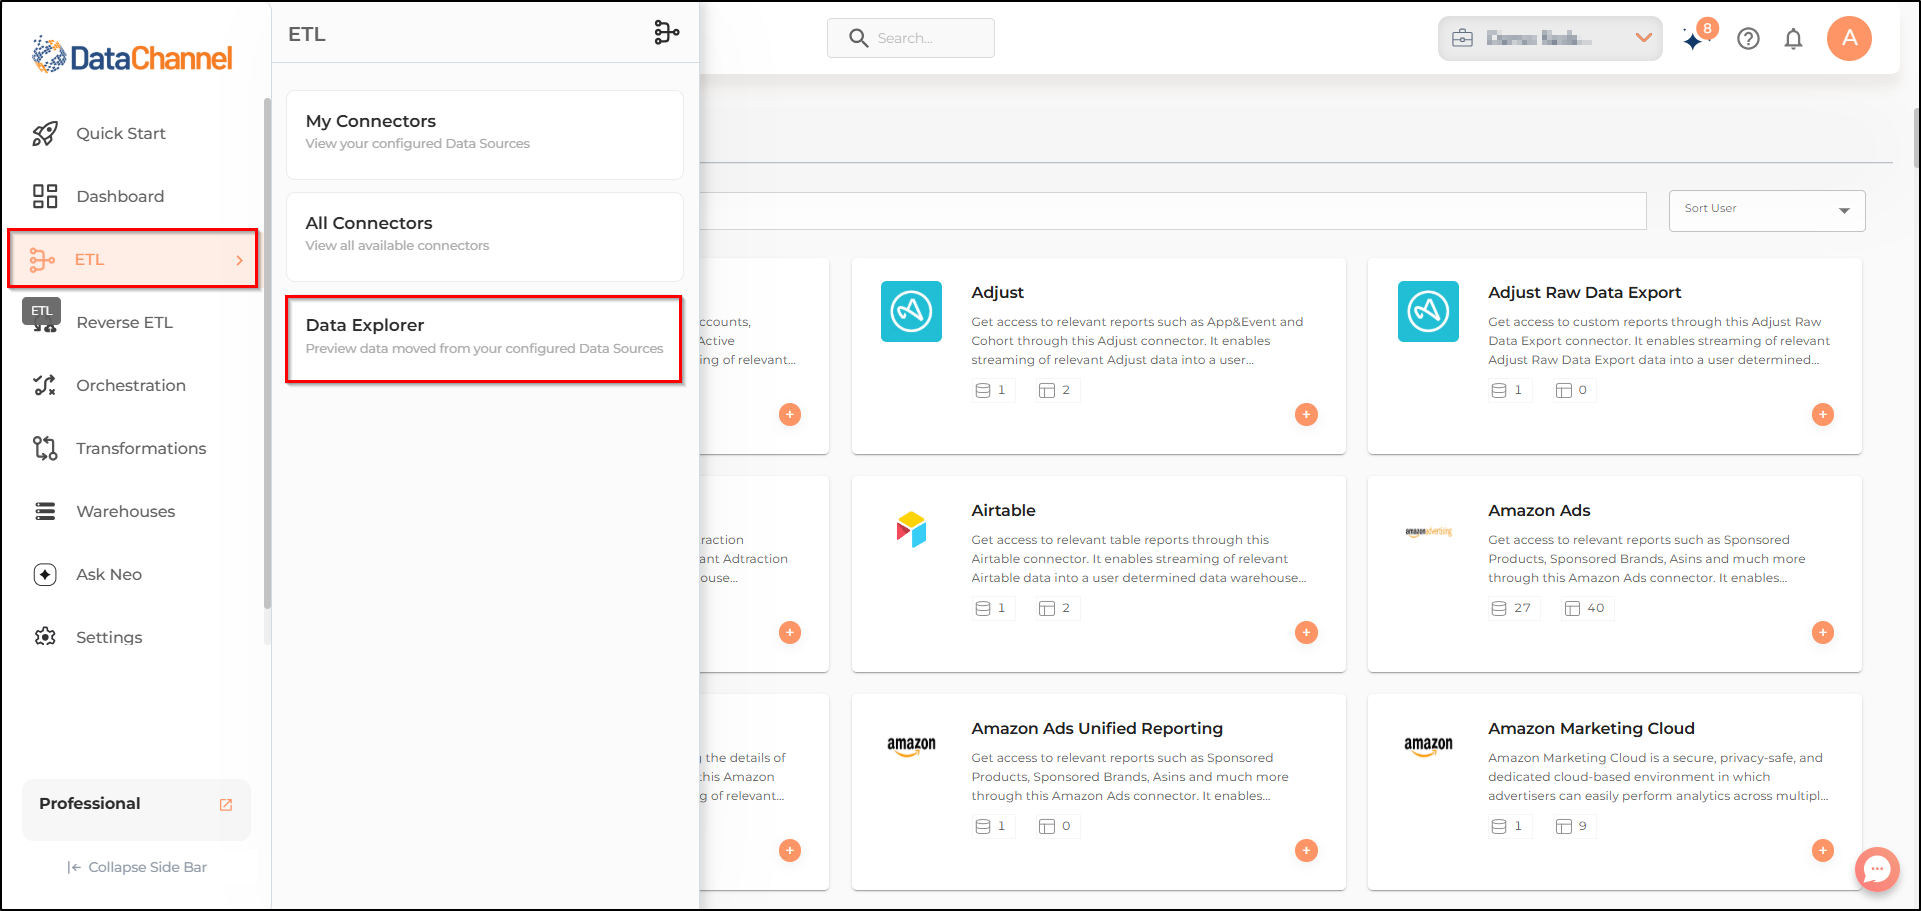
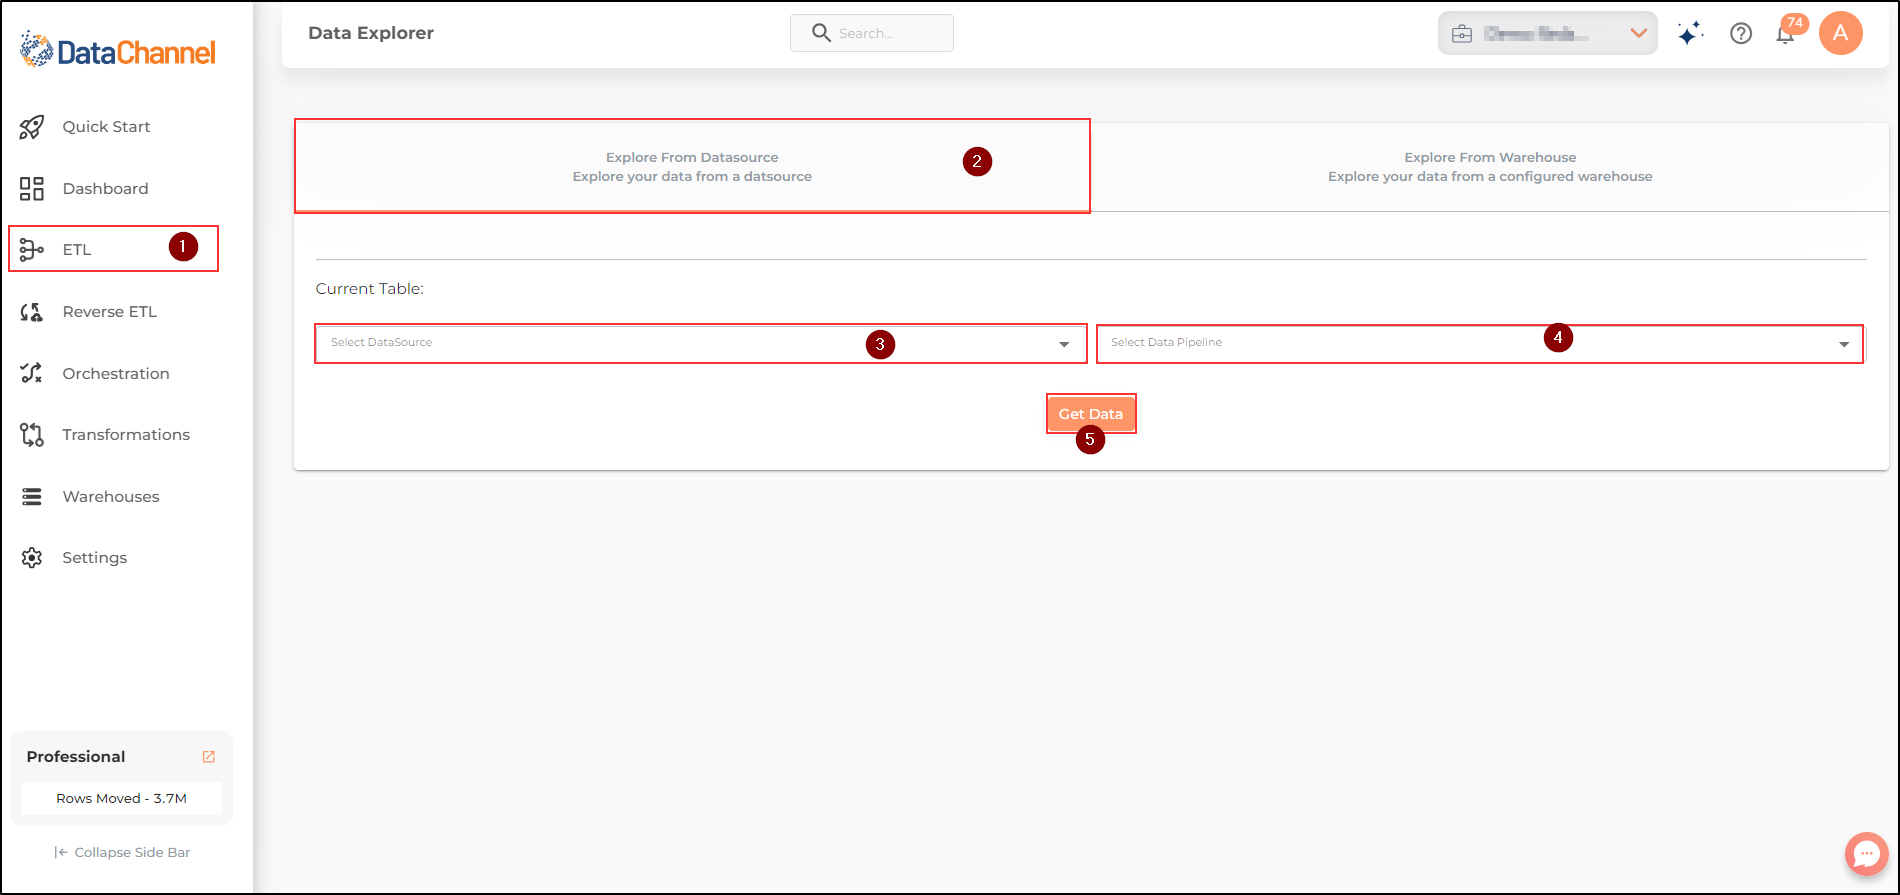
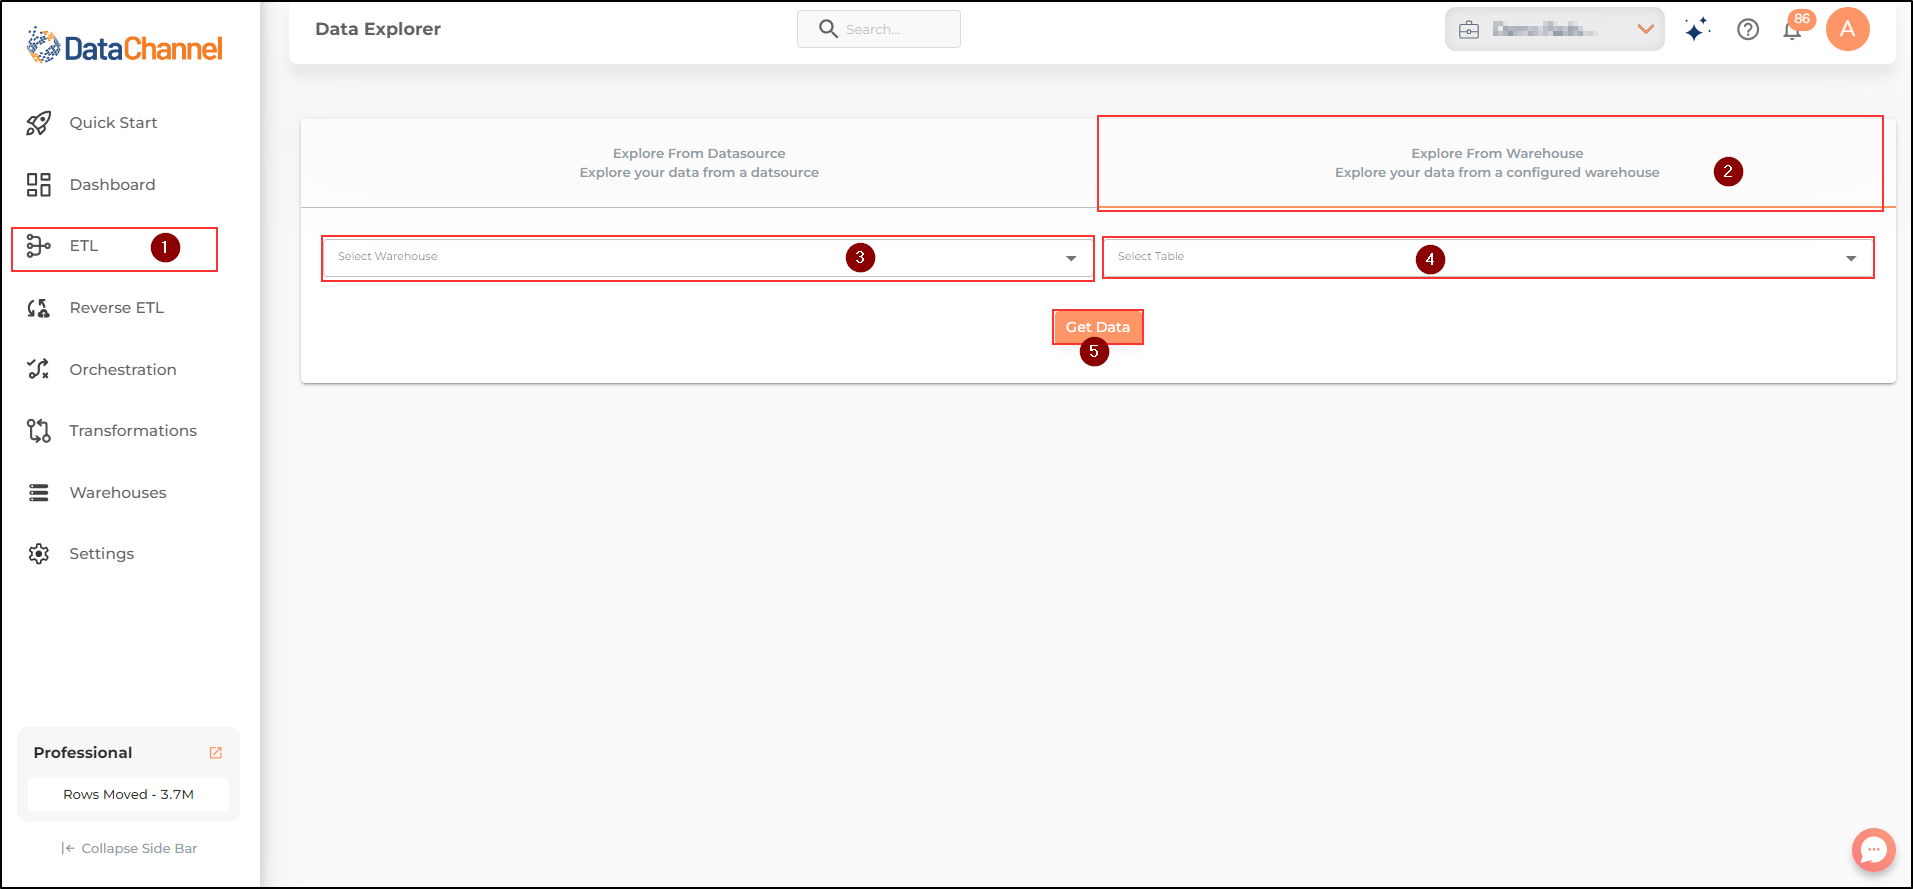
Data Explorer
-
Go to the ETL tab, third icon on the sidebar, right below the Dashboard Tab.
-
Go to the Data Explorer option. Once there, you’ll notice that the Main UI screen on the Data Explorer page is divided into two side-by-side panes which allow you to access the Data Source and Data Warehouse explorers.
Data Source Explorer
-
Access the Data Explorer page by clicking on the Data Explorer Tab.
-
Go to the first pane which is the Explore from Data Source Tab.
-
There are two dropdown fields side-by-side. In the first field, select the name of the Configured Data Source that you want to view data from.
-
Thereafter, in the second field, select the name of the Configured Pipeline that you want to use to view the relevant data.
-
Once completed, click on the Get Data button.
Data Warehouse Explorer
-
Access the Data Explorer page by clicking on the Data Explorer Tab.
-
Go to the second pane which is the Explore from Warehouse Tab.
-
There are two dropdown fields side-by-side. In the first field, select the name of the Data Warehouse that you want to view data from.
-
Thereafter, in the second field, select the name of the Table that contains the data that you want to view.
-
Once completed, click on the Get Data button.
Still have Questions?
We’ll be happy to help you with any questions you might have! Send us an email at info@datachannel.co.
Subscribe to our Newsletter for latest updates at DataChannel.