Setup Guide - AppsFlyer Data Locker
Follow our setup guide to connect AppsFlyer Data Locker data to DataChannel. Before configuring this connector, if you haven’t already set up Data Locker you must first set it up. You can read more about this endpoint and the procedure to set up Data Locker on the AppsFlyer Data Locker API documentation page here
|
Prerequisites
To connect AppsFlyer Data Locker to DataChannel, you need:
|
Setup instructions
-
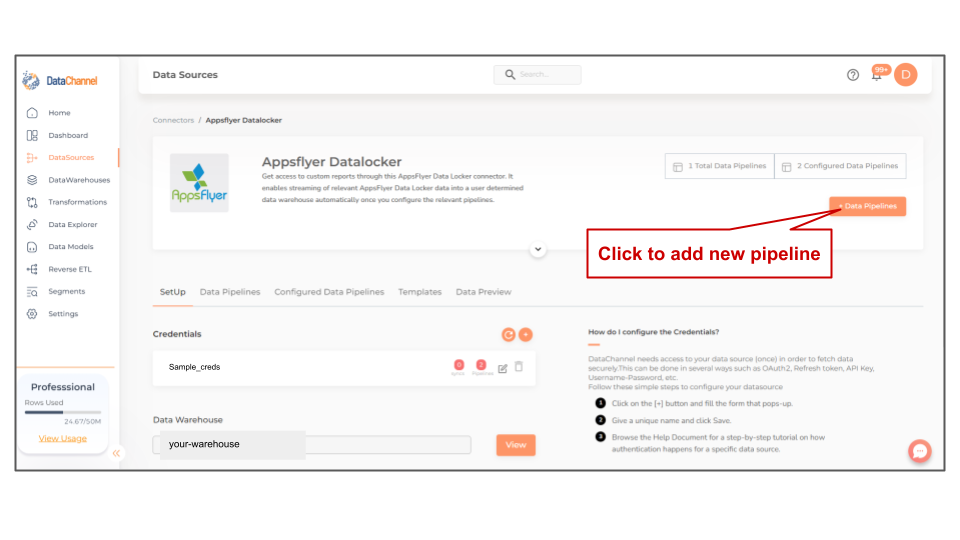
Select a data destination for your AppsFlyer Data Locker Data. If you have not yet added a data warehouse, go to data warehouse tab and add a warehouse.
Data Warehouse once selected cannot be changed. -
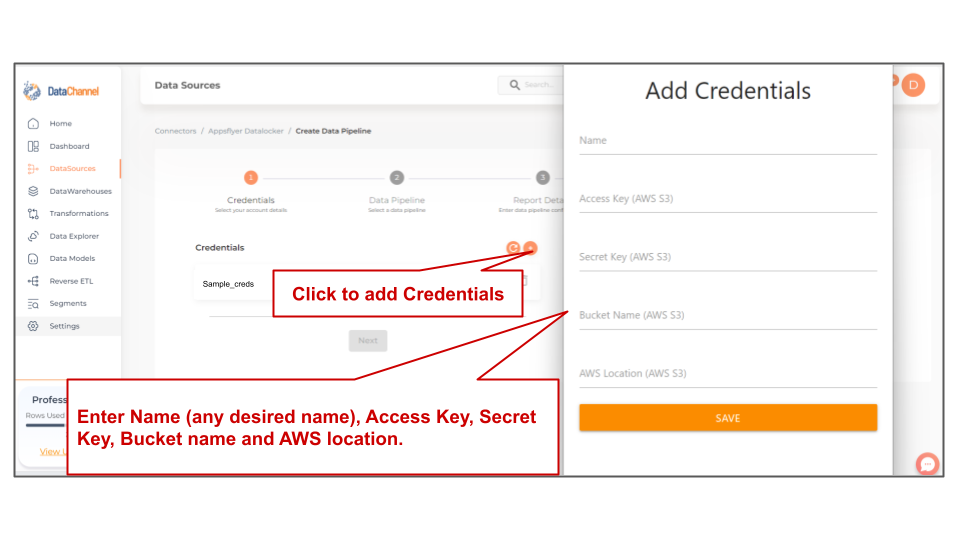
Authorize DataChannel to connect to your AppsFlyer Data Locker using the + icon with your cloud storage details such as Access Key, Secret Key, Bucket name and AWS Location. You can give any name of your choice for identfication of your credentials.This name is only for your reference and understanding, and is not dependent on the API. It can be anything that helps you identify the API credentials later on.
-
Click on + Data Pipeline to start adding data pipelines to your account.
-
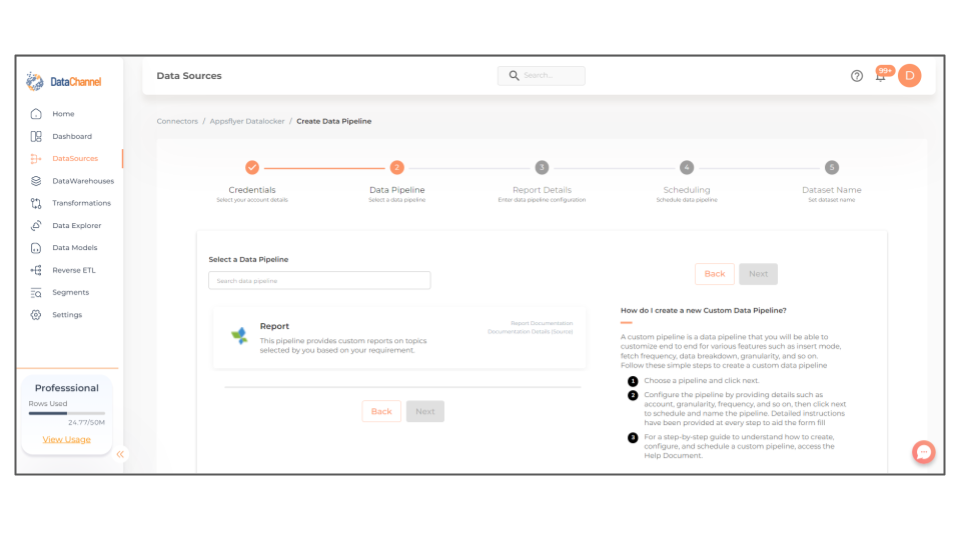
Details of individual objects and reports are available here.
-
Select the required pipeline fron the list and click Next
-
Configure the pipeline by setting the report parameters in the given fields.
Still have Questions?
We’ll be happy to help you with any questions you might have! Send us an email at info@datachannel.co.
Subscribe to our Newsletter for latest updates at DataChannel.