Familiarisation with the User Interface
Basic Layout
This section will help to familiarize you with the Basic layout of the DataChannel Console. Knowing your way around on the console will help you access all the functionalities available to you with ease.
To access the DataChannel console, you must first have a DataChannel Account. Refer our Free Trial Account Documentation to learn how to set up your DataChannel Account. Alternatively, in case you are facing an issue, you can also get in touch with our support team to guide you through the process of setting up an account.
Once you’ve finished setting up an account, Login to DataChannel at https://console.datachannel.co/login.
When you login for the first time, an Onboarding Wizard will open up to guide you through the process of setting up your first connector and Data Warehouse. Refer our Setting up your Data Warehouse Documentation to understand the process of setting up a data warehouse better.
Thereafter, the Homepage of your console will open up as follows:
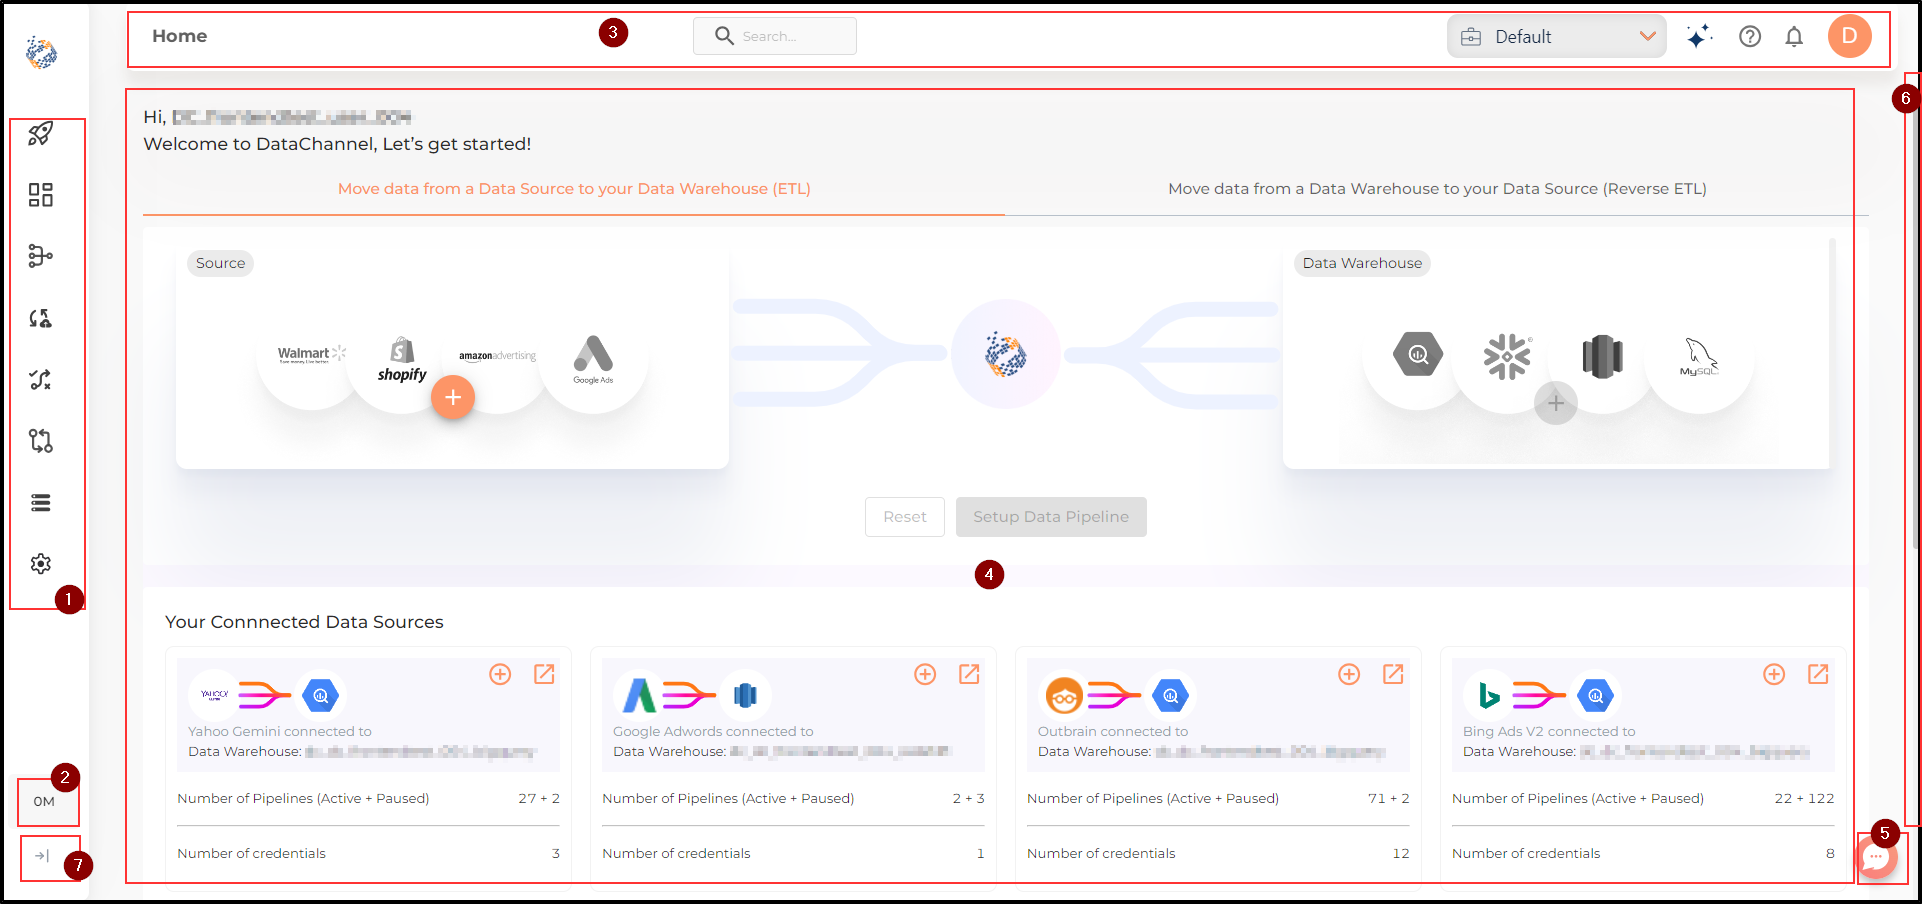
-
Sidebar: On the left side of the screen, you will be able to view the Sidebar, which allows you to navigate between various menus on the DataChannel Console. To get a detailed understanding of the various menu options on the Sidebar click here.
-
Top Banner: On the uppermost part of the screen, you will be able to view the Top Banner. The top banner displays the name of the tab on which you are currently located. You can also access the search box,Workspace name, Product updates icon, Help icon and Notifications Bell on the top banner. The Profile icon on the right corner of the Top banner lets you manage your account, profile, settings, passwords and also contains the Logout button. To get a detailed understanding of the various menu options on the Top Banner click here.
-
Main UI Screen: The Main UI screen displays the content of the tab on which you are currently located. The Main UI screen may be divided into a number of panes, which may be arranged horizontally, or vertically. The different panes can be accessed by clicking on the required tab.
-
Support Icon: On the bottom right corner of the screen, you will be able to view the Support Icon. The Support Icon allows you to raise a ticket in case you are facing an issue in setting up / running any connector. Alternatively, you can also chat with the Datachannel Support team.
-
Scroll Bar: The scroll bar on the right side of the screen helps you navigate vertically on the current page you are viewing.
-
Collapse Button: Clicking on the Collapse Button allows you to collapse / expand the sidebar at any time to increase/ decrease the size of the display area of your Main UI screen.
Still have Questions?
We’ll be happy to help you with any questions you might have! Send us an email at info@datachannel.co.
Subscribe to our Newsletter for latest updates at DataChannel.