Pre-requisites to Setup : Google Chat
A Step by Step guide to create a Service account key
In order to connect your warehouse to Google Chat through DataChannel, you will need to perform a series of pre-setup steps as follows:
-
If you’re new to Google Cloud, create an account .
-
Login to your Google Cloud console.
-
Create a Project: In the Google Cloud console, go to Menu > IAM & Admin > Create a Project. Once you give your project a name, the Google Cloud console generates a unique project ID that can be a combination of letters, numbers, and hyphens. For more info on creating a project click here
-
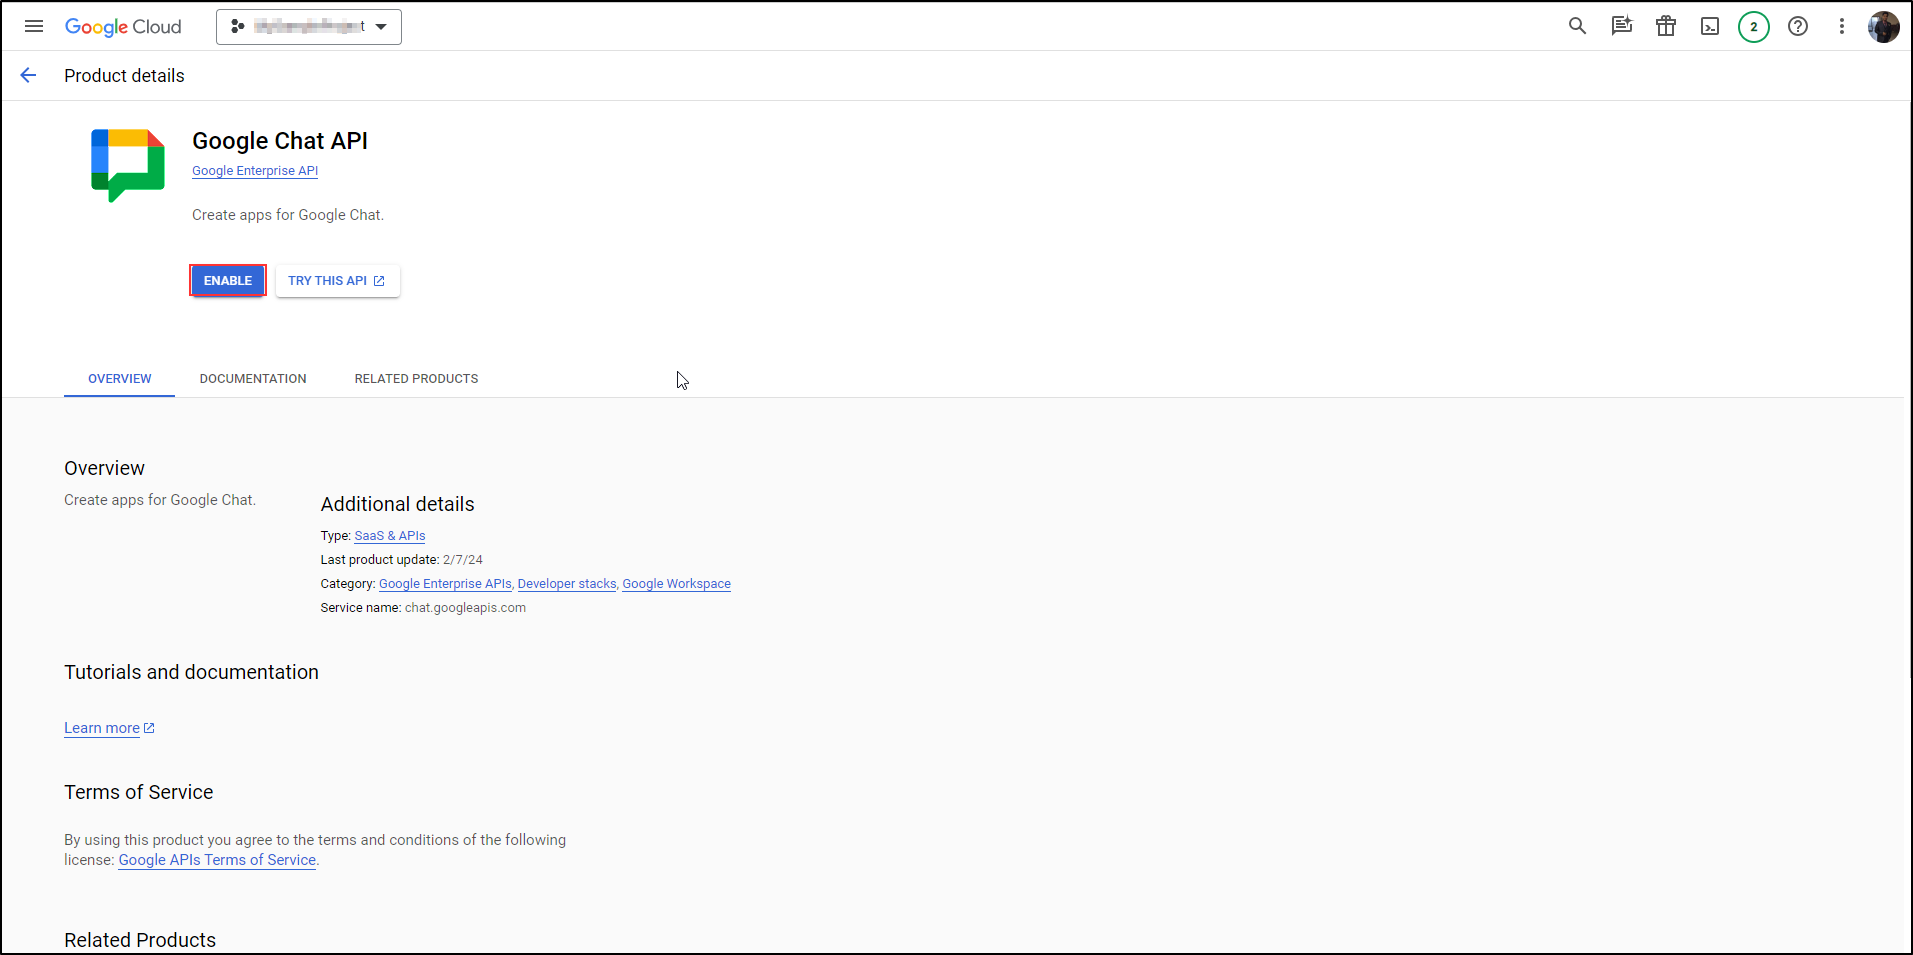
Enable Google Chat API: Before using Google Chat API, you need to turn it on in your Google Cloud project. In the Google Cloud console, go to Menu > More products > Google Workspace > Product Library. Click the Google Chat API, and then click Enable.
-
Create a Service Account: When the Google Chat API needs to access Google Cloud resources,we will need to authenticate as a service account. A service account is a special kind of account used by an application, rather than a person. So, you must configure the service account and you must attach the service account to the required resource. In the Google Cloud console, go to the Create service account page. Select a Google Cloud project. Enter a service account name to display in the Google Cloud console.The Google Cloud console generates a service account ID based on this name.Click Done to finish creating the service account. To learn more about attaching a service account to a resource click here.
-
Grant Roles/ Permissions: After you create a service account, grant one or more roles to the service account so that it can act on your behalf. Using roles, you can control access and permissions granted to principals.You can read more about managing access here . In the Google Cloud console, go to the IAM page. Select a project and select a principal to grant a role to:
-
To grant a role to a principal who already has other roles on the resource, find a row containing the principal, click Edit principal in that row, and click Add another role.
-
To grant a role to a principal who doesn’t have any existing roles on the resource, click person_add Grant Access, then enter the principal’s email address or other identifier.
-
Select the following roles to be granted from the drop-down list:
-
Chat Bots Owner
-
Chat Bots Viewer
-
-
To understand more about these roles click here.
-
Once finished click on Save.
-
Create Keys for Authentication: For using this service account to authenticate to Google Chat API, we need to authenticate using a service account key to establish the identity of the service account. Public/private key pairs provide a secure way of authentication. When you create a service account key, the public portion is stored on Google Cloud, while the private portion is available only to you. You can create a service account key using the Google Cloud console. In the Google Cloud console, go to the Service accounts page. Select a project. Click the email address of the service account that you want to create a key for. Click the Keys tab.Click the Add key drop-down menu, then select Create new key. Select JSON as the Key type and click Create. Clicking Create downloads a service account key file. After you download the key file, you cannot download it again. Make sure to store the key file securely, because it can be used to authenticate as your service account.
-
The downloaded key has the following format, where PRIVATE_KEY is the private portion of the public/private key pair:
{
  "type": "service_account",
  "project_id": "PROJECT_ID",
  "private_key_id": "KEY_ID",
  "private_key": "-----BEGIN PRIVATE KEY-----\nPRIVATE_KEY\n-----END PRIVATE KEY-----\n",
  "client_email": "SERVICE_ACCOUNT_EMAIL",
  "client_id": "CLIENT_ID",
  "auth_uri": "https://accounts.google.com/o/oauth2/auth",
  "token_uri": "https://accounts.google.com/o/oauth2/token",
  "auth_provider_x509_cert_url": "https://www.googleapis.com/oauth2/v1/certs",
  "client_x509_cert_url": "https://www.googleapis.com/robot/v1/metadata/x509/SERVICE_ACCOUNT_EMAIL"
}-
This JSON file content will be required at the time of adding your credentials at DataChannel.
Steps for Creating and Publishing your App
After following the above mentioned steps, you will be required to Create and Publish your App.
-
Publish the Chat app from the Google Cloud console.
-
In the Google Cloud console, search for Google Chat API, and click Google Chat API.
-
If not enabled, please enable the API. Click Manage.
-
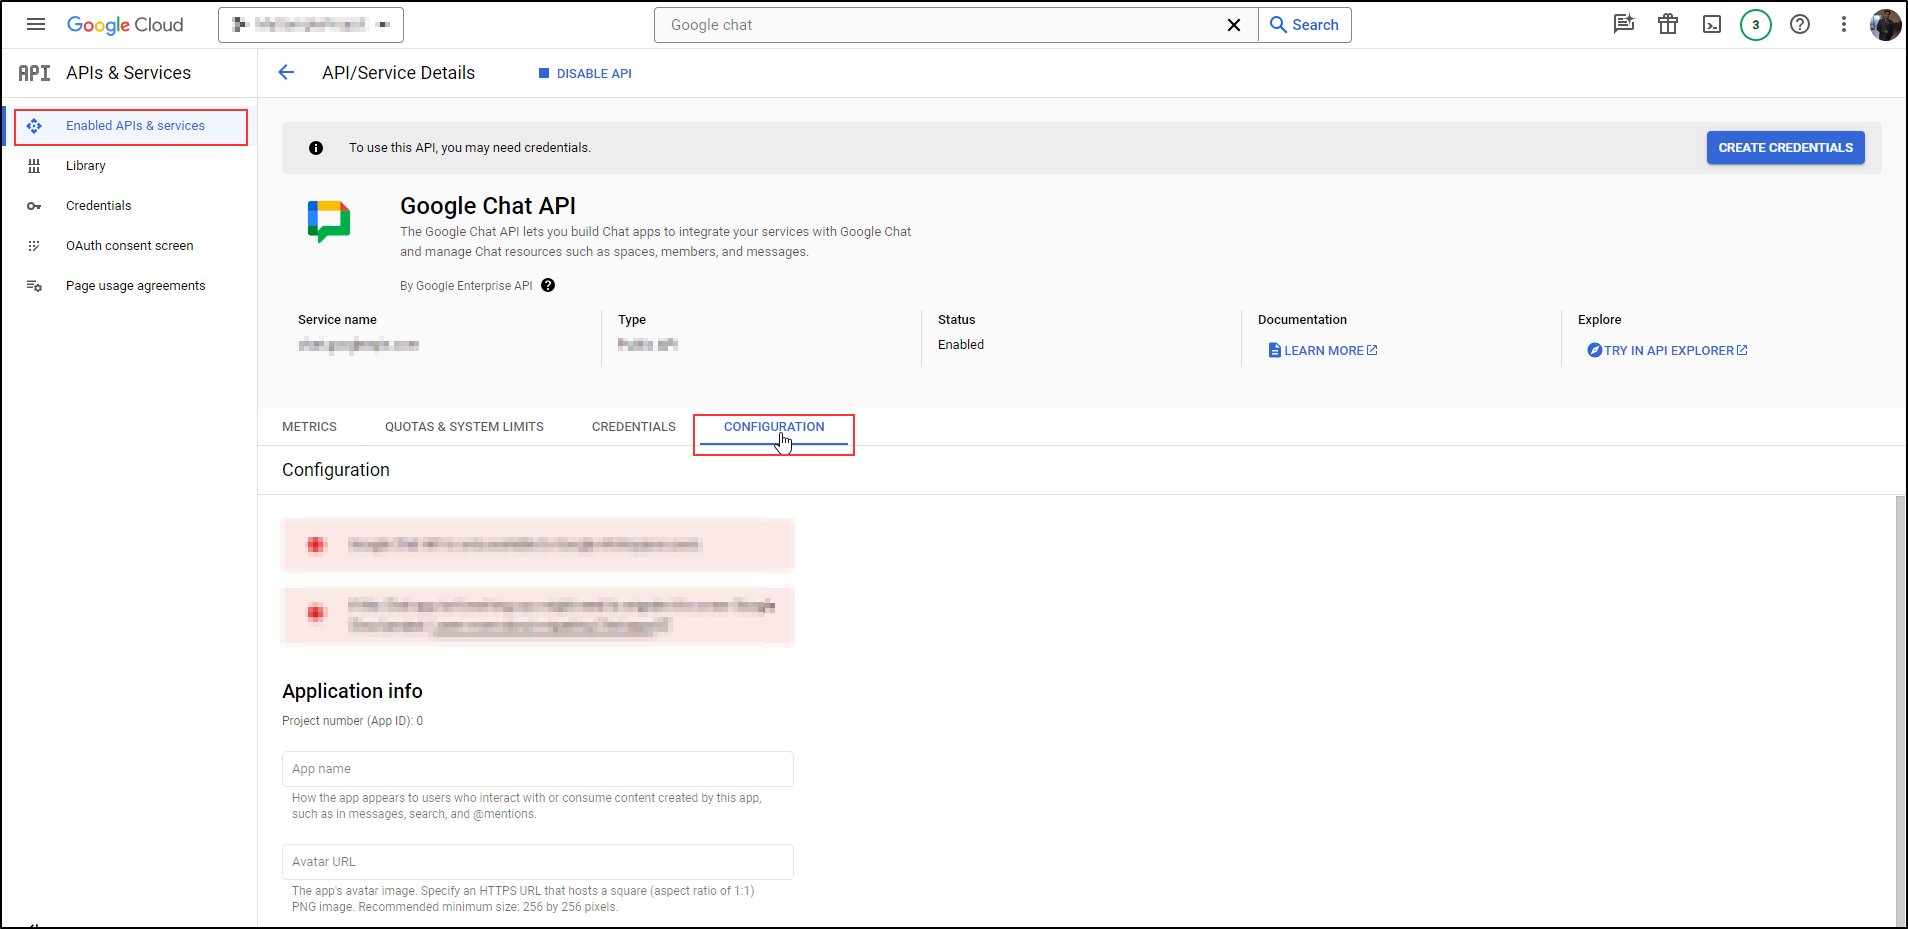
Click Configuration and set up the Chat app:
-
In the App name field, enter the desired app name e.g.:
Quickstart app. -
In the Avatar URL field, enter the desired URL. e.g.:
https://developers.google.com/chat/images/quickstart-app-avatar.png. -
In the Description field, enter the desired app description e.g.:
Quickstart app. -
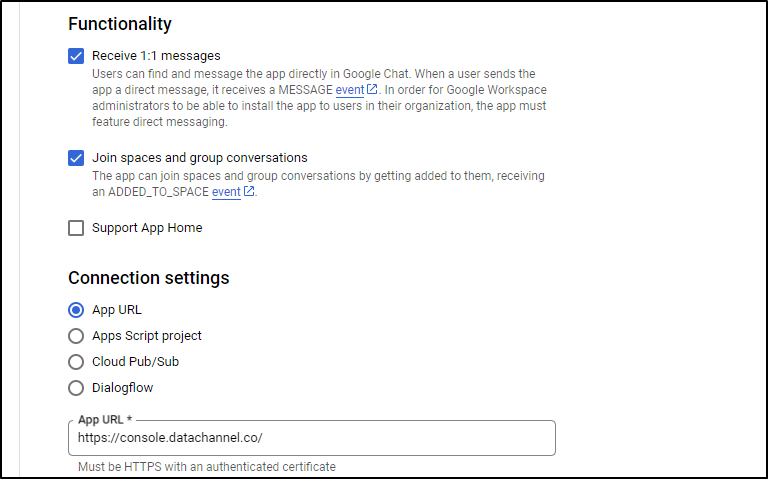
Under Functionality, select Receive 1:1 messages and Join spaces and group conversations.
-
Under Connection settings, select Apps URL and paste the App URL into the field (as shown in image).
-
Under Visibility, select Specific people and groups in your domain, and enter your email.
-
Click Save and refresh the page.
-
On the configuration page, under App status, set the status to Live - available to users.
-
Click Save.
-
The Chat app is ready to respond to messages.
Still have Questions?
We’ll be happy to help you with any questions you might have! Send us an email at info@datachannel.co.
Subscribe to our Newsletter for latest updates at DataChannel.