Create a new Workspace from the DataChannel Console
There are two ways to create a new Workspace fron the DataChannel Console:
Option 1: Create a new Workspace from the Settings Tab
-
Sign in to your enterprise level account at DataChannel.
-
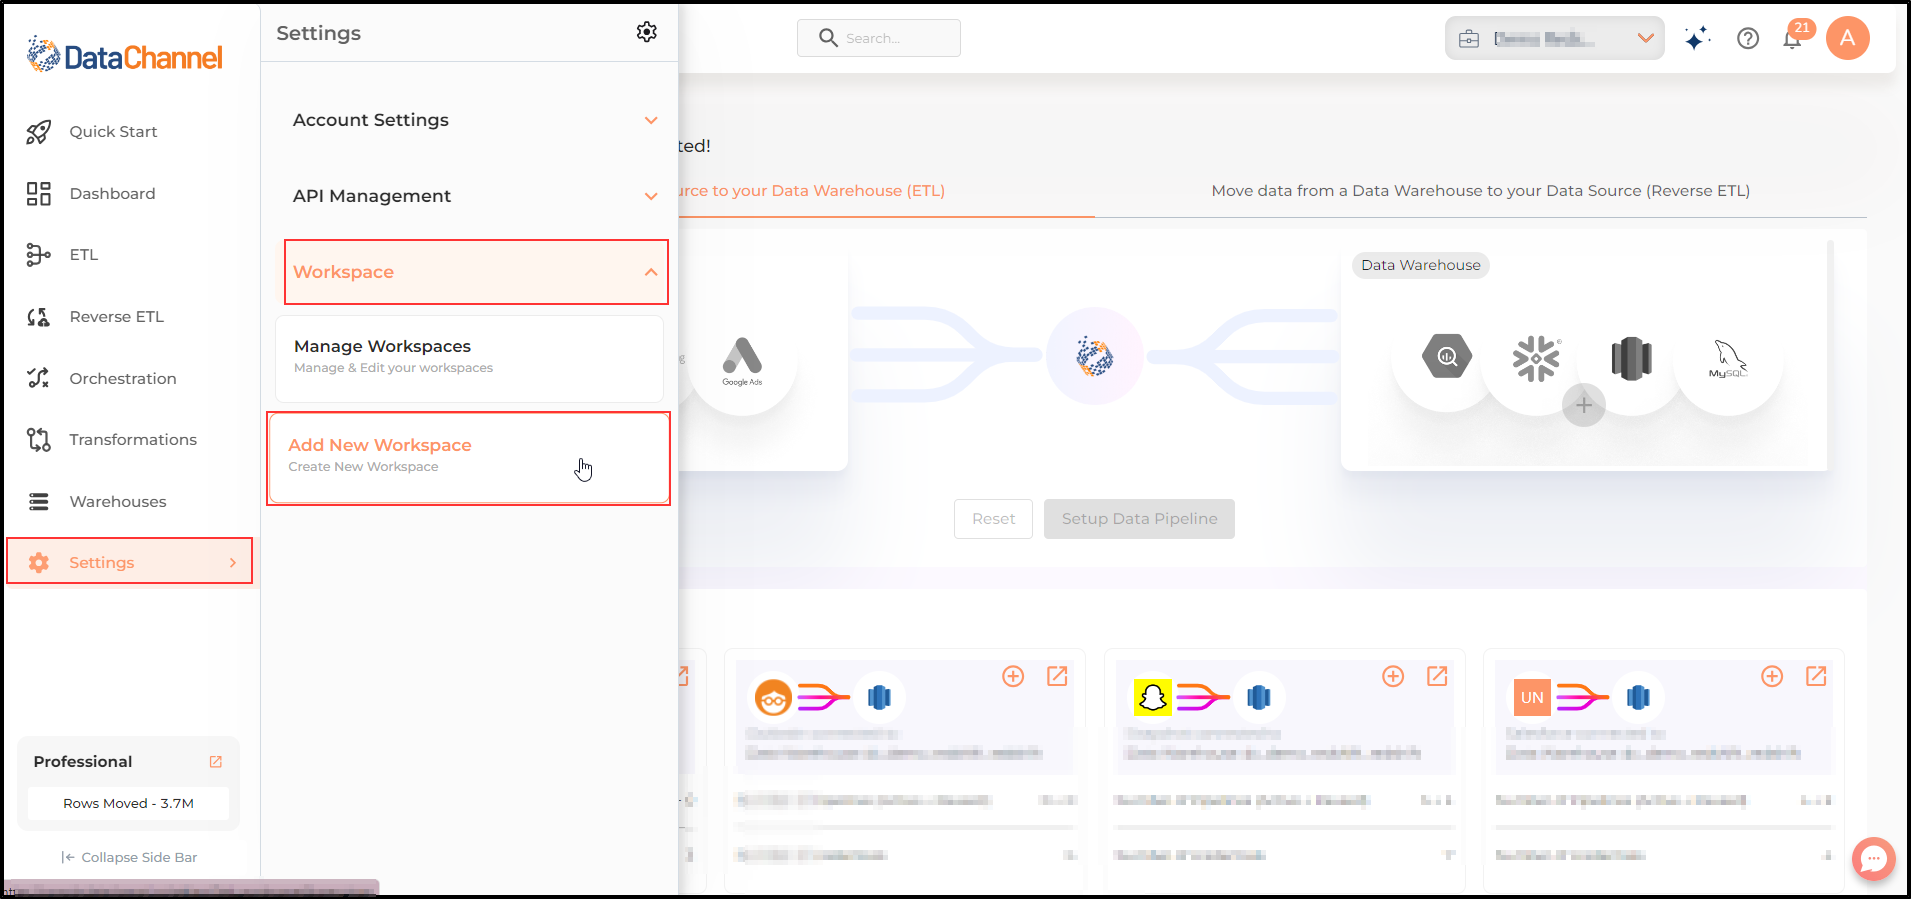
Go to the Settings tab which is the bottommost icon on the sidebar.
-
Go to the Workspace menu and select the Add New Workspace option, to add a new Workspace to your Account. You will be able to do this only if you are signed in to and located in your super-admin account.
-
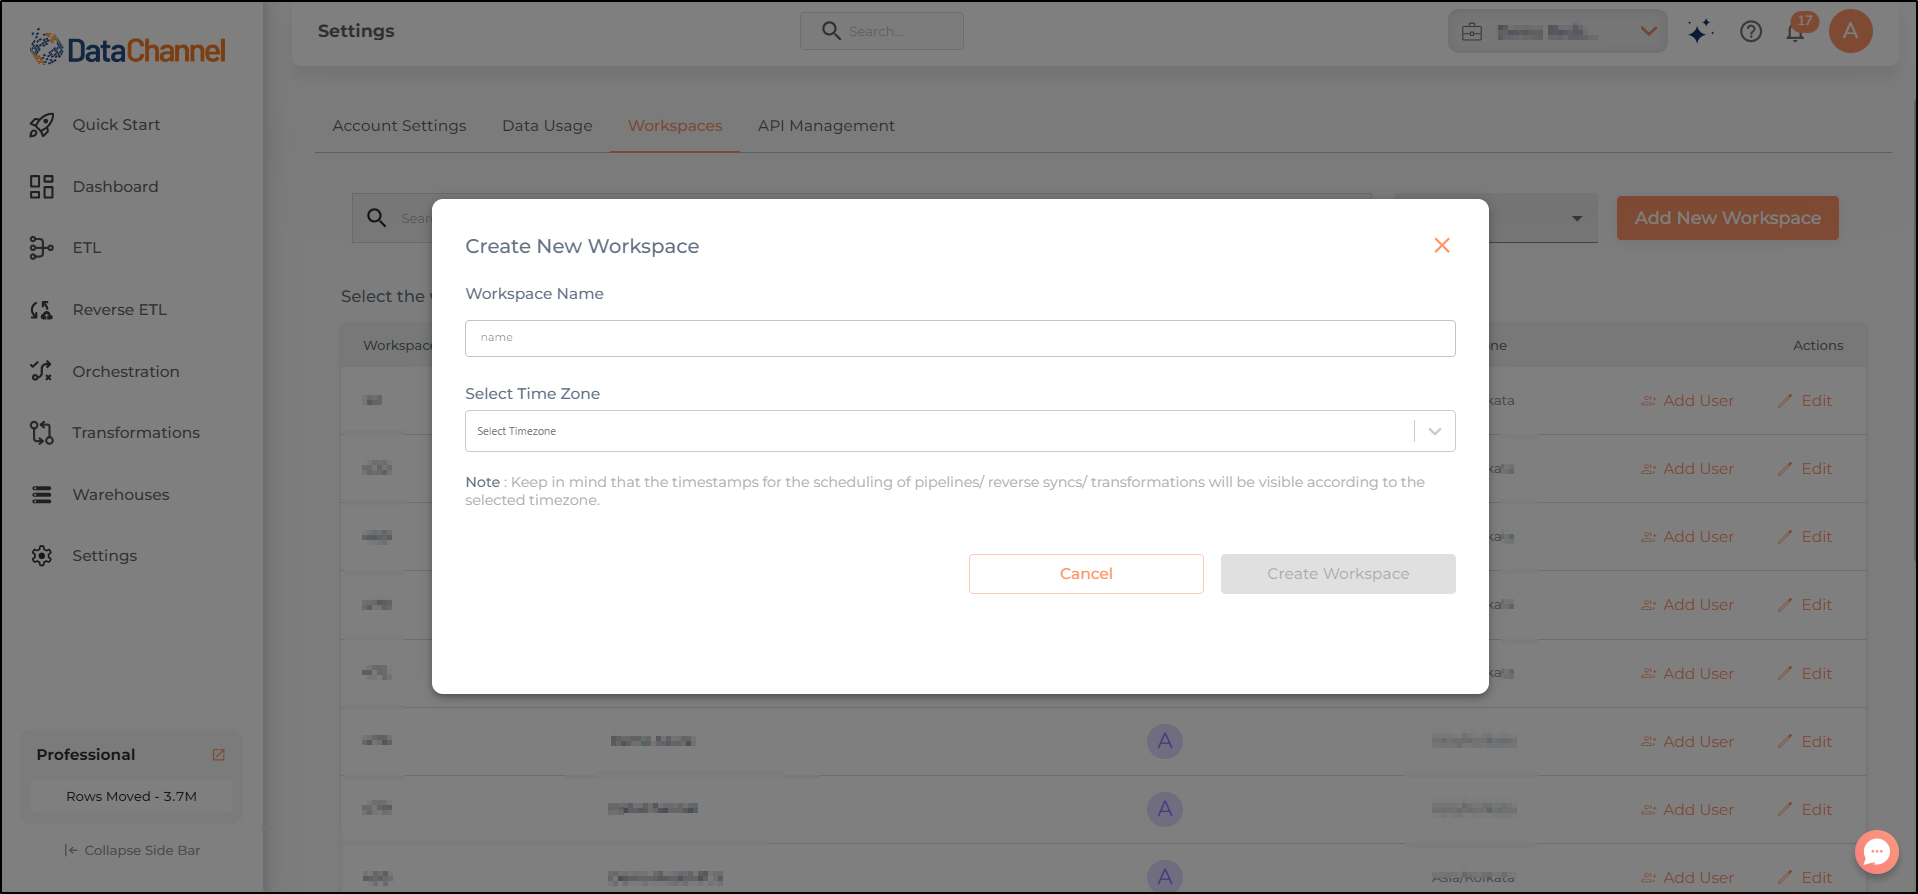
Give a name to the Workspace and select a timezone. Click on Create Workspace button.
-
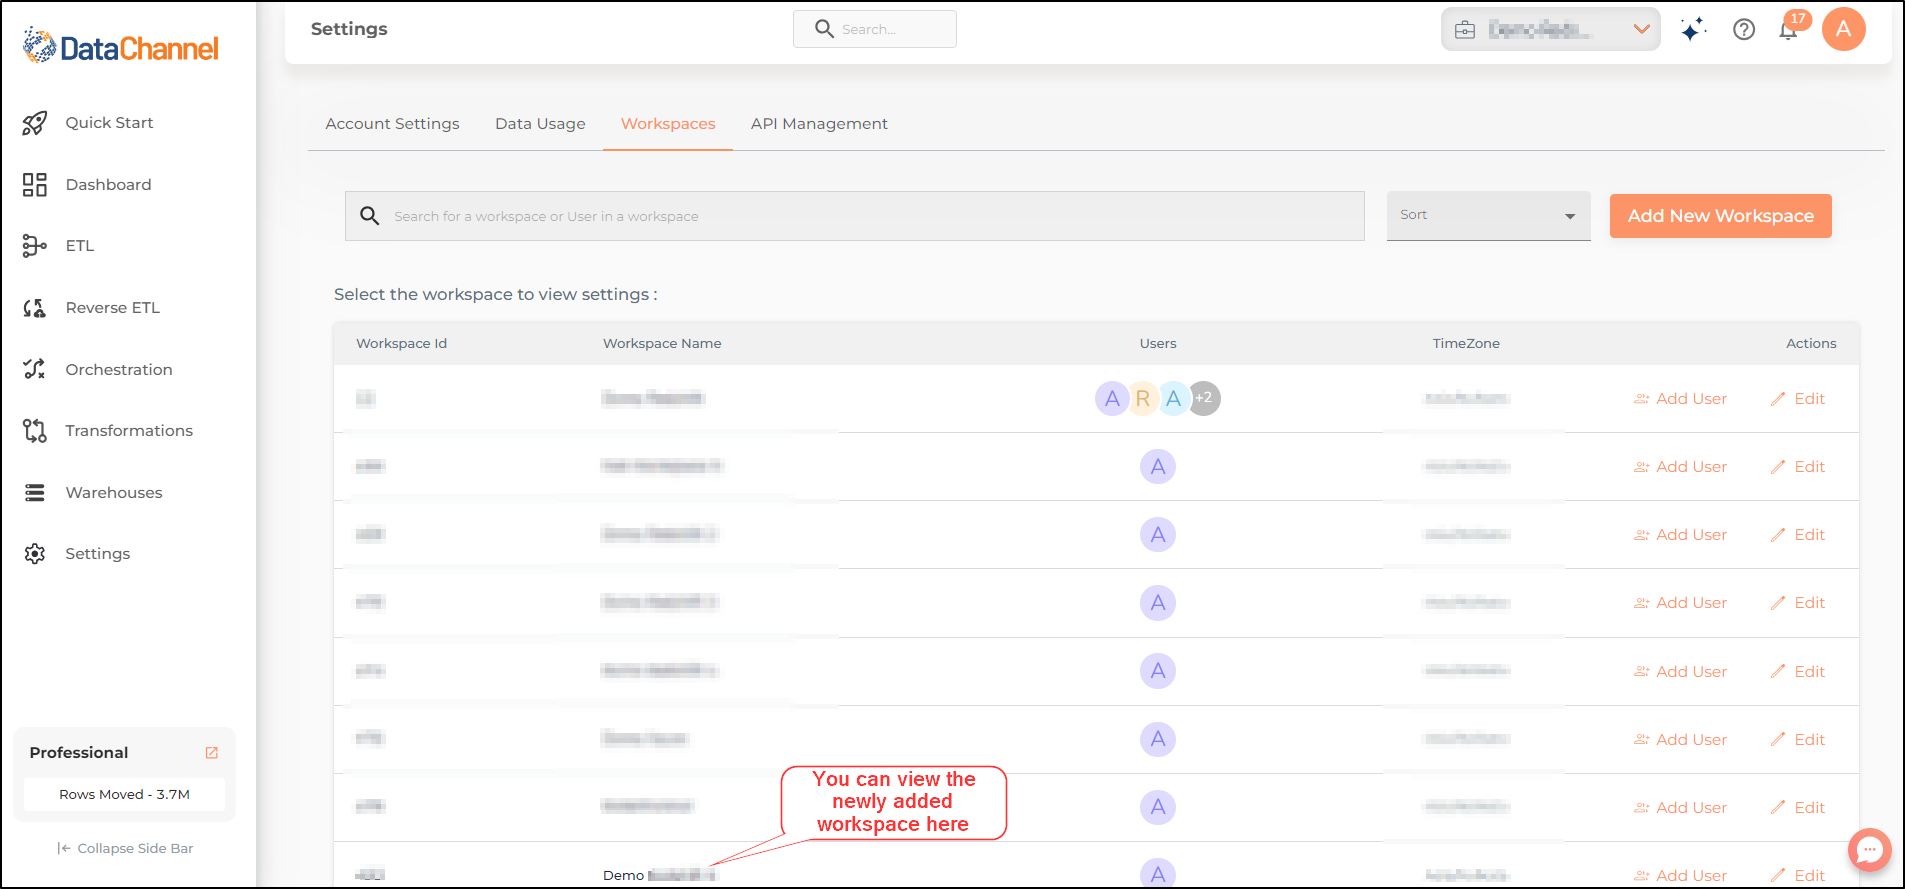
You can view the newly added workspace in the listed workspaces.
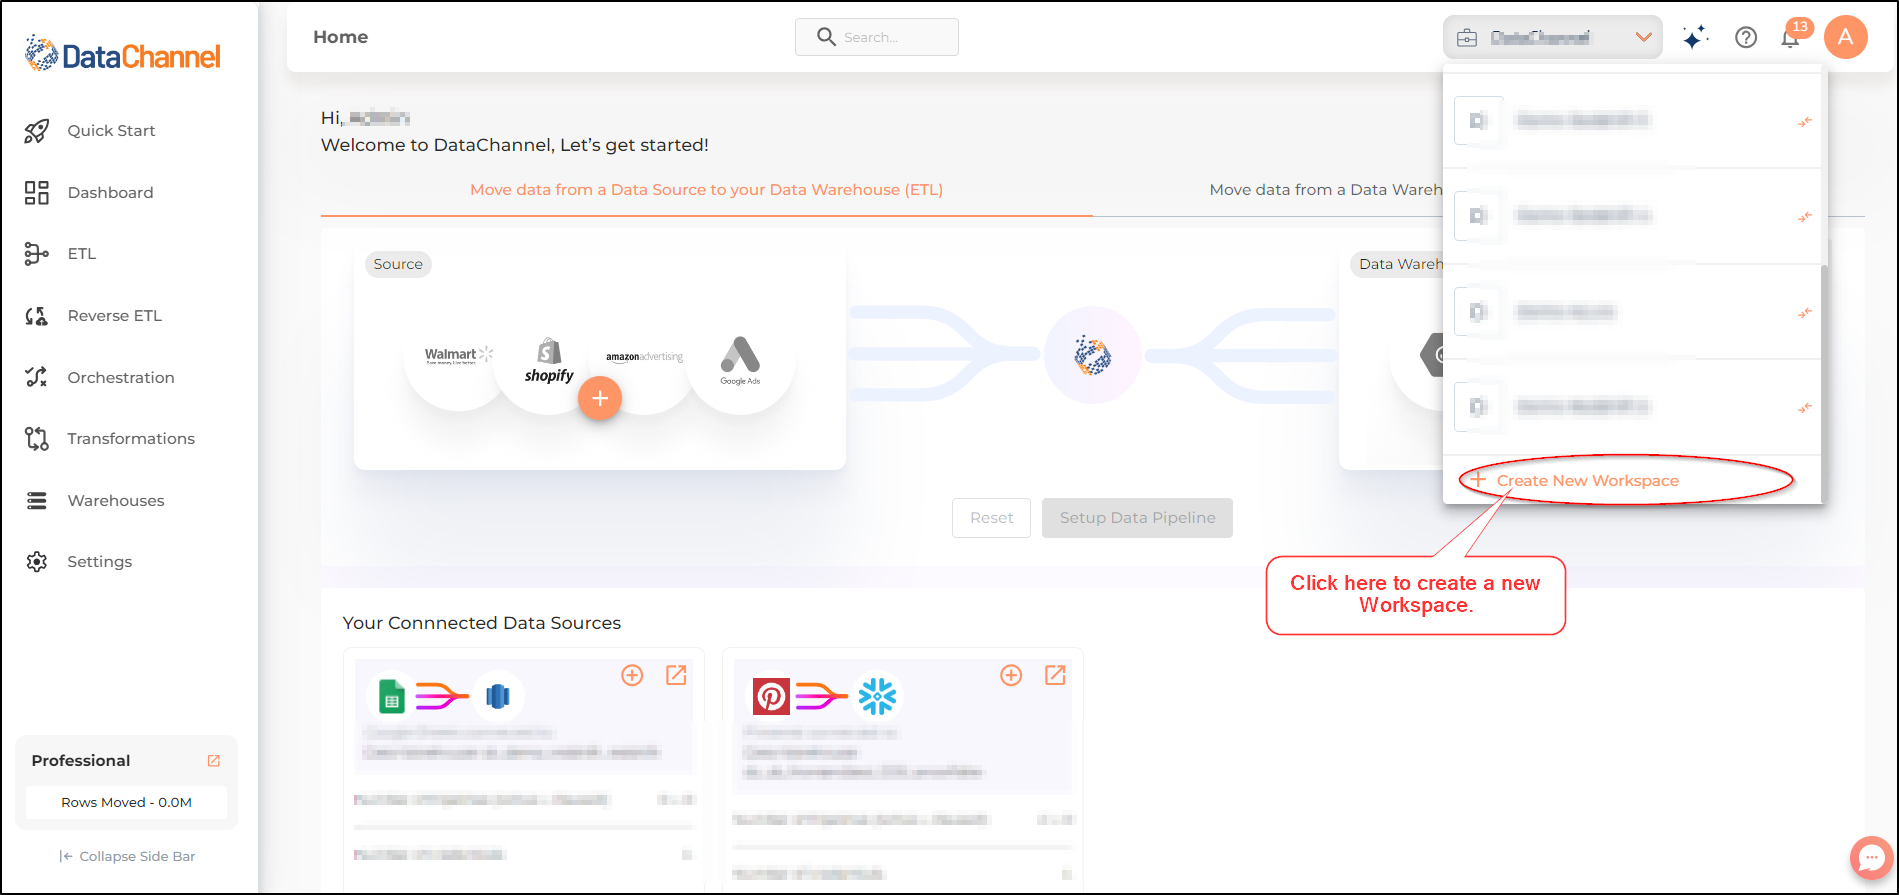
Option 2: Create a new Workspace from the Top Banner
-
Sign in to your enterprise level account at DataChannel.
-
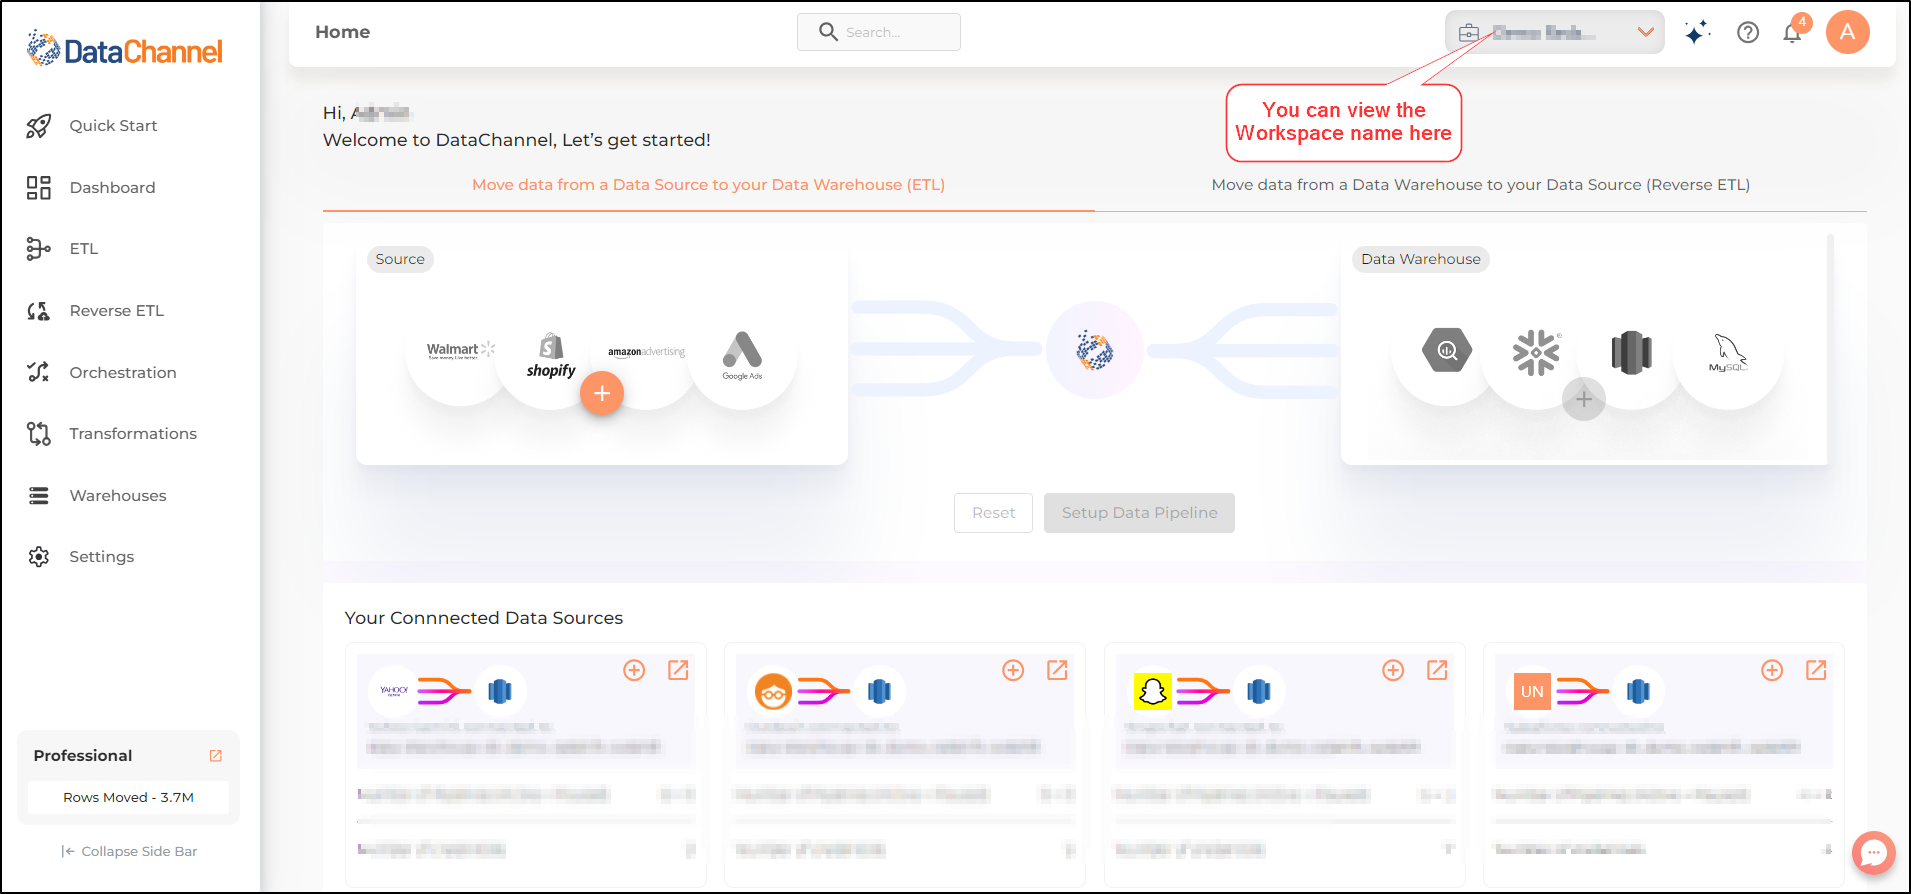
On the top banner, you can view the name of the workspace/ super-admin that you are currently working on.
-
To create a new Workspace, you should be signed in to and located in your super-admin account.
-
Click on the dropdown arrow, to view a list of Workspaces added to your account. At the bottom of the list you can see the option to +Create new workspace. Click on it.
-
Give a name to the Workspace and select a timezone. Click on Create Workspace button.
-
You can view the newly added workspace in the listed workspaces.
Still have Questions?
We’ll be happy to help you with any questions you might have! Send us an email at info@datachannel.co.
Subscribe to our Newsletter for latest updates at DataChannel.