Snowflake
Introduction
Snowflake enables data storage, processing, and analytics solutions that are flexible, fast, and easy to use. It was not built on any existing database technology or “big data” software platforms such as Hadoop. Instead, Snowflake combines a completely new SQL query engine with an innovative architecture natively designed for the cloud.
Read more about its features and how to get started with the popular platform here.
This document will show you how you can connect / provision a Snowflake based warehouse in minutes using the DataChannel Platform.
|
Prerequisites for connecting your Snowflake Cluster
|
To find your Snowflake Details
You’ll be needing certain Snowflake details when configuring your Data Warehouse at DataChannel:
-
Before you can execute SQL statements you must sign into a Snowflake account.
-
In a supported web browser, navigate to https://app.snowflake.com.
-
You can sign into Snowflake using your Snowflake account name and your Snowflake account credentials (username, and password).
-
You can view the account name in the URLs for accessing any of the Snowflake web interfaces. The URL for an account uses the following format:
https://<account_name>.snowflakecomputing.com.
-
You can write the following SQL queries using the Worksheets page on the Snowflake web interface:
---
SHOW WAREHOUSES;
SHOW DATABASES;
SHOW SCHEMAS;
SHOW STAGES;
---
In the query results you will see the lists of all the warehouses,databases, schemas and stages for which you have access privileges, across your entire account. Please make a note of the details of all the resources that you would like to be accessed by DataChannel.
-
Alternatively , these details about database name, schema name and stage name are also visible to you from the Snowflake web interface. To know more refer Snowflake documentation
-
If you use the classic Snowflake Console the warehouse name, database name, schema name and stage name details are visible near the top right corner of the screen as shown below:
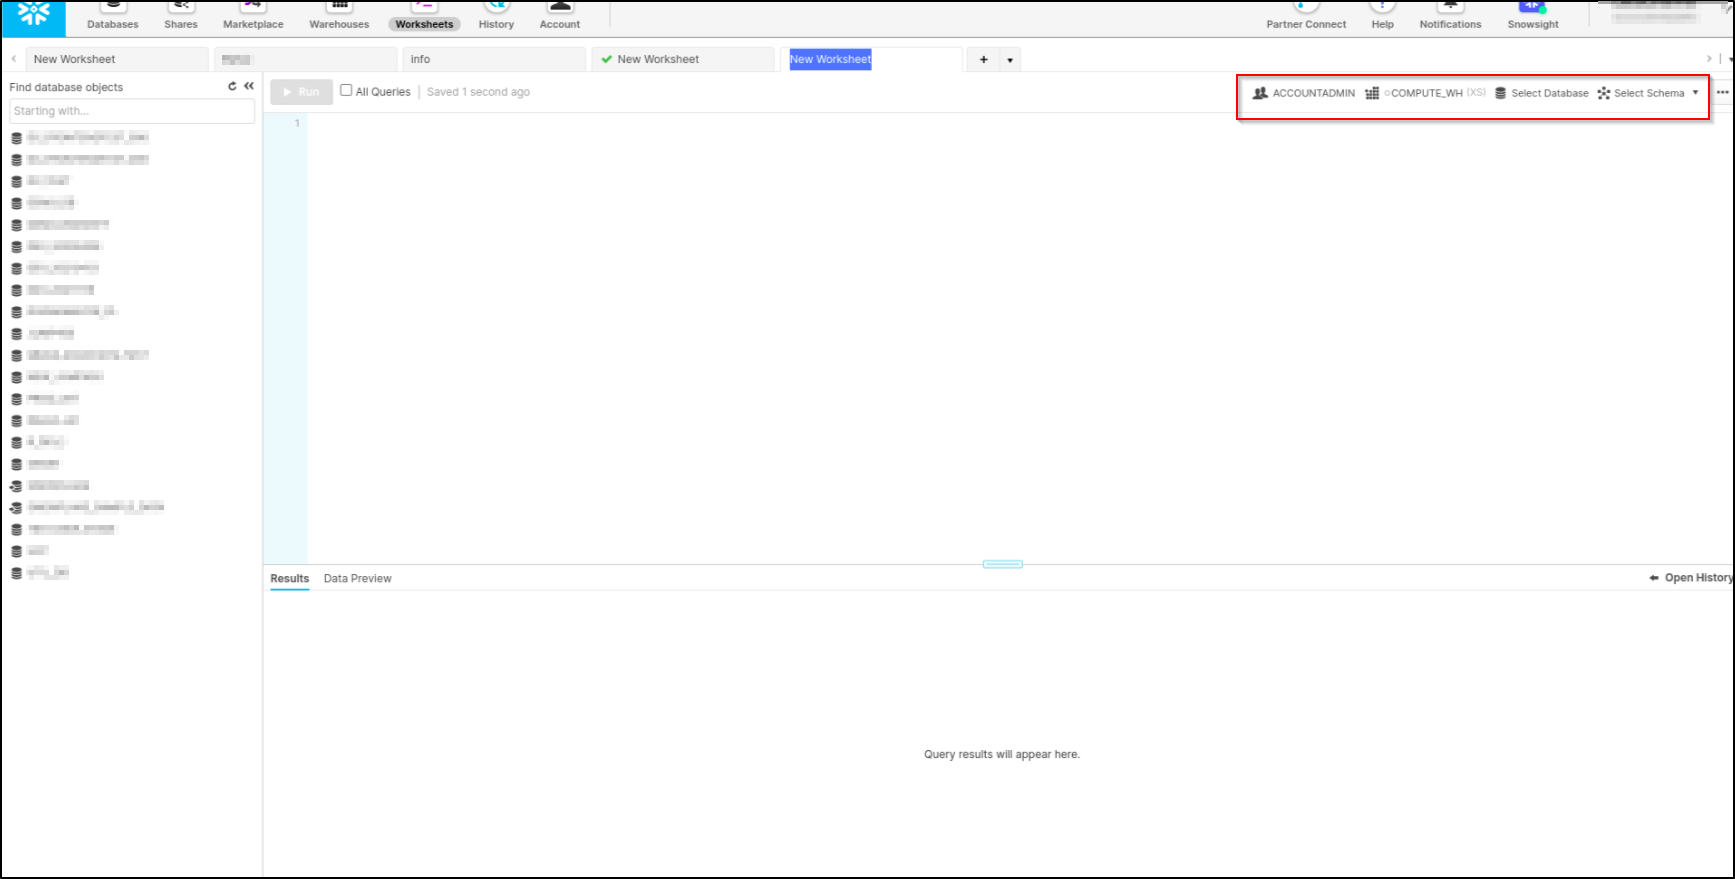
-
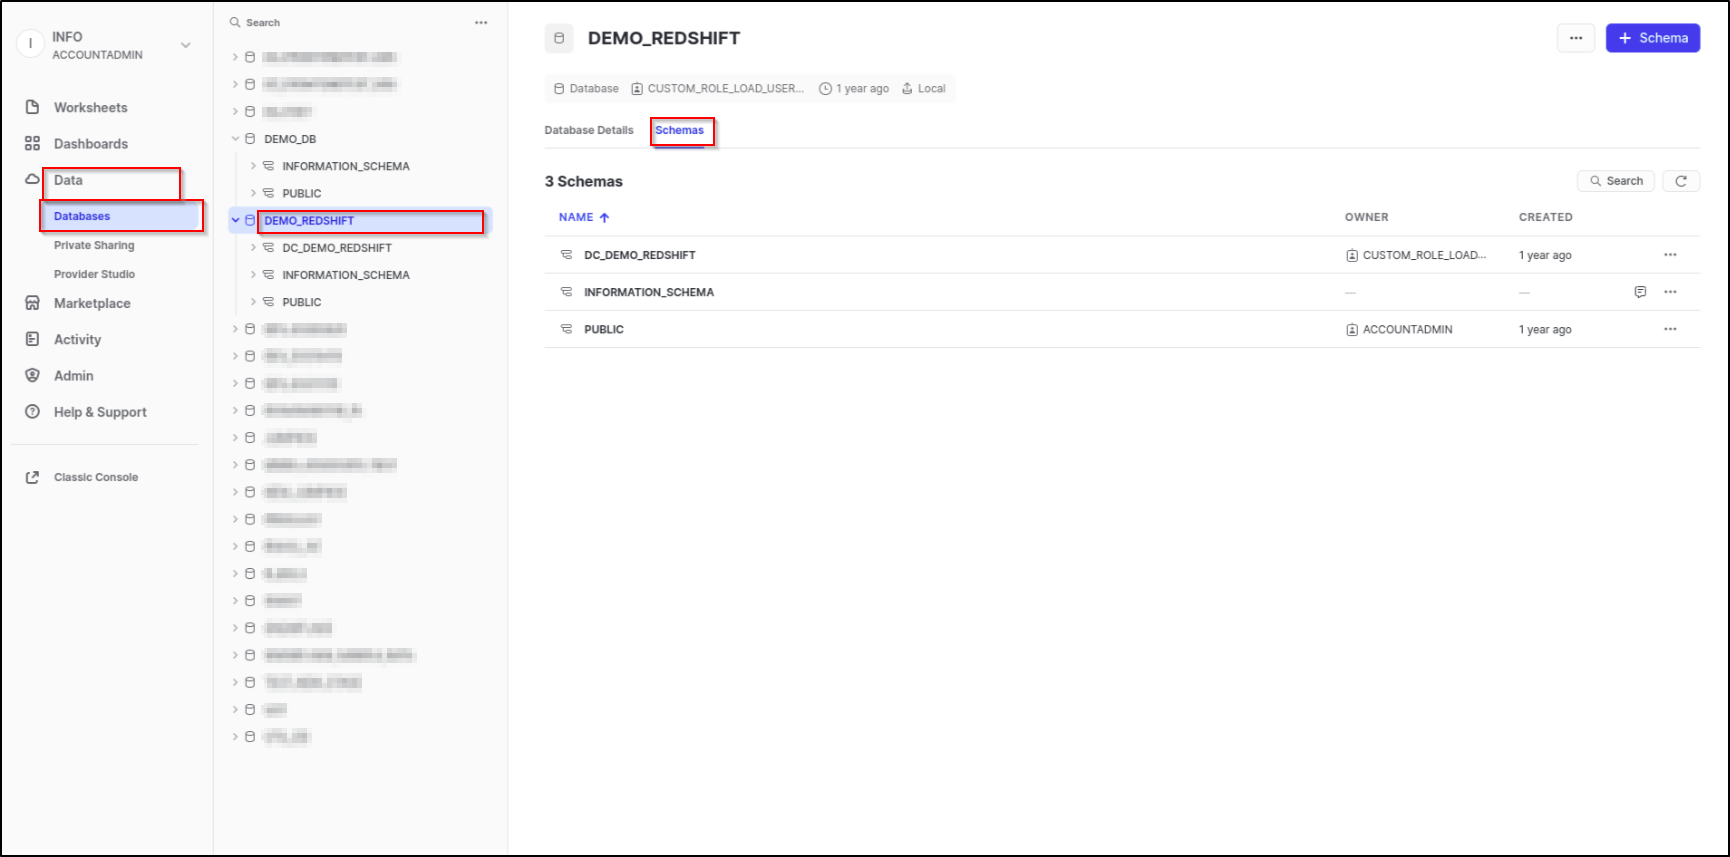
If you use the Snowsight web interface the warehouse name, database name, schema name and stage name details are visible from the Data menu as shown below:
Step By Step Guide
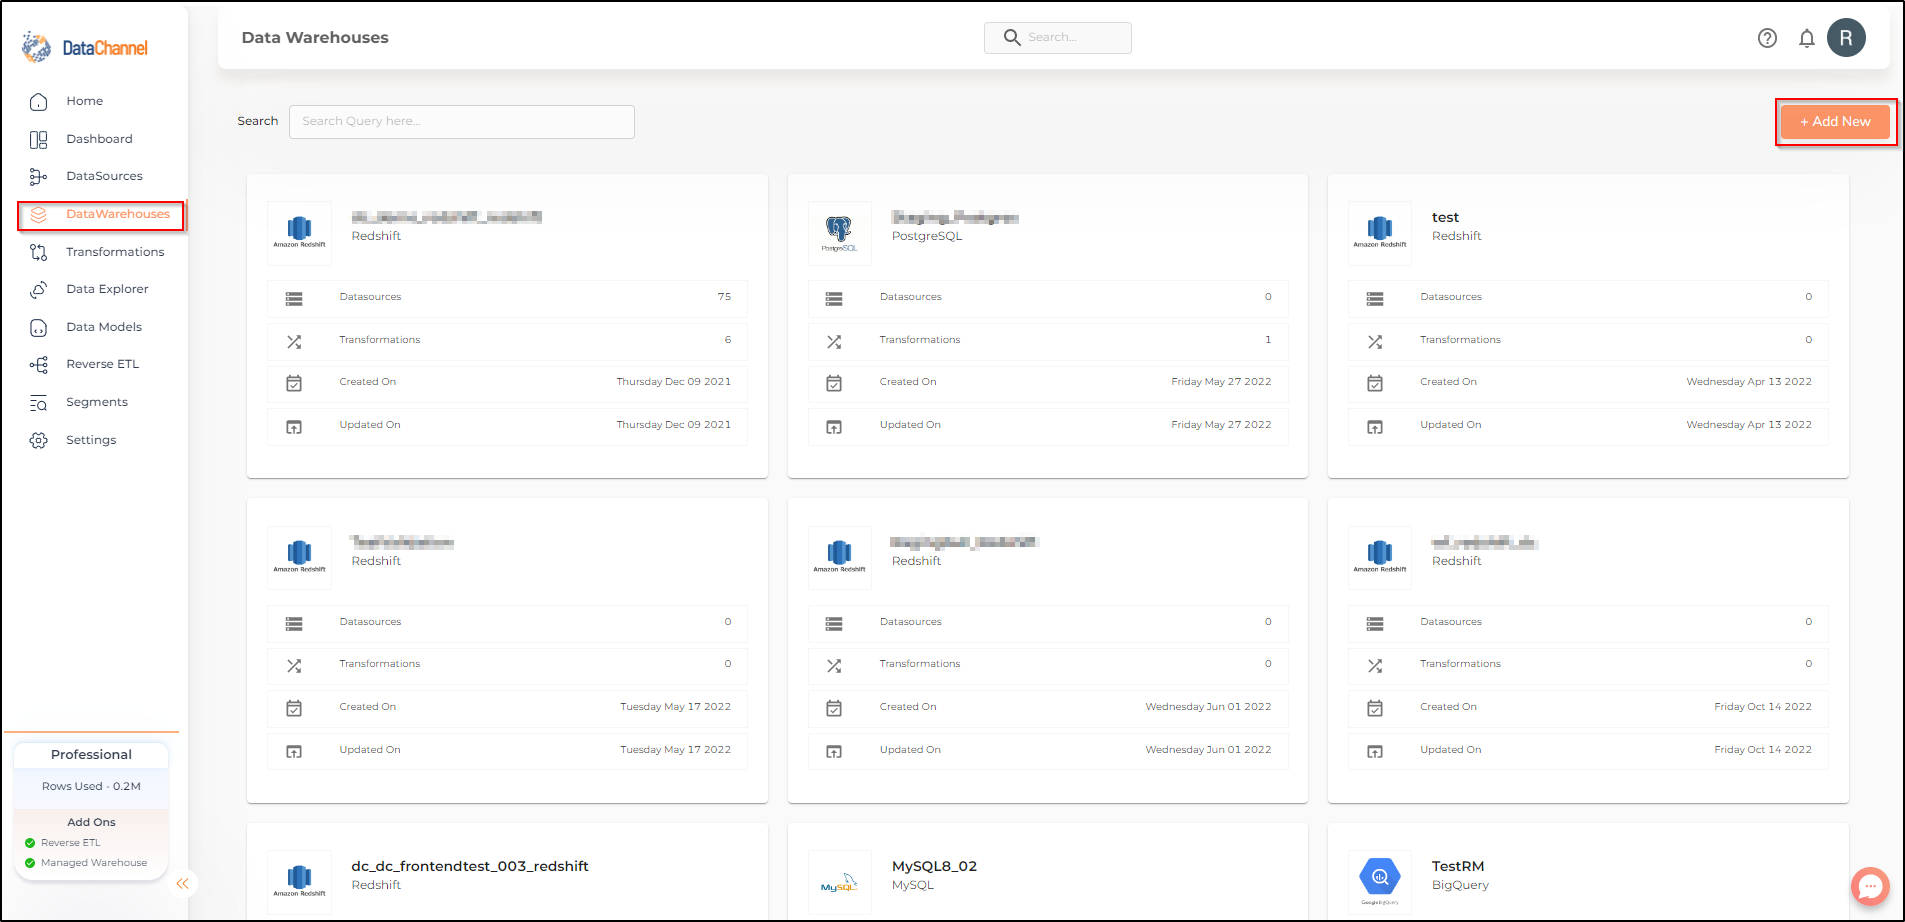
- Step 1
-
Click on Data Warehouses tab in the left side bar navigation to reach the Data Warehouses Module as shown below.
- Step 2
-
Click on Add New to add an additional Data Warehouse to your account.
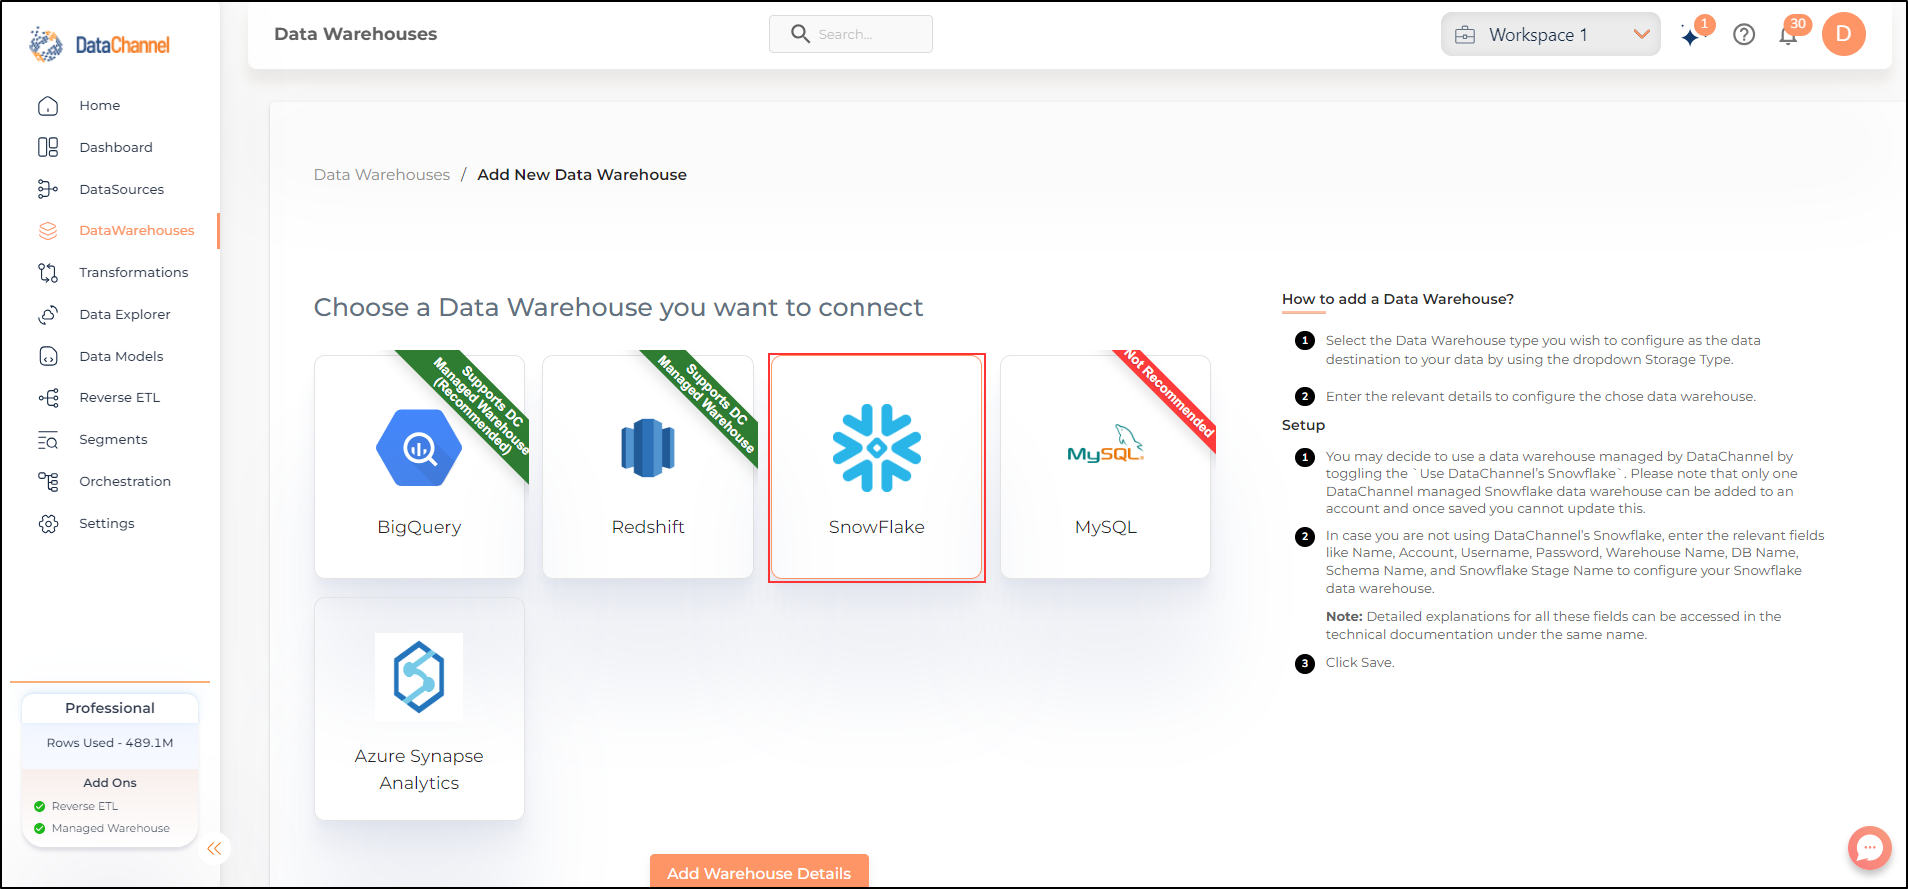
- Step 3
-
Select Snowflake from the listed Warehouse options.
- Step 4
-
Enter the details about your Snowflake cluster in the form and click on Save to add the warehouse. An explanation of each of the fields in the form has been given below.
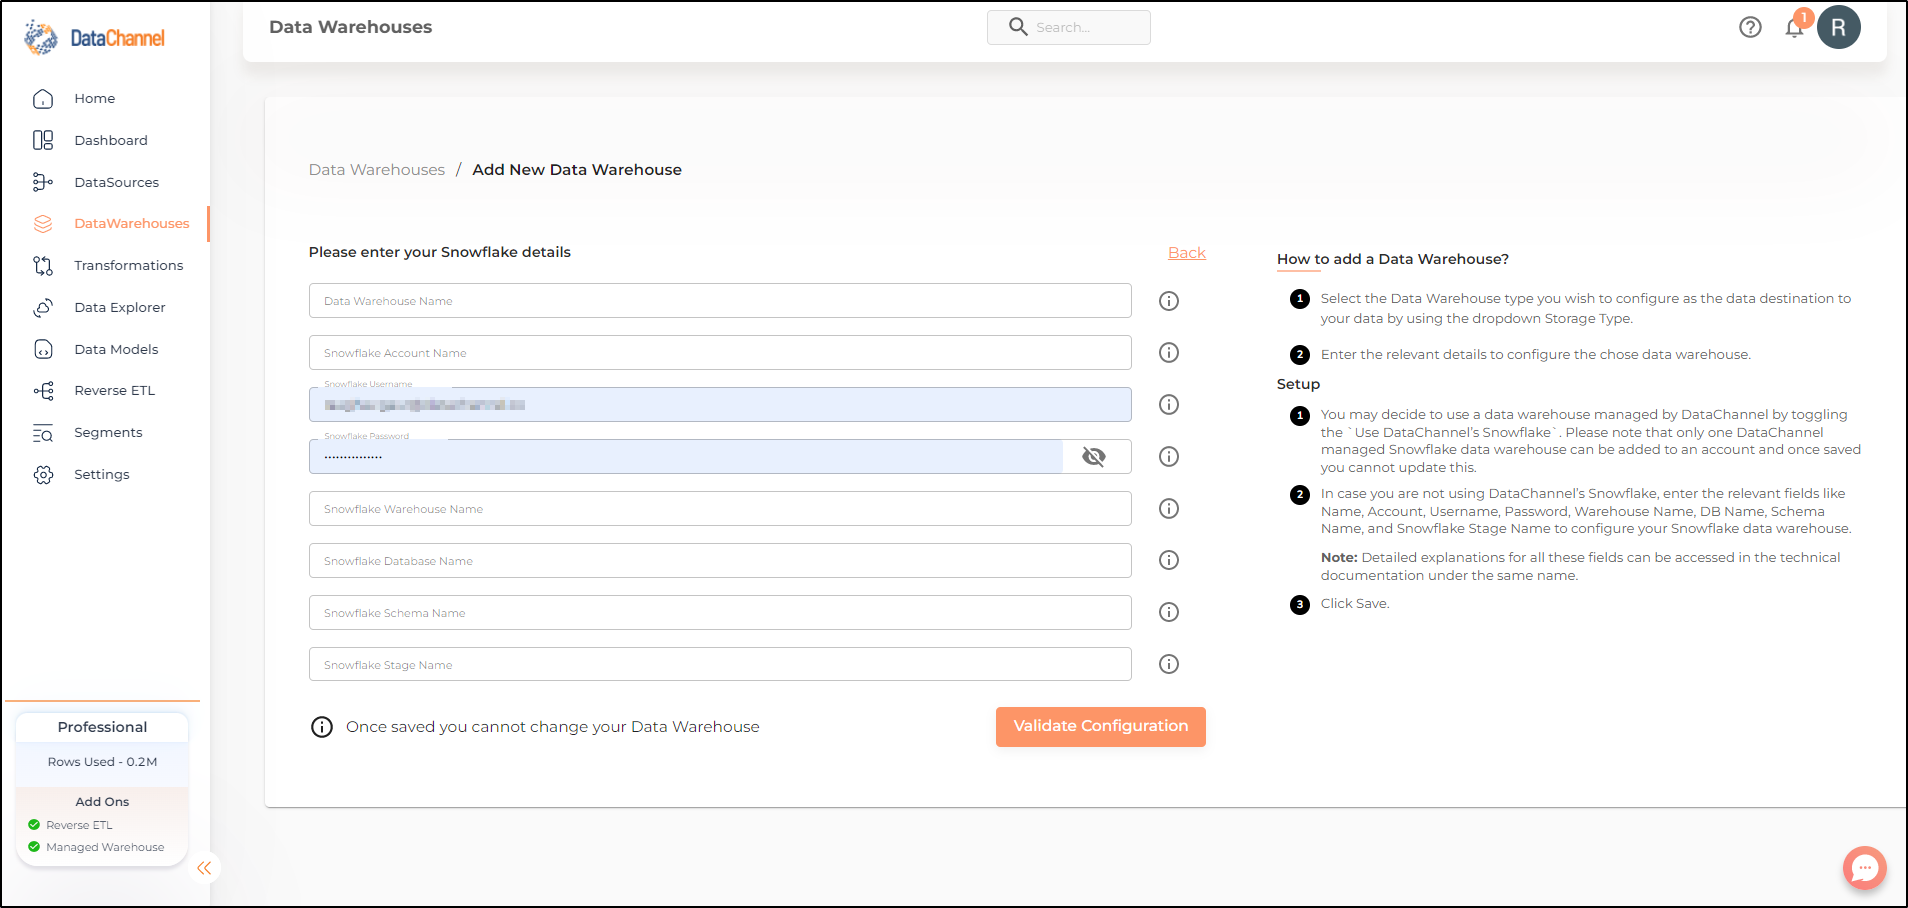
| Field | Description |
|---|---|
Name |
Required Provide a name for your warehouse. It needs to be unique across your account. |
Account |
Required Provide your Snowflake account name here. You can access directly from the URL. Example: ACCOUNT NAME.snowflakecomputing.com |
Username |
Required Provide a username which will be used to create the tables and load data. This user needs to have all rights on the database, datawarehouse(only usage), and the schema you intend to use. In case you are creating a dedicated schema for the data from DataChannel (which is recommended), then this user can be the schema owner. |
Password |
Required Provide the password for the username entered above. |
Warehouse Name |
Required Provide the name of the Warehouse. This can be accessed from the Warehouses Tab. |
DB Name |
Required Provide the name of the database you have created in your Snowflake instance. |
Schema Name |
Required Provide the database schema where DataChannel should push the data. As mentioned above, it is recommended to create a new schema for DataChannel in your database. |
Snowflake Stage Name |
Required Provide the Internal Stage name here that should be used to load data to tables. This internal stage should be created in the same database which is being used to load data. This can be accessed from the Databases Tab. Cick on the Database you are using and Go to the Stages Tab. |
Still have Questions?
We’ll be happy to help you with any questions you might have! Send us an email at info@datachannel.co.
Subscribe to our Newsletter for latest updates at DataChannel.