Create Orchestrations
-
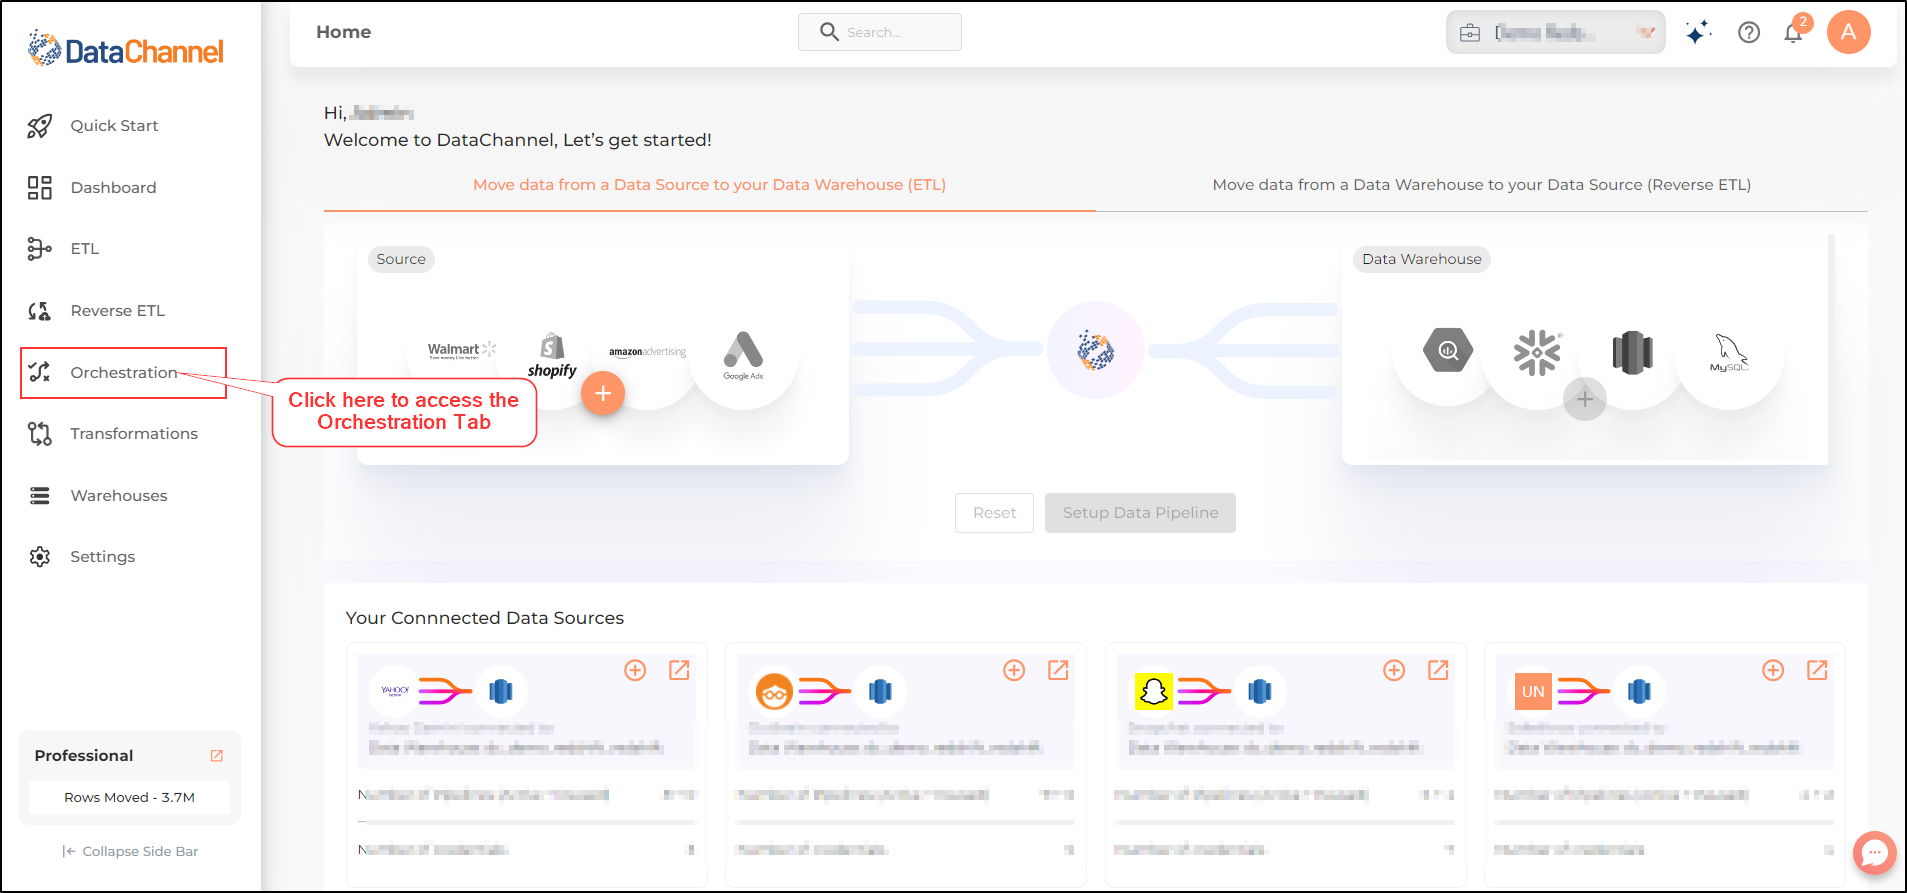
To start creating Orchestrations or to view the already created Orchestrations click on the Orchestration link in the sidebar as shown below.
-
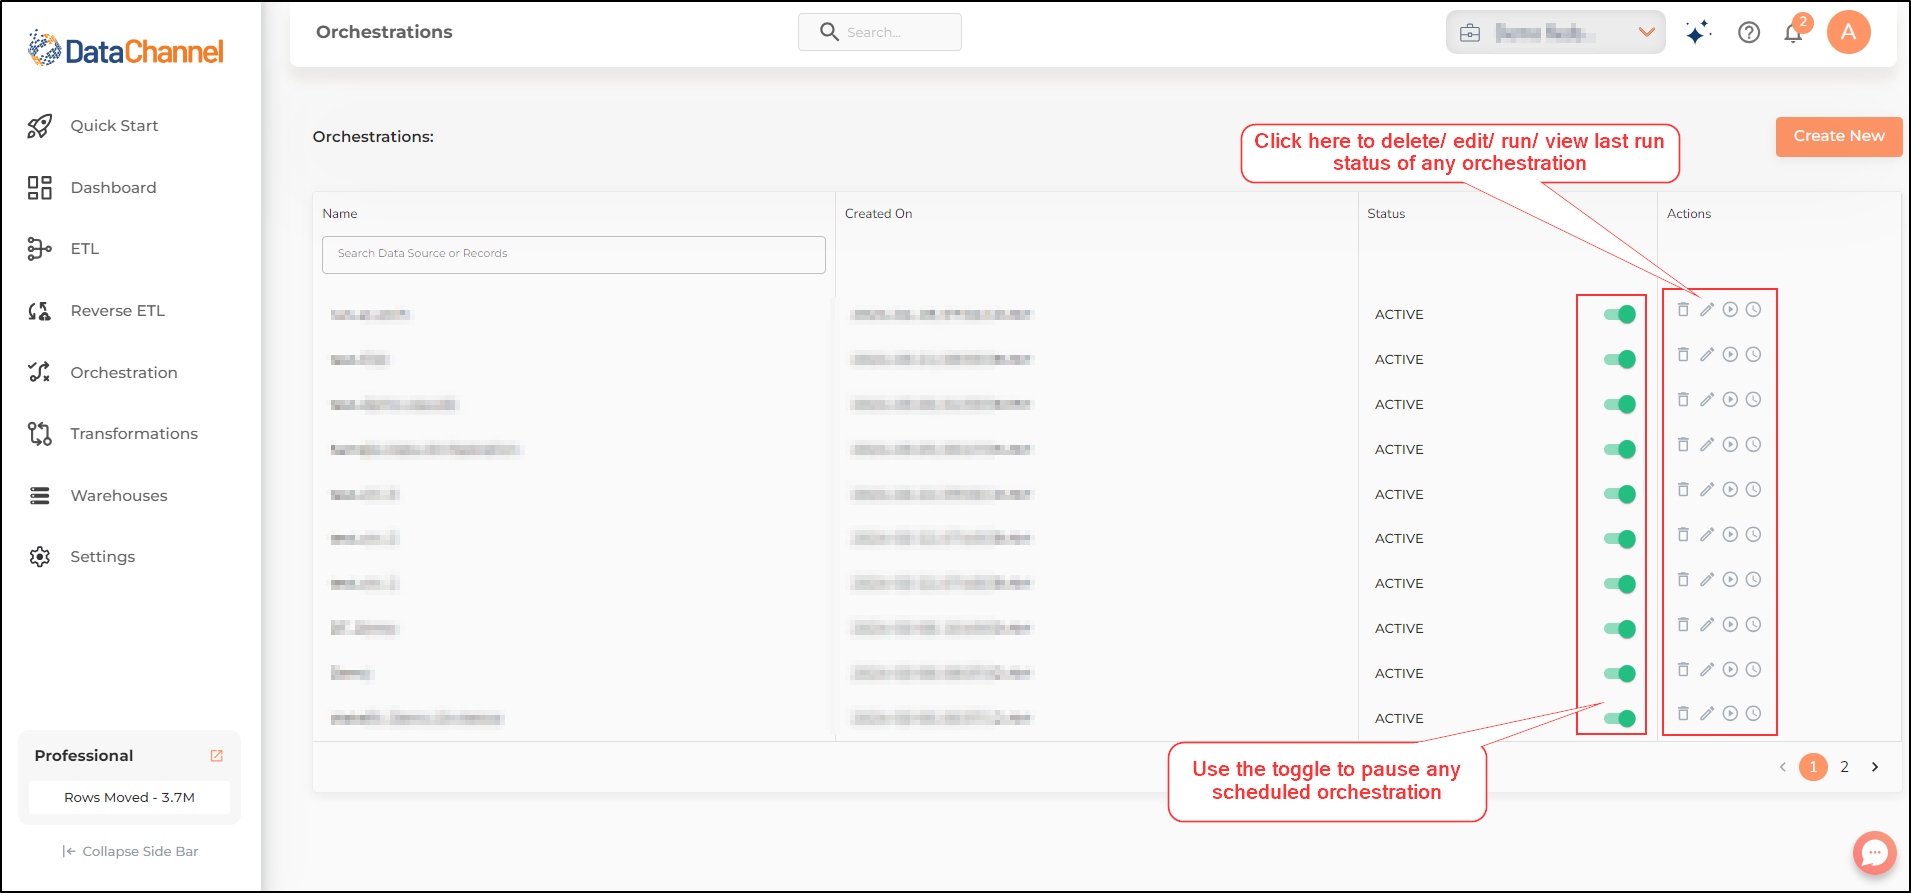
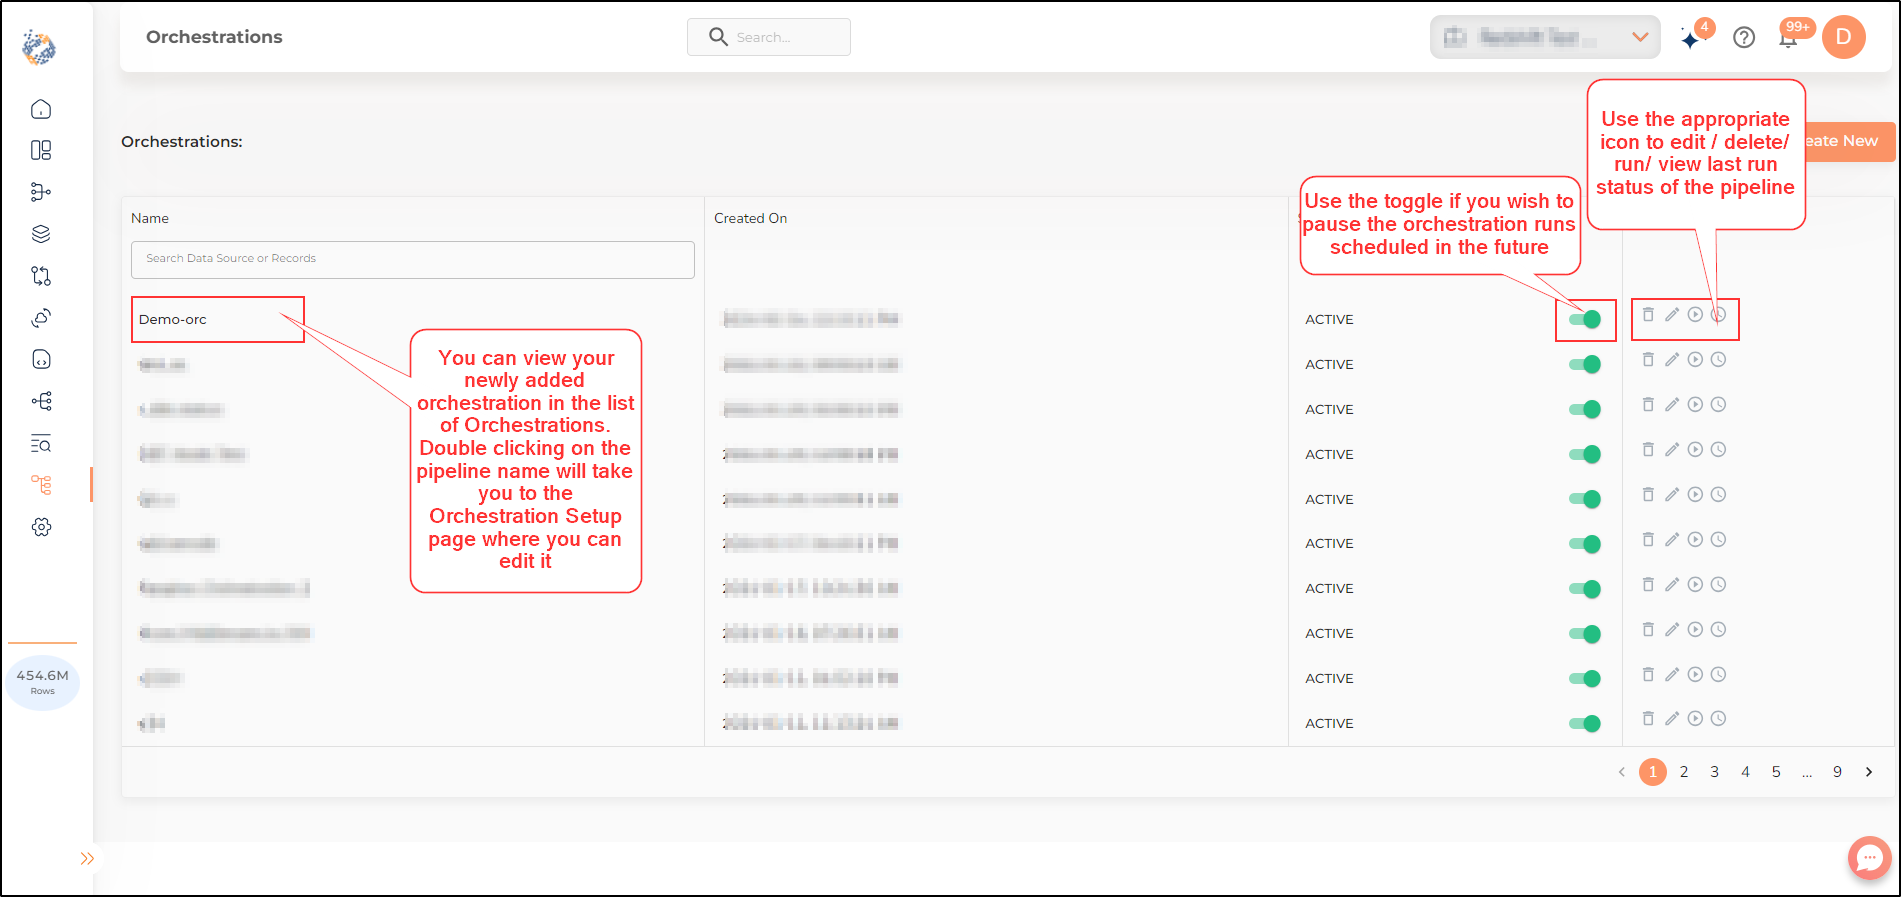
On the main UI screen you can view a list of the orchestrations already added by you. You can edit/delete/run/pause/ view last run status of any of these orchestrations from here.
-
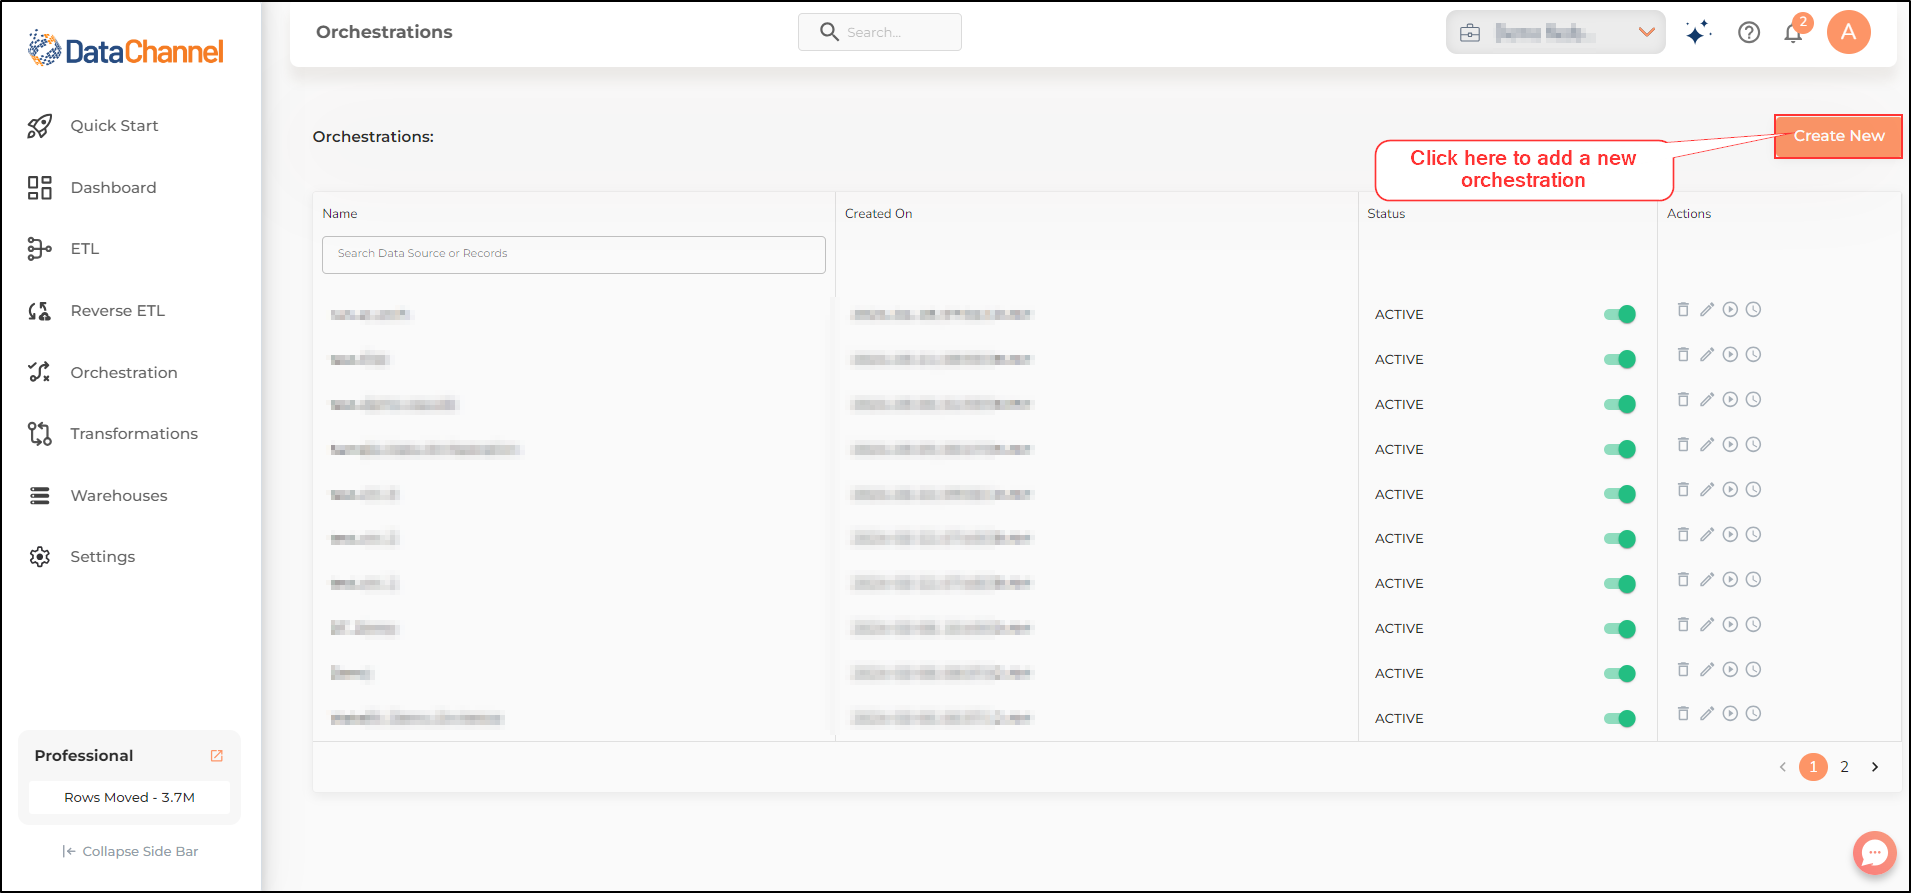
You may also add a new orchestration using the Create New button.
-
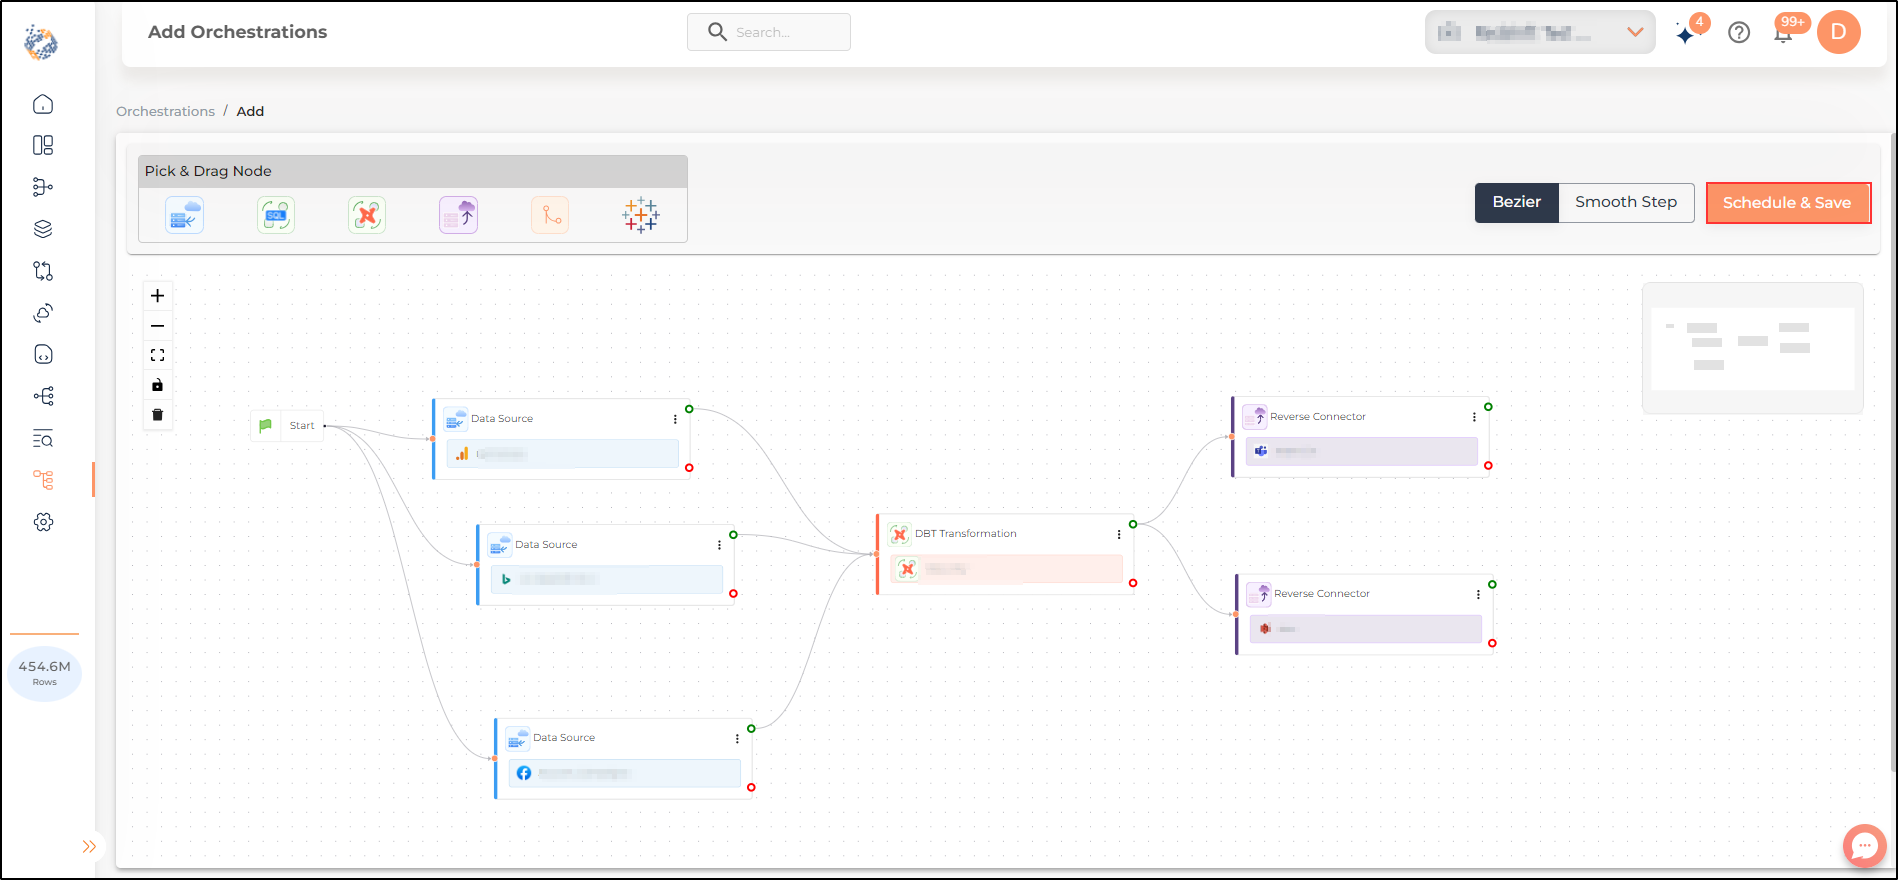
You may start building the orchestration here by adding the required nodes. The several types of nodes available are: Data Sources, SQL transformation, dbt™ transformation, reverse connectors , decision nodes, PowerBI Refresh Node, Tableau node, delay node and Lambda node.
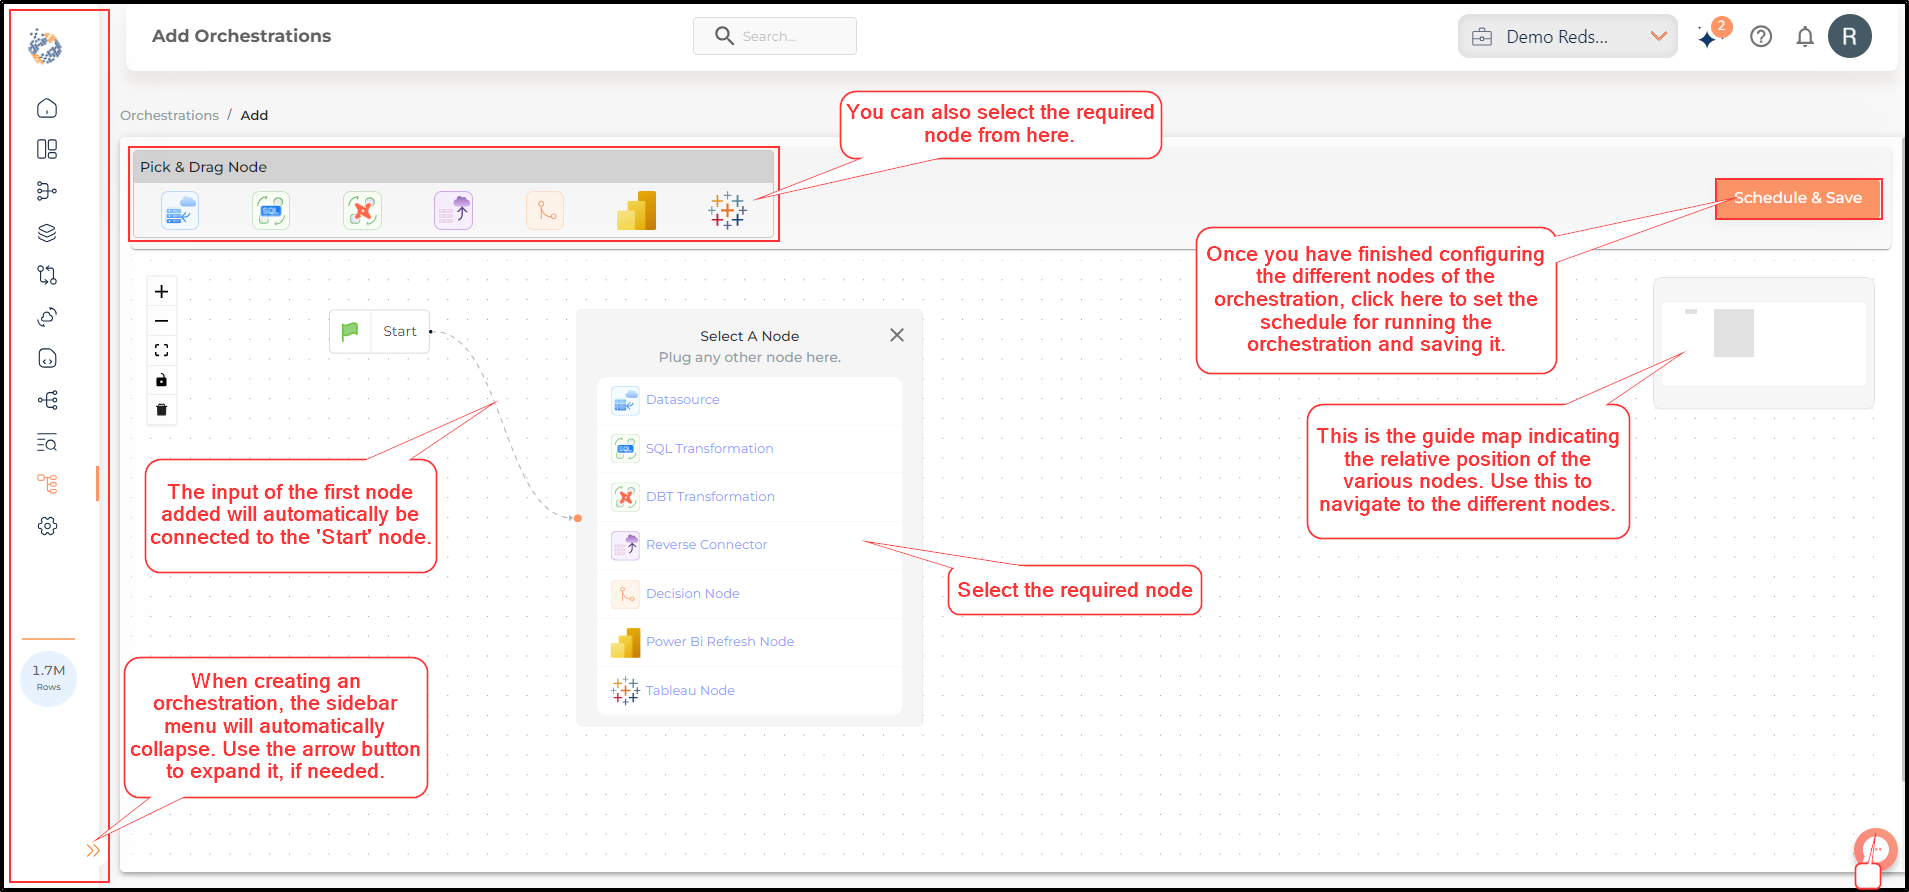
-
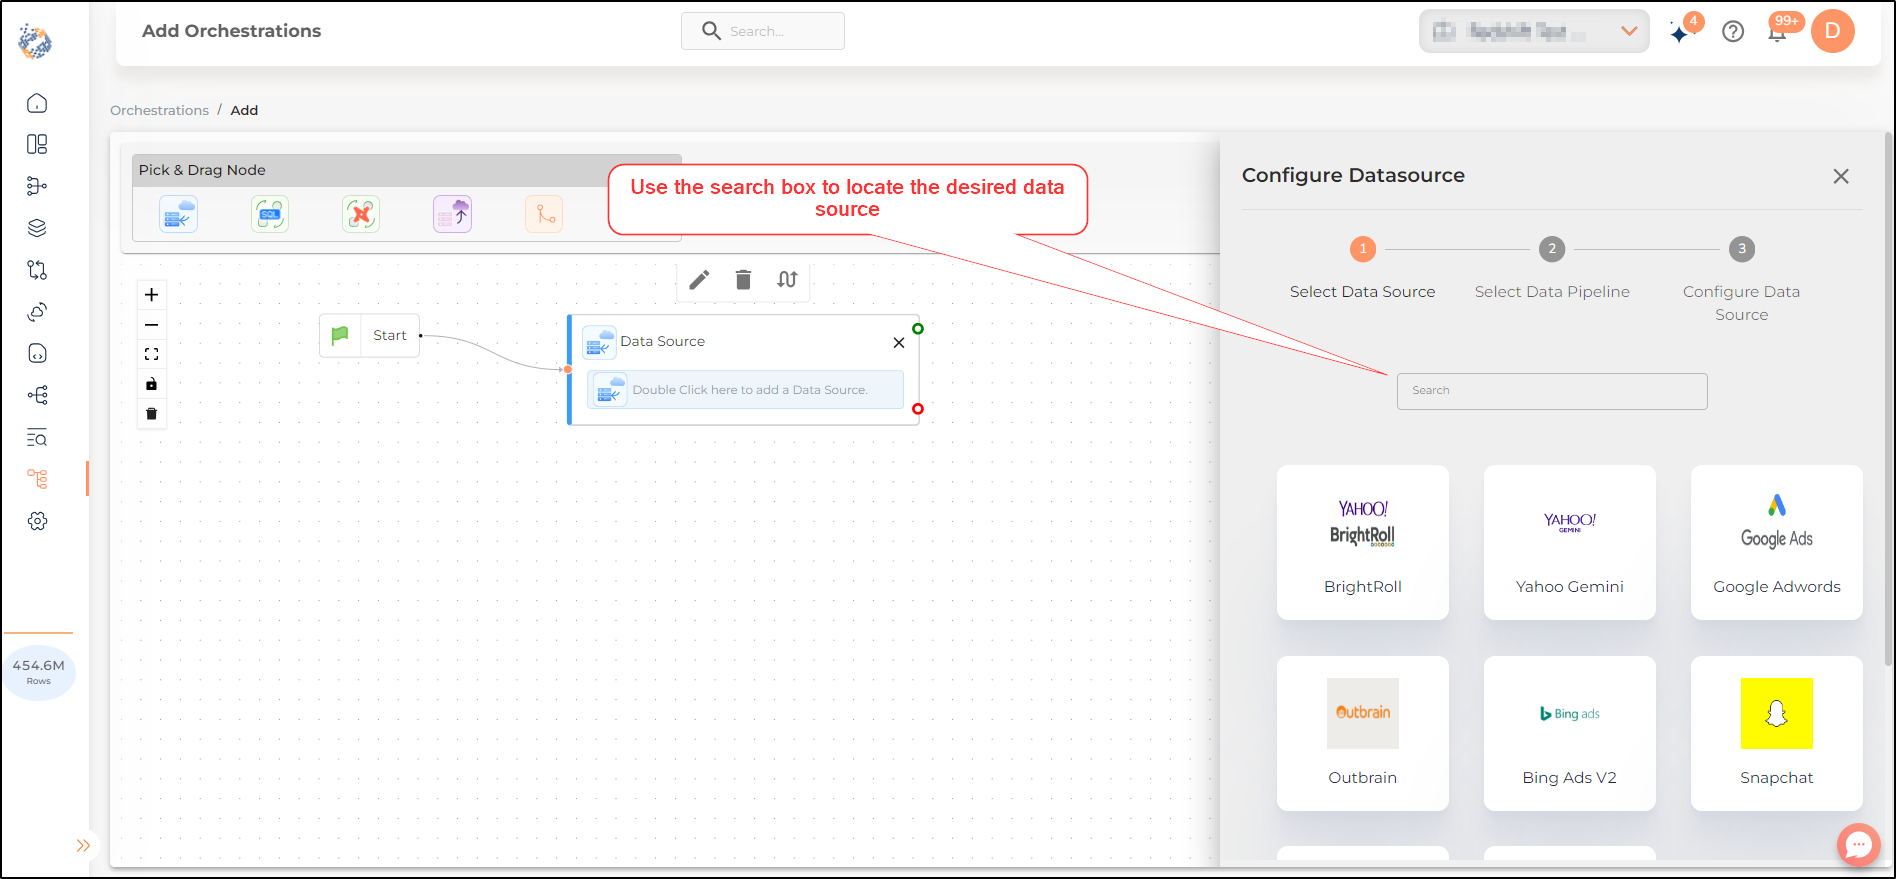
Once the required node is added, you will be prompted to configure the desired data source/ reverse etl/ transformation. Use the search box to locate the desired data source/ reverse etl/ transformation.
-
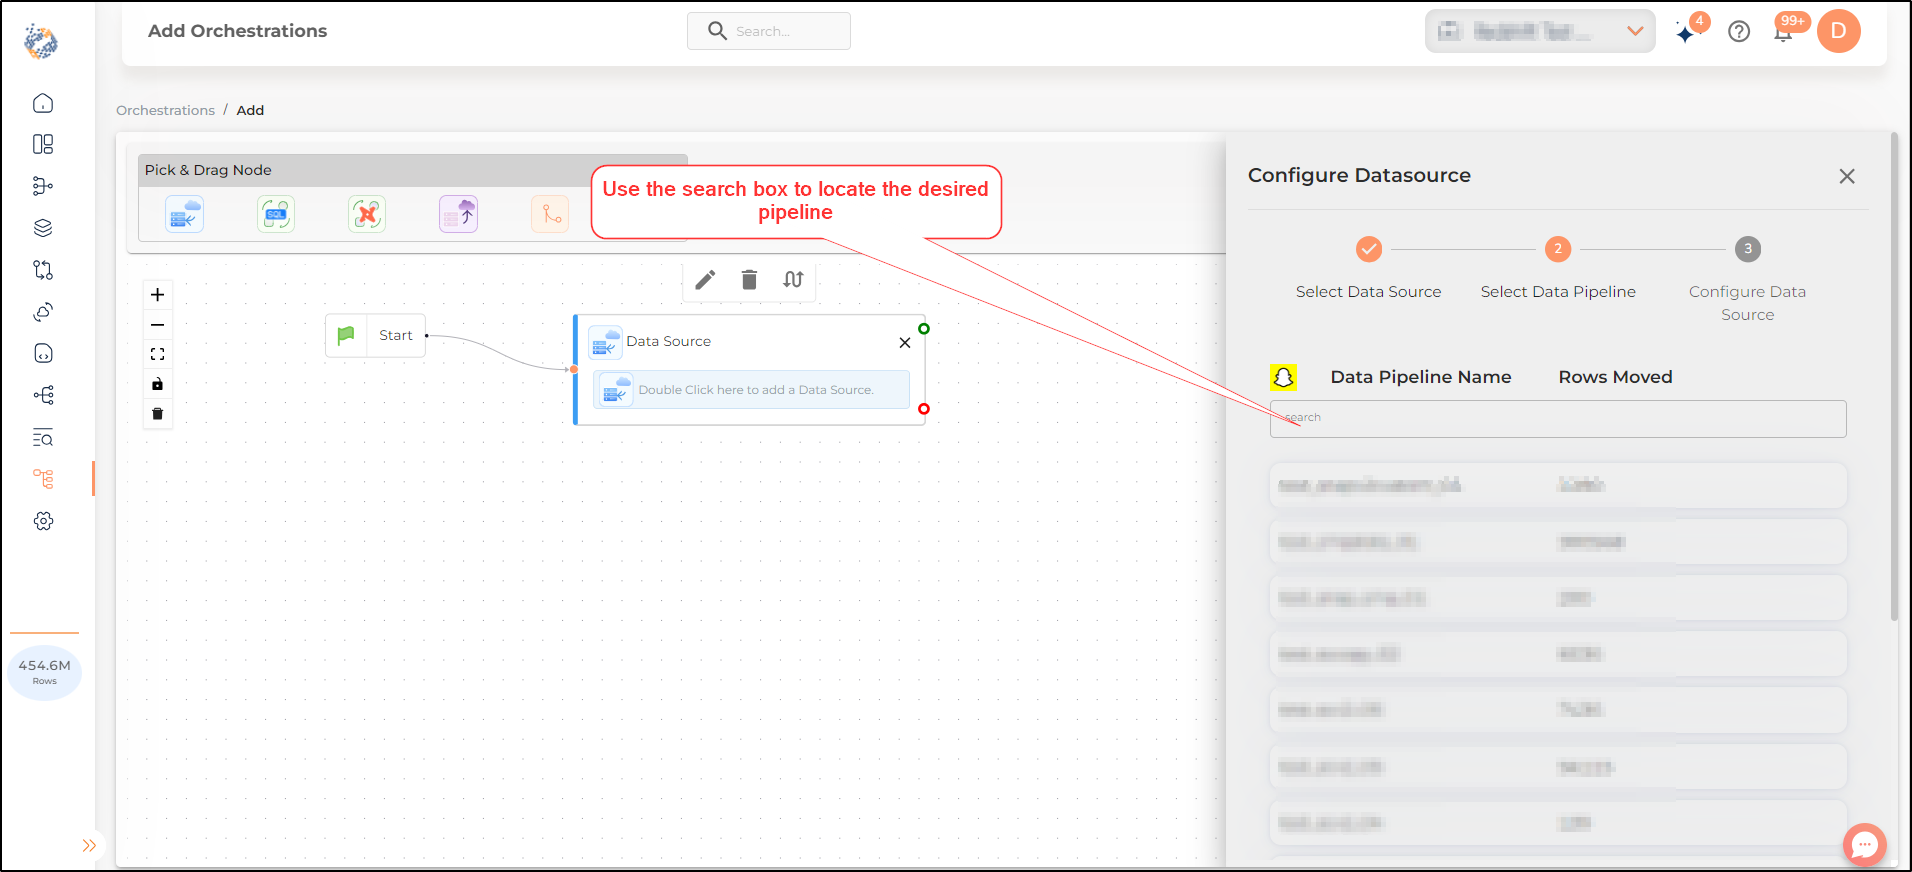
Next, you will be prompted to add the desired pipeline/ reverse sync.
-
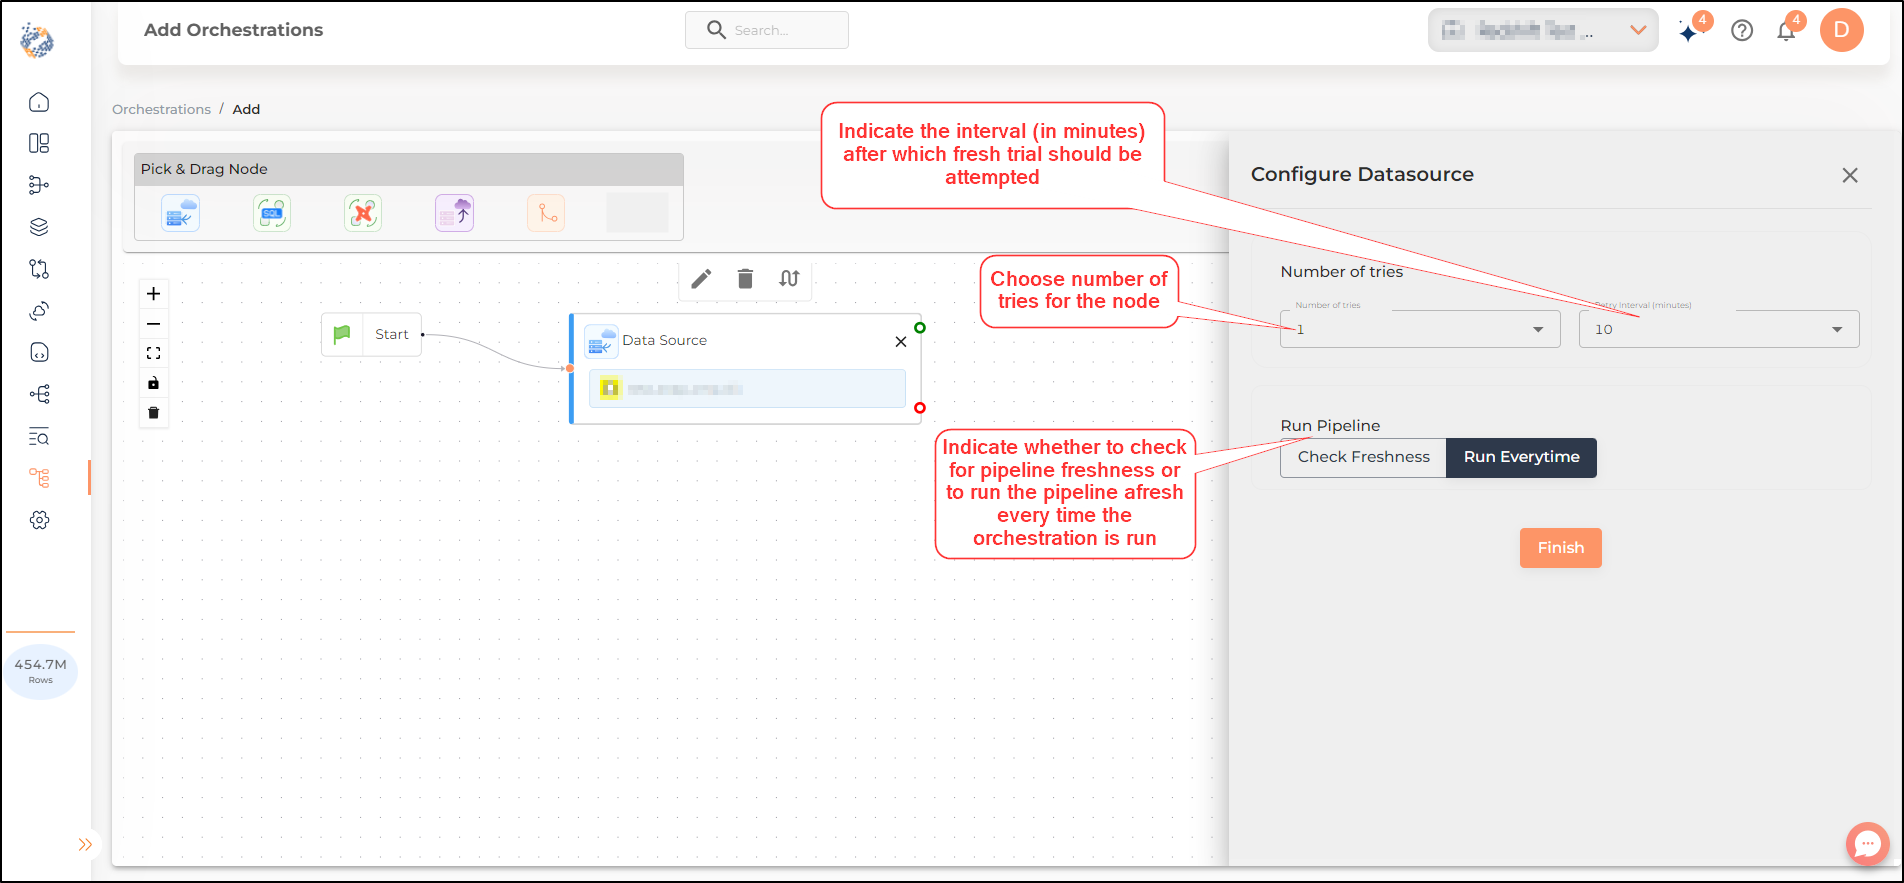
Follow the steps to complete the configuration. Choose the desired number of tries and pipeline freshness settings. Once completed, click on Finish to complete configuring the node.
-
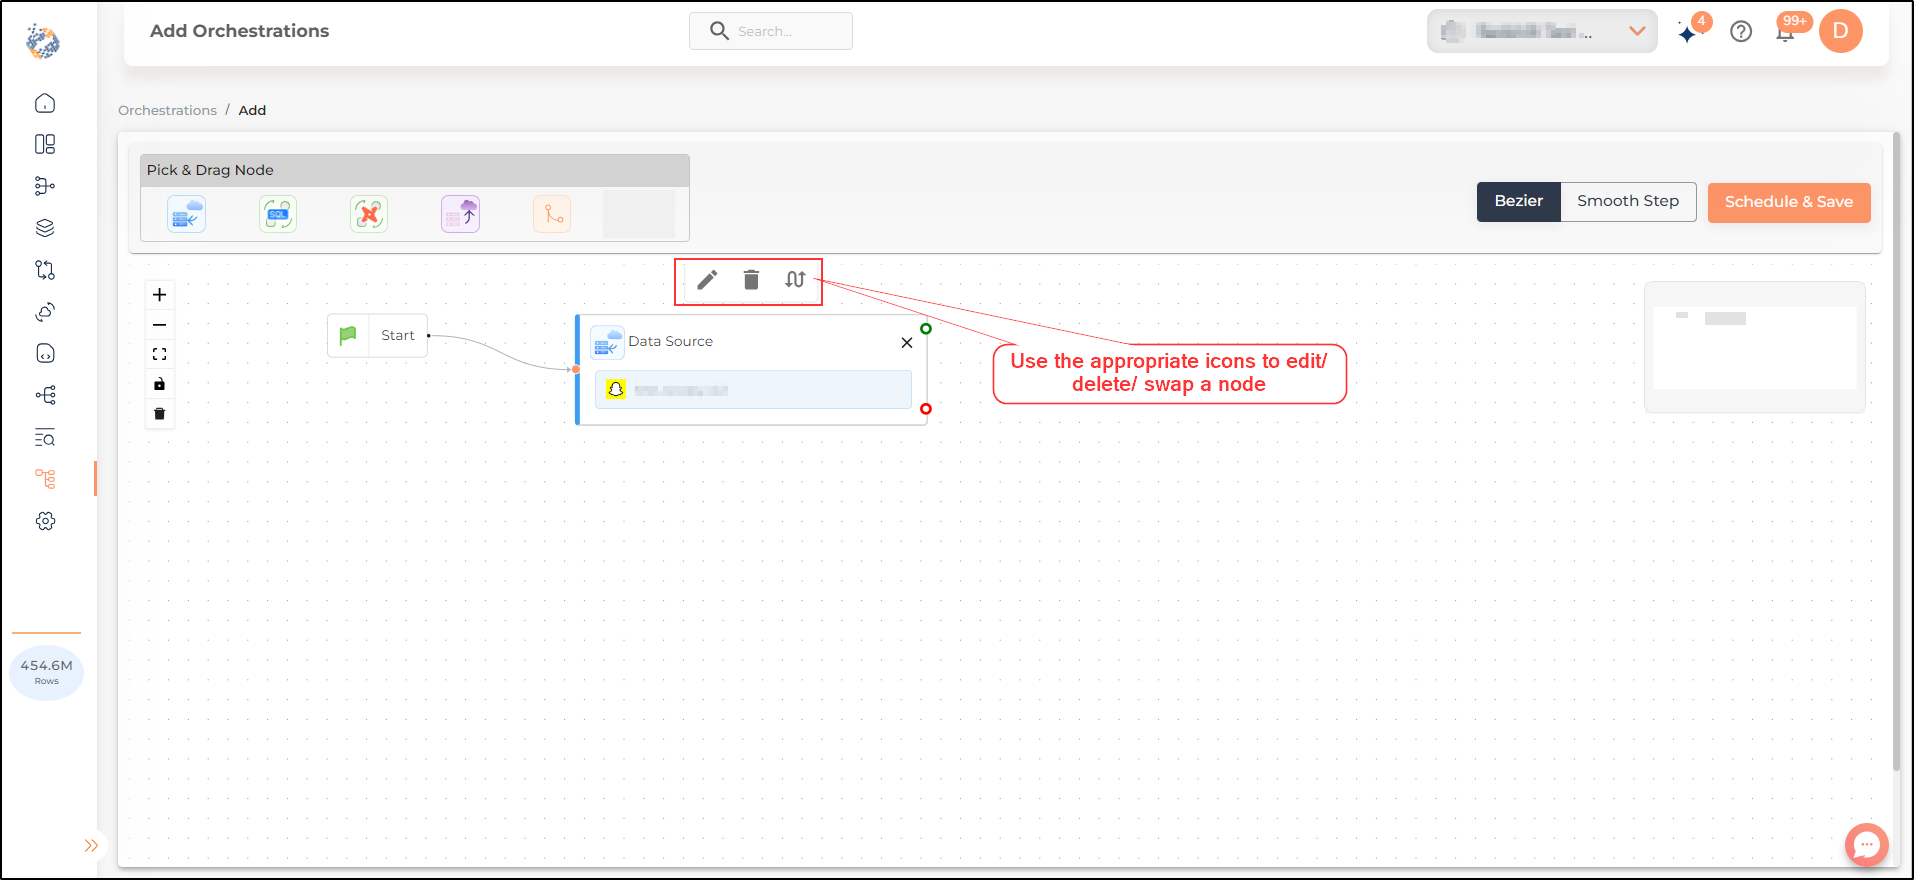
You can edit, delete or swap any node using the appropriate icons.
-
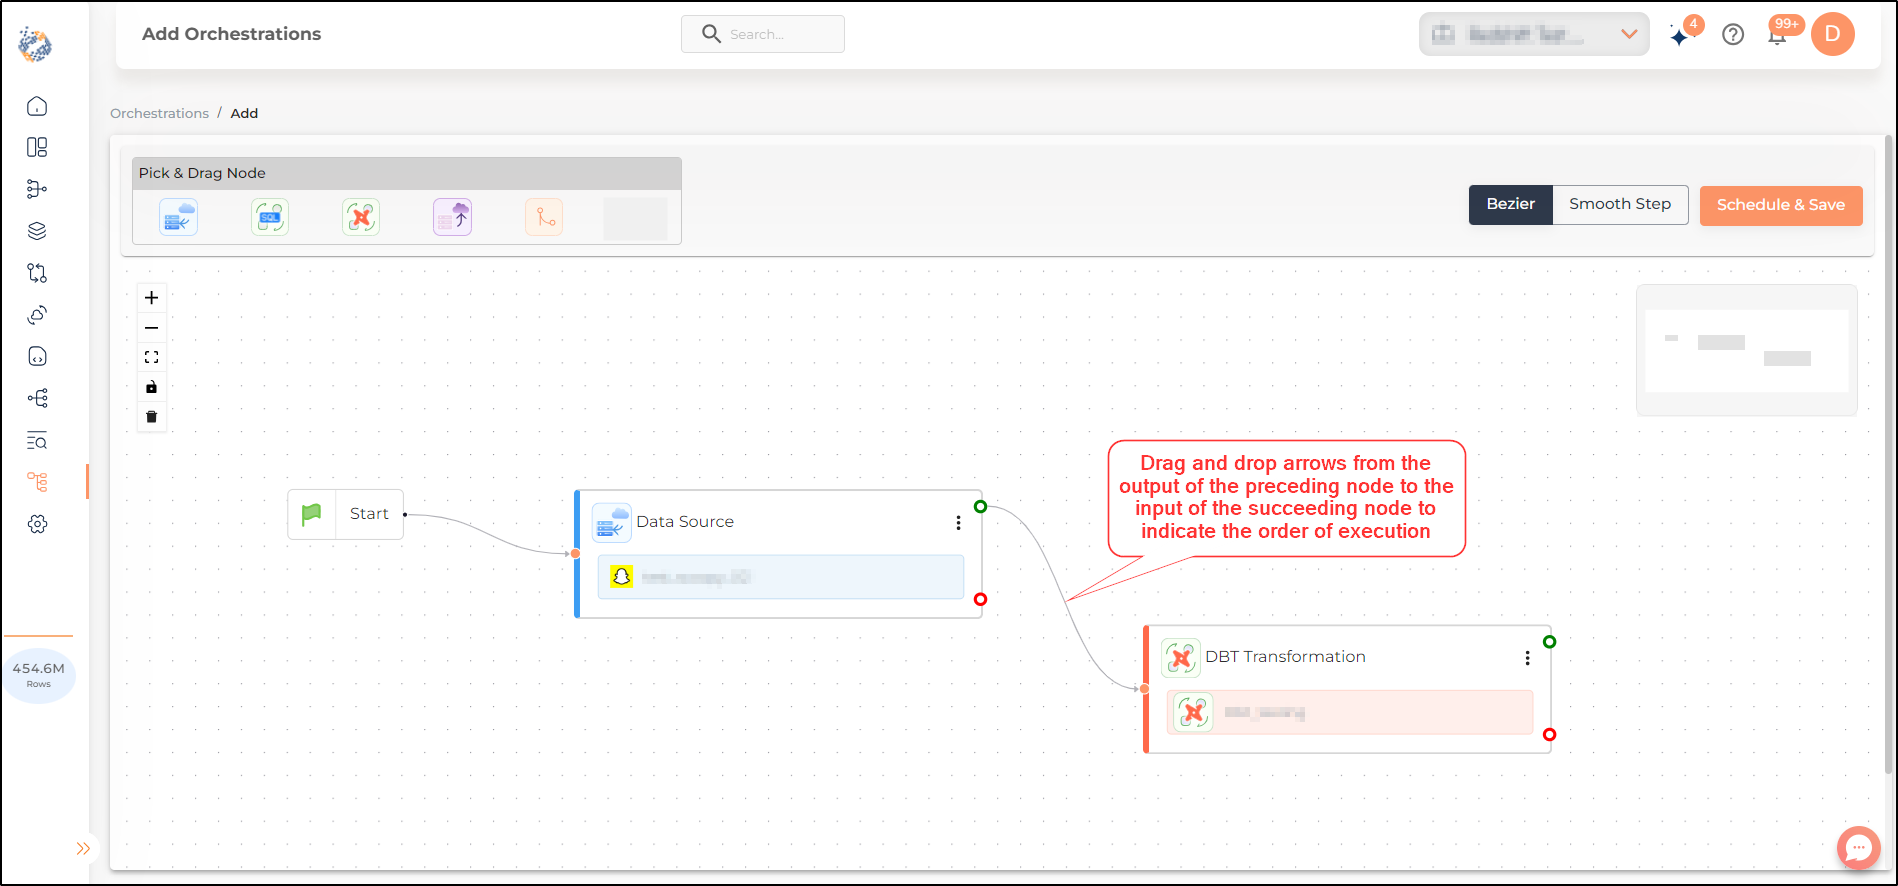
Repeat steps 4 to 8 to add more nodes. Drag and drop arrows from the output of the preceding node to the input of the succeeding node to connect nodes and indicate their order of execution. Please note that PowerBI Refresh node and Tableau node (when configured) offer an important advantage of automatically refreshing your data (as per the desired schedule) in the Analytics dashboards created by you.
-
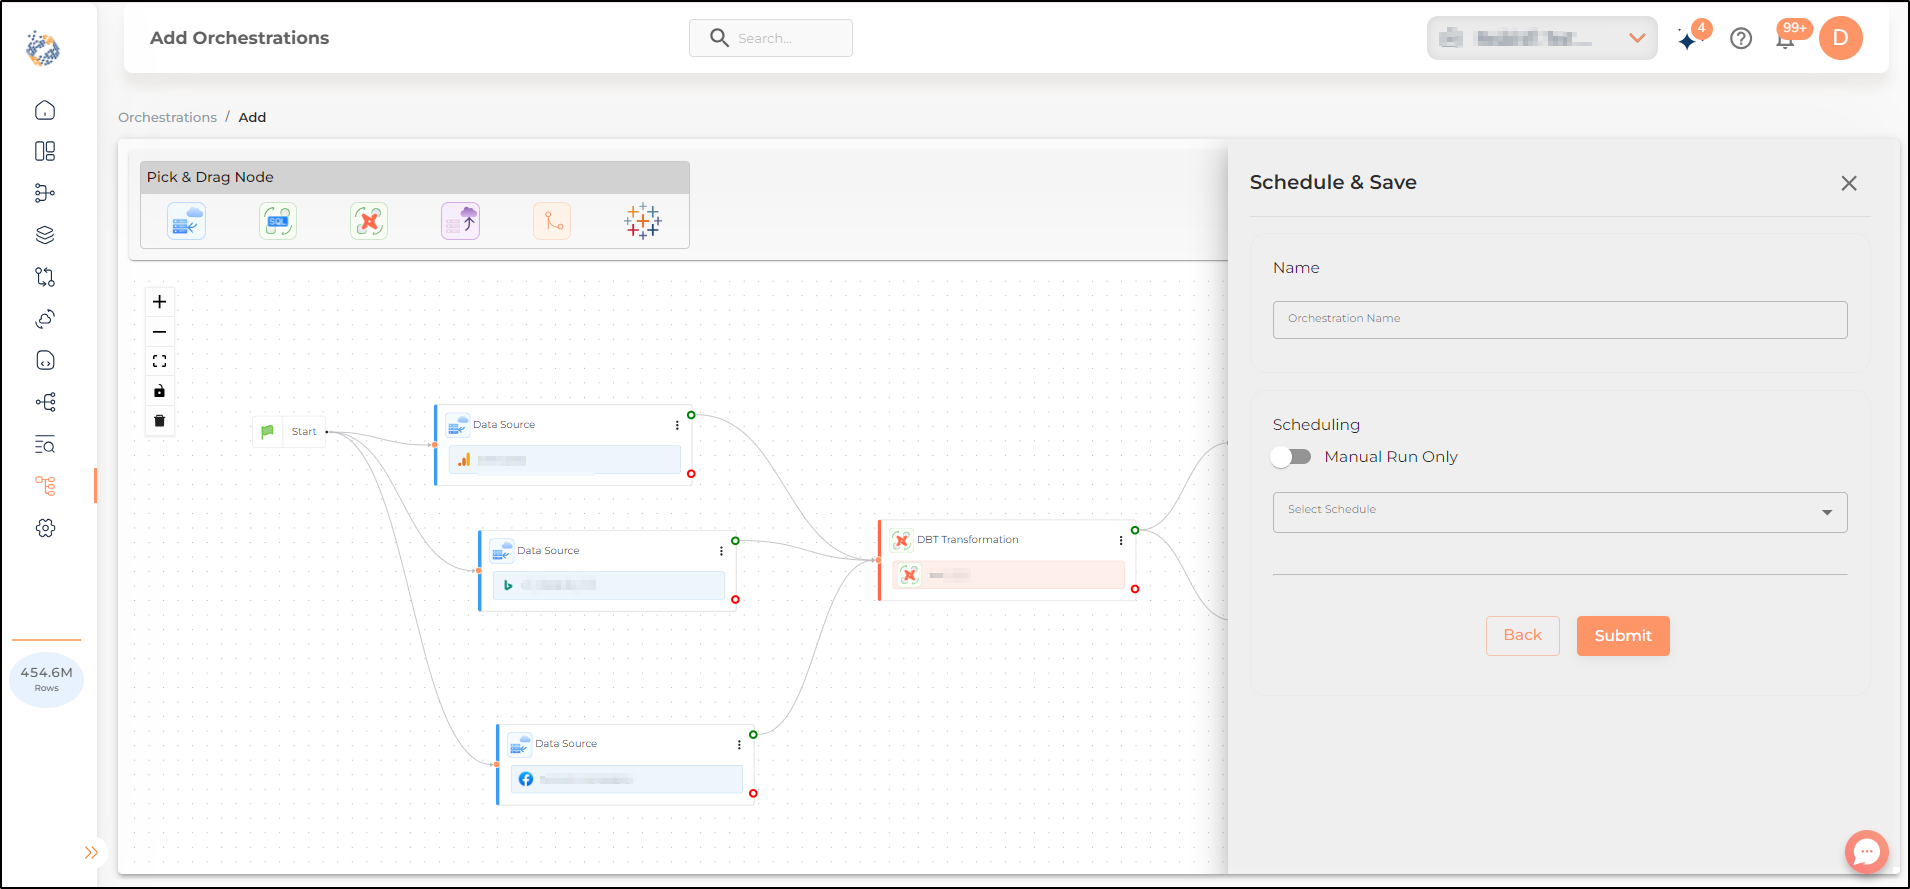
Multiple nodes can be added in one orchestration to automate complex workflows. Once finished click on Schedule & Save.
-
Give a name to the orchestration and select a schedule to run it. Click on Submit.
-
Your orchestration is now ready. Once you have finished configuring your orchestration, you will be redirected to the screen where your added orchestrations are listed.
-
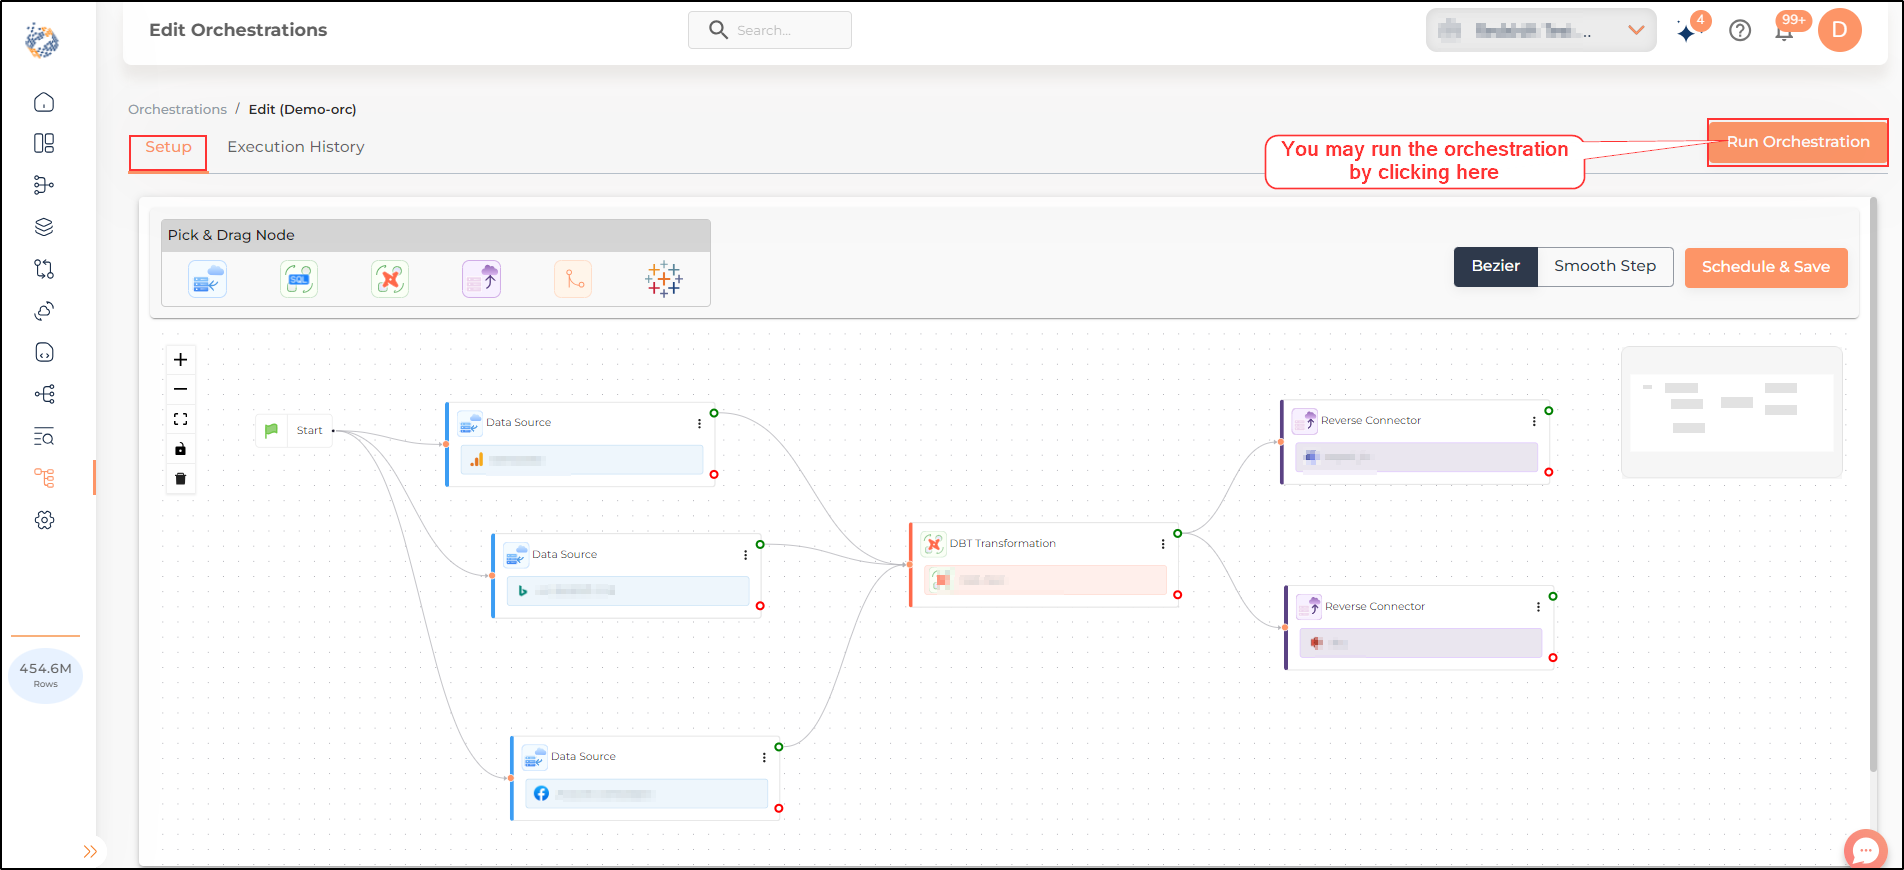
On clicking the orchestration name in the list, you will reach the 'Edit orchestration' page. Here, you can view two side-by-side tabs namely, ‘Setup’ and ‘Execution History’. You can edit the orchestration on the 'Setup' page. Also, on the top right corner a Run Orchestration button is provided. You can click here to initiate a manual run.
-
The ‘Execution History’ Tab displays the execution details of the configured orchestration. To view which tasks were completed during any previous run, click on the View Tasks button.
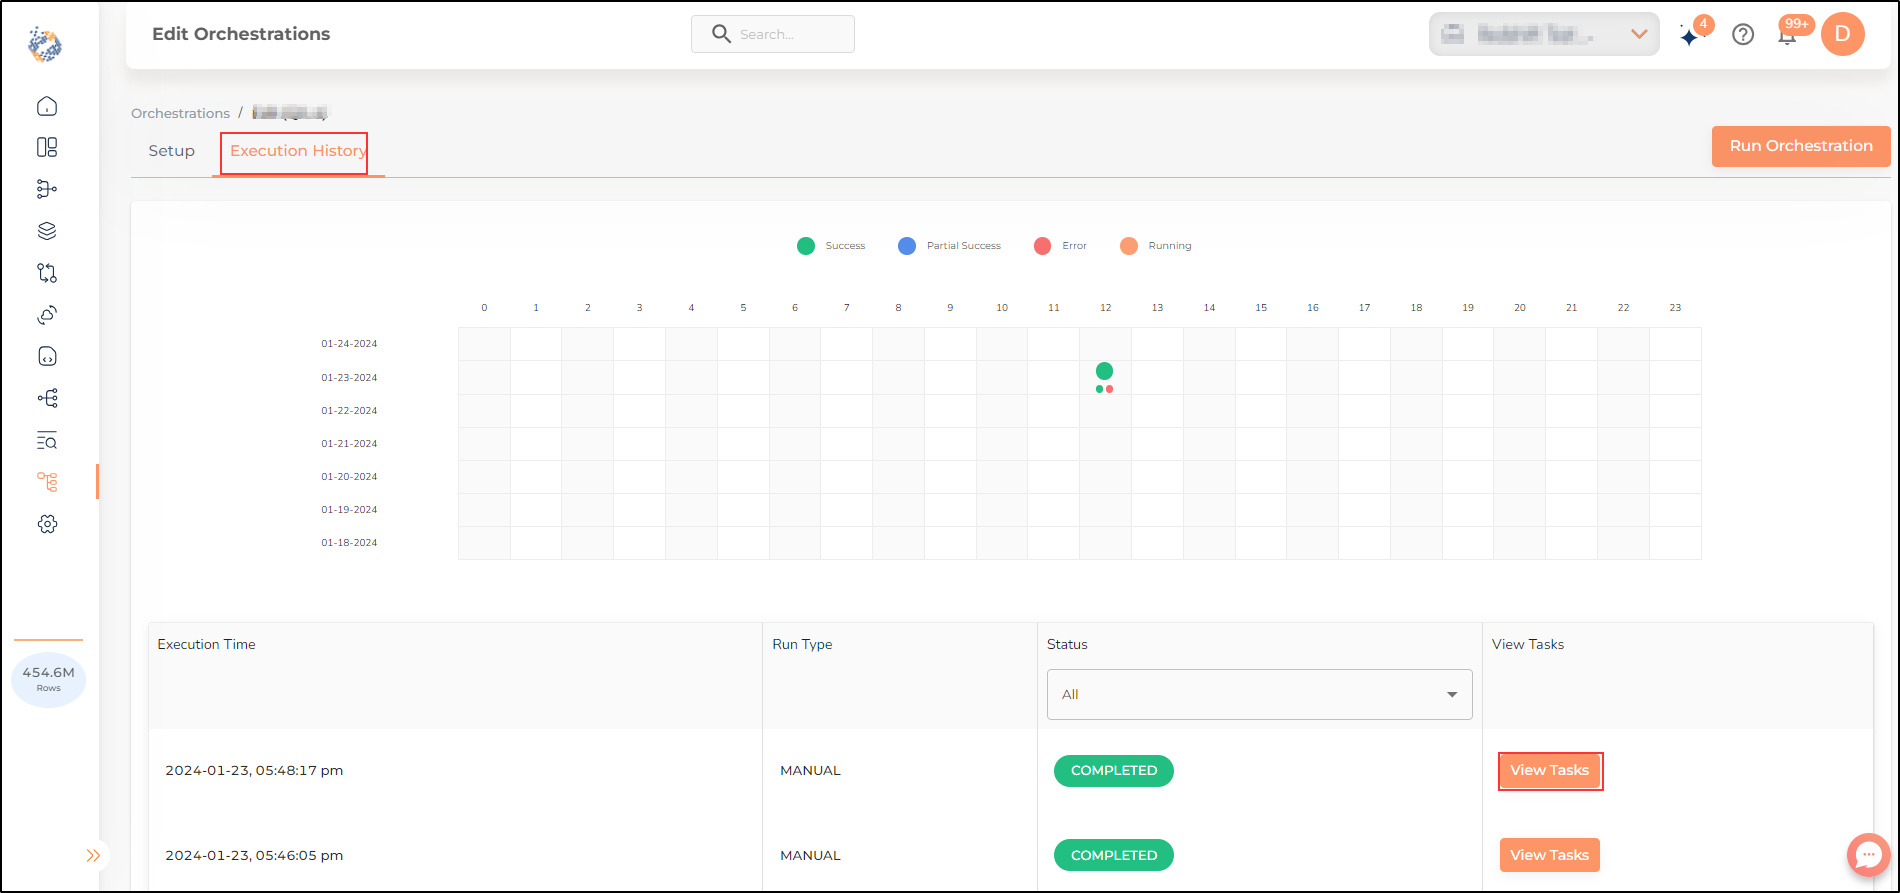
-
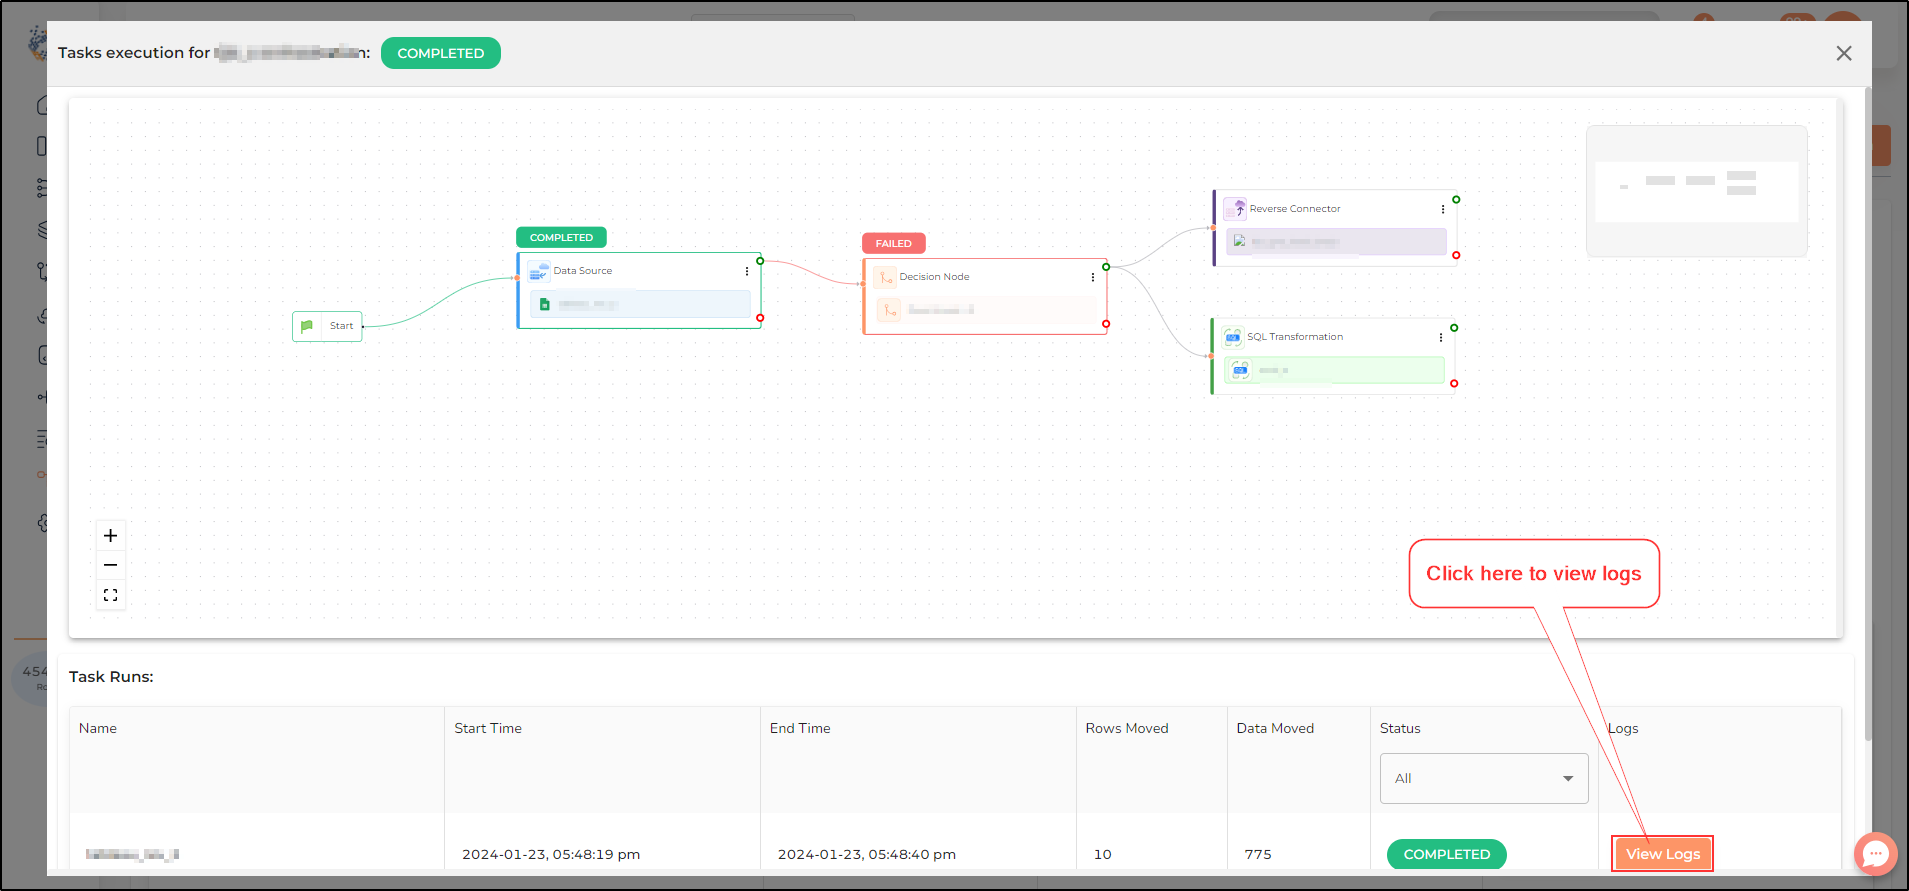
On clicking the View Tasks button, you will be able to see which tasks were executed successfully. To access detailed logs, click on the View Logs button.
-
Logs will be displayed as shown.

Some useful Shortcuts
-
To delete a node/connection- select the required node/connection and press backspace key on the keyboard.
-
For selecting multiple contiguous items- Holding the Shift key down while selecting first and last item selects multiple contiguous items between the first and last item.
-
For selecting discrete multiple items- Holding the Control key down while selecting each item selects multiple discrete items.
-
To edit a node- double click on it.
-
To automatically connect two nodes- click on the output of the preceding node and drag the mouse to the input of the succeeding node.
Still have Questions?
We’ll be happy to help you with any questions you might have! Send us an email at info@datachannel.co.
Subscribe to our Newsletter for latest updates at DataChannel.