How to integrate my Amazon Redshift Warehouse with Tableau?
Introduction
Tableau is a business intelligence (BI) tool, that makes data more accessible and understandable by means of data visualization in the form of dashboards. The interactive dashboards offered by Tableau enable a better comprehension of data, leading to meaningful insights. This helps businesses leverage the power of data for informed decision-making. Thus, Tableau makes it easy for you to create effective and engaging dashboards, using data from a variety of sources.
In order to link your Amazon Redshift Data Warehouse to Tableau, you will need to install Tableau desktop.
Steps to Connect Amazon Redshift to Tableau
-
Before you begin, you’ll be required to allow access to Amazon Redshift resources.
-
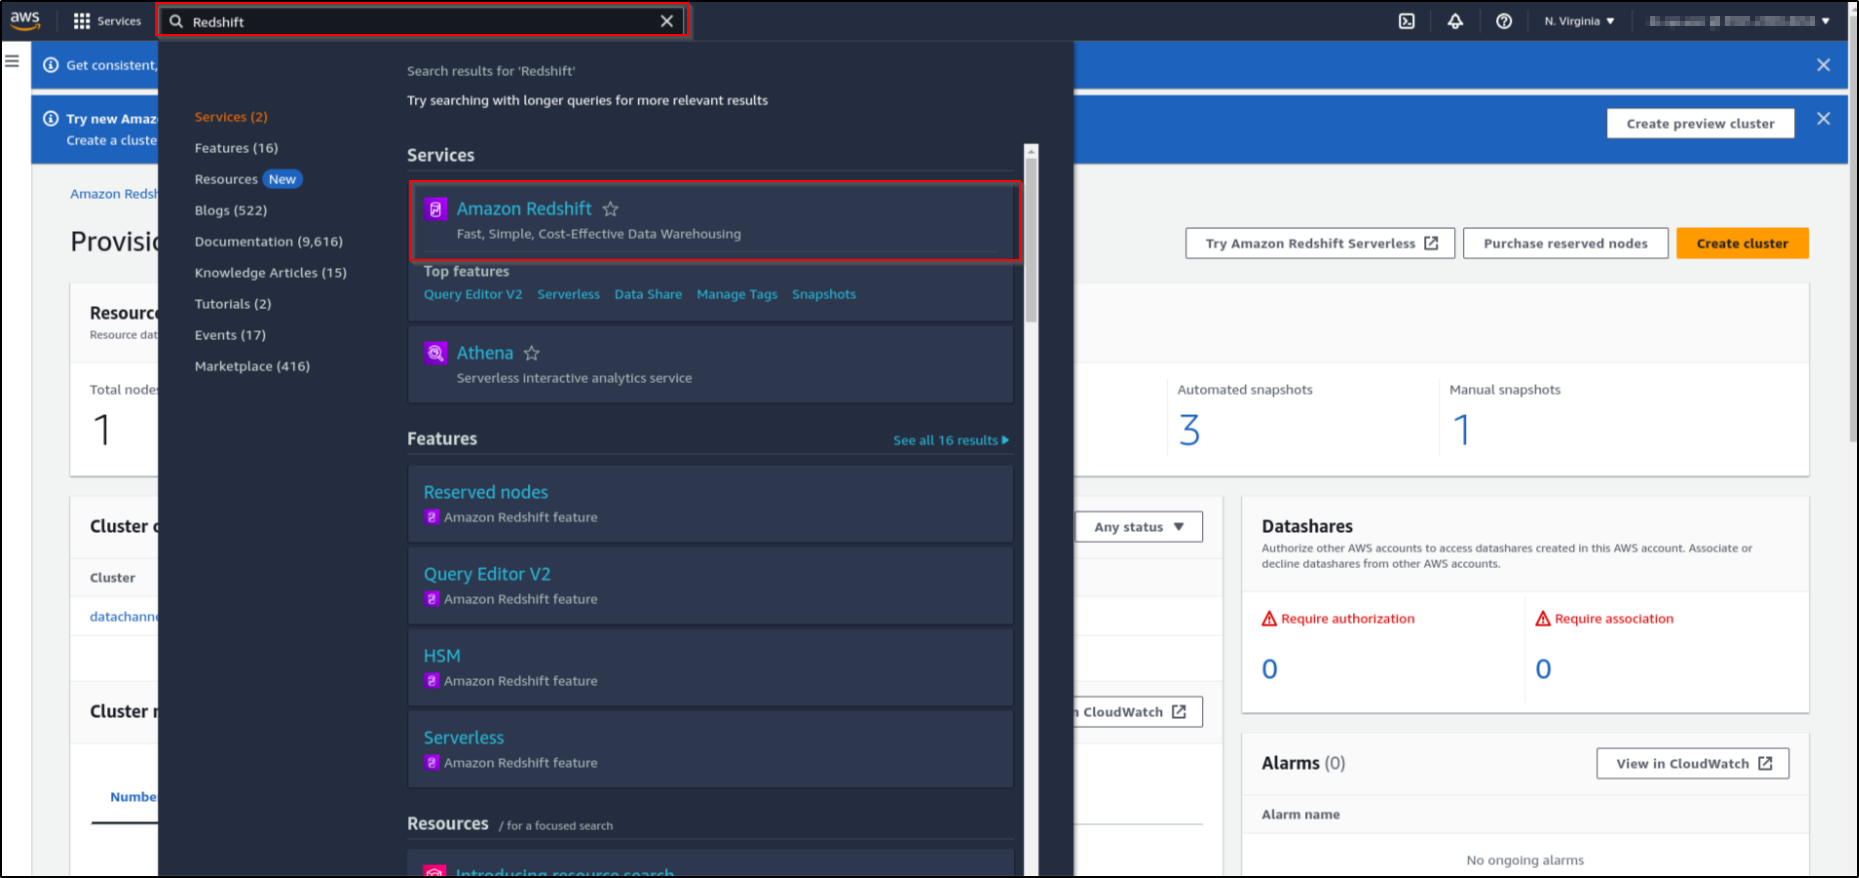
Open your AWS admin console.
-
Search for Redshift in the search box and from the search results, click on "Amazon Redshift".
-
This will list all the clusters that you have in your current region. Click on the cluster that you want to use.
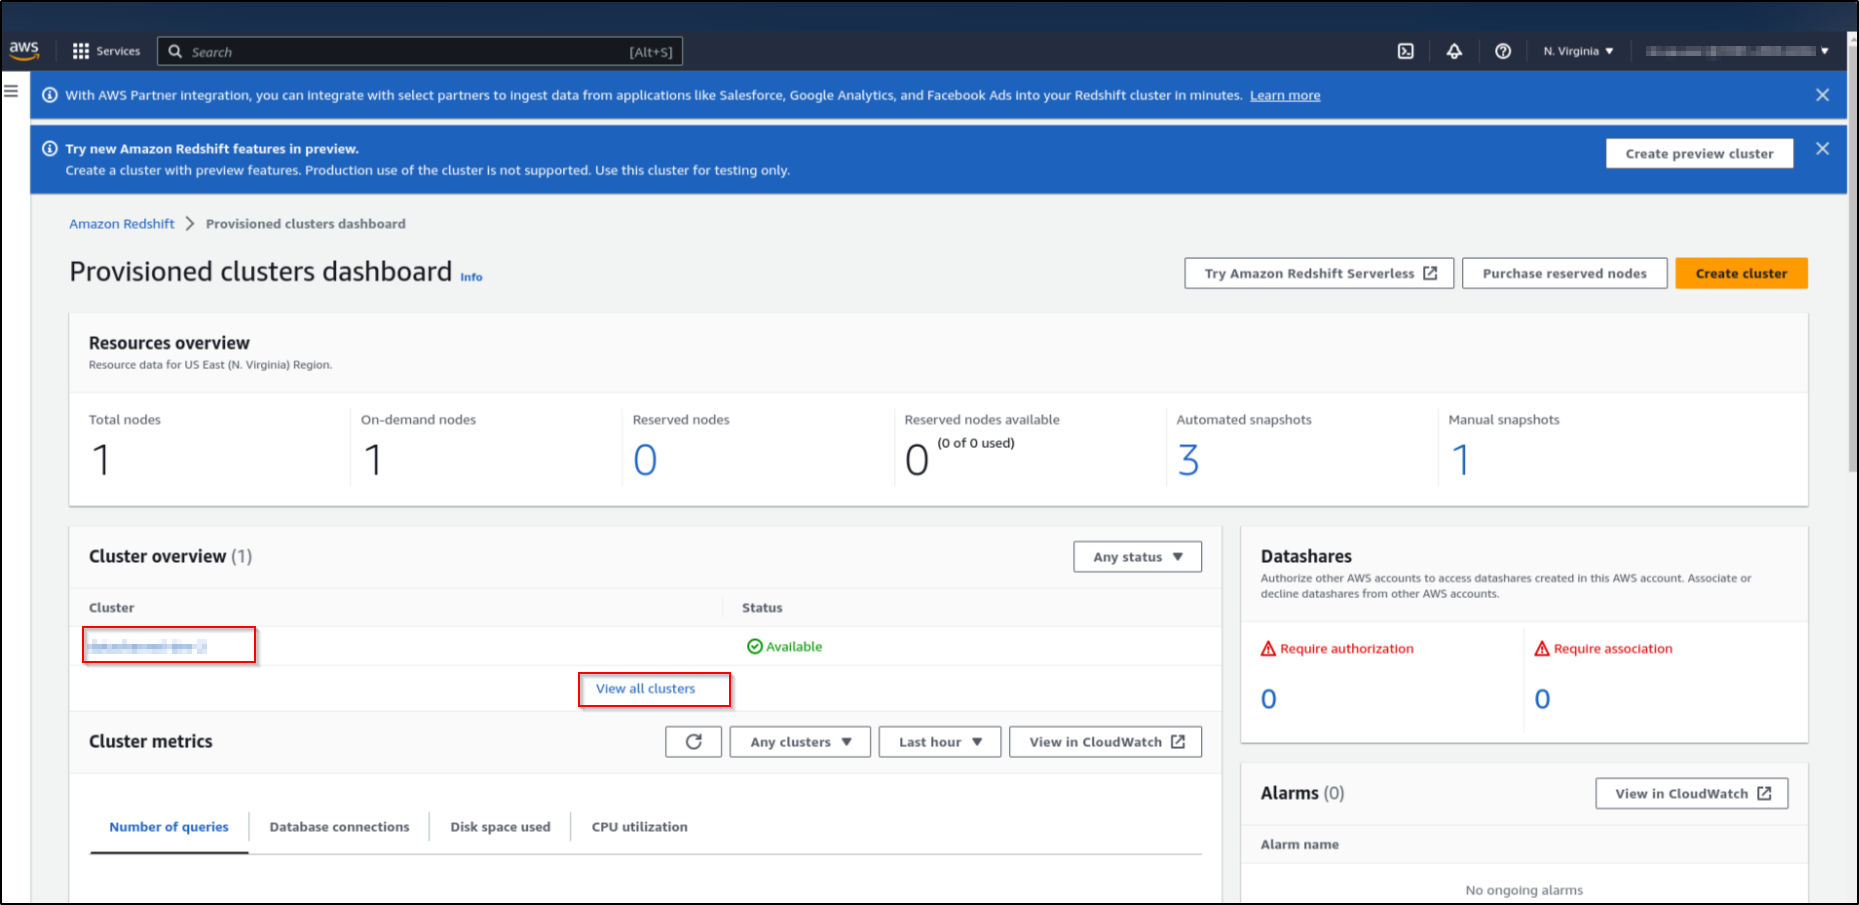
-
Copy the "Endpoint URL" from the General Information. This will have a format:
{cluster_url}:{port}/dev. cluster_url is your Host Name. The “Endpoint URL” also gives you the details of Amazon Redshift Database Port Number (see format).
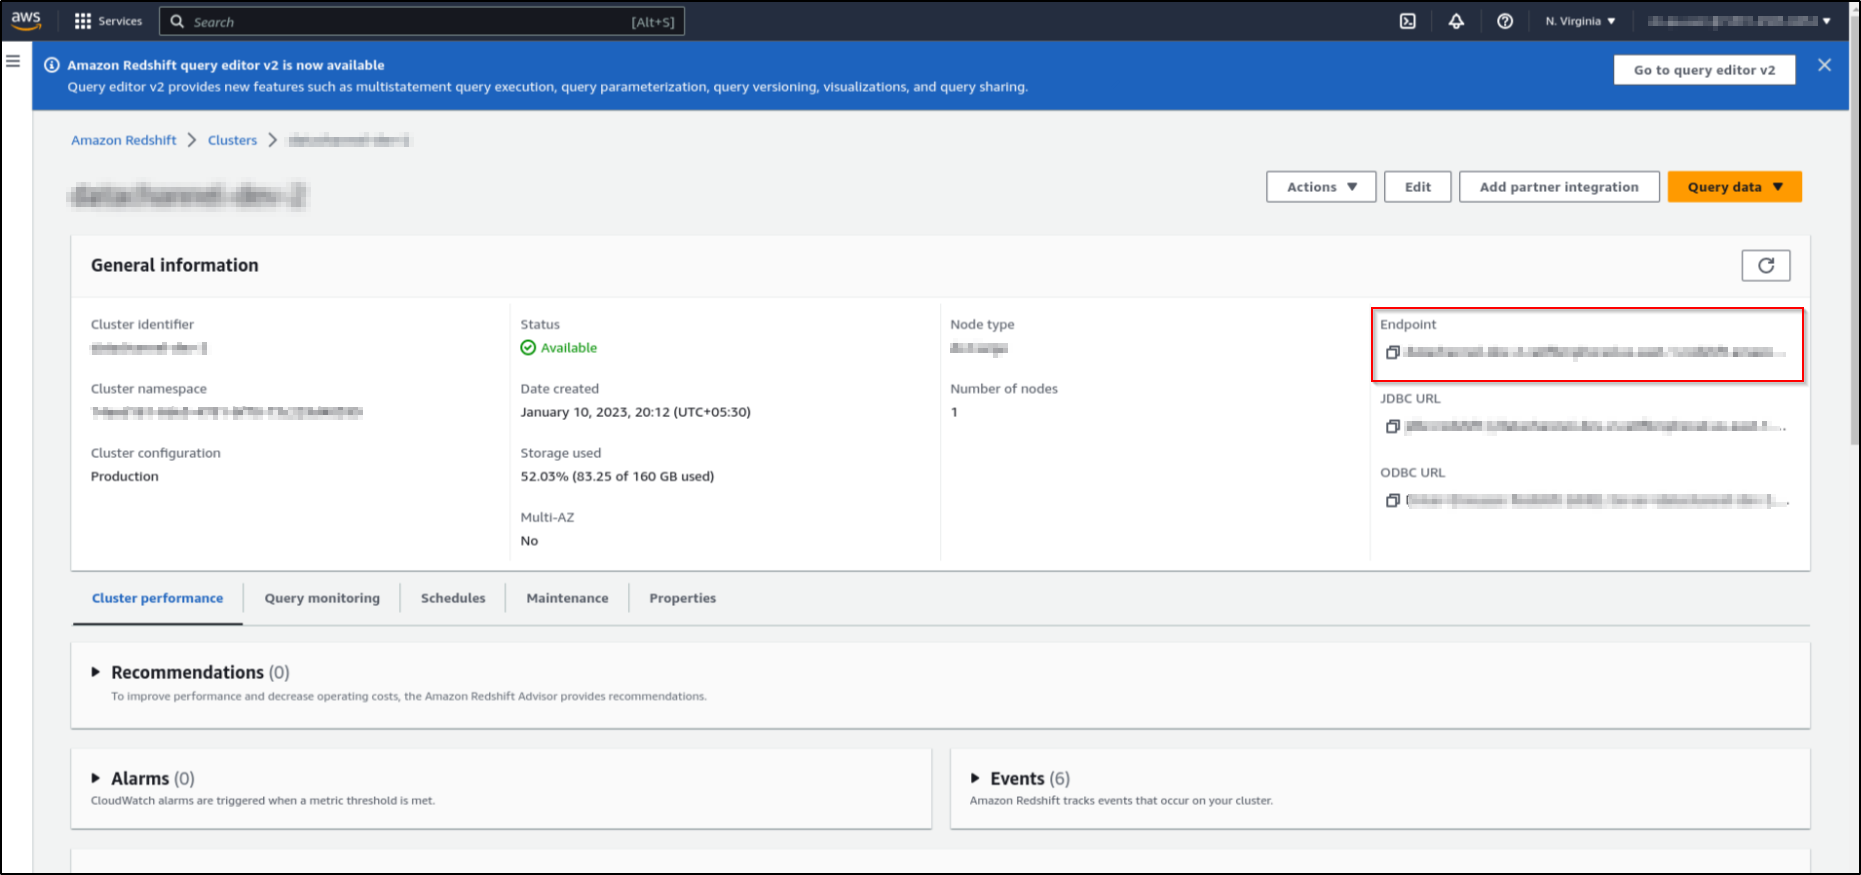

-
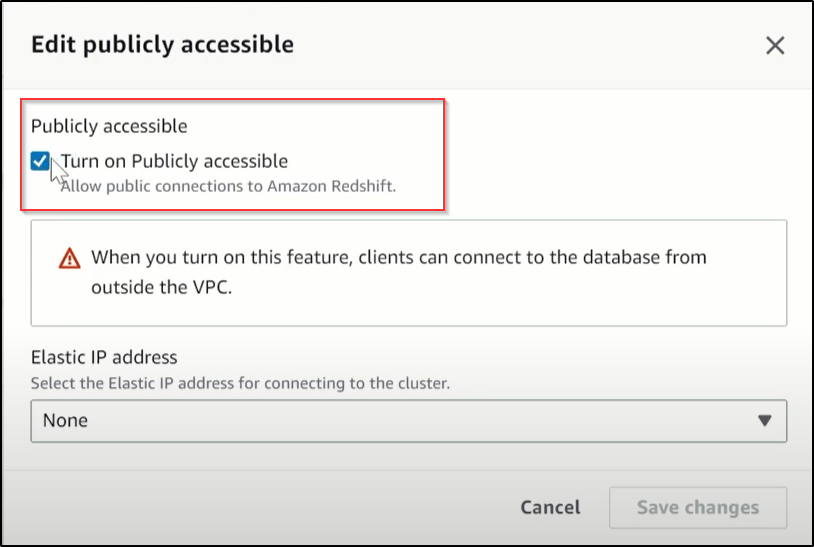
On the Cluster General infirmation page, go to Actions and select Modify publicly accessible setting from the dropdown.
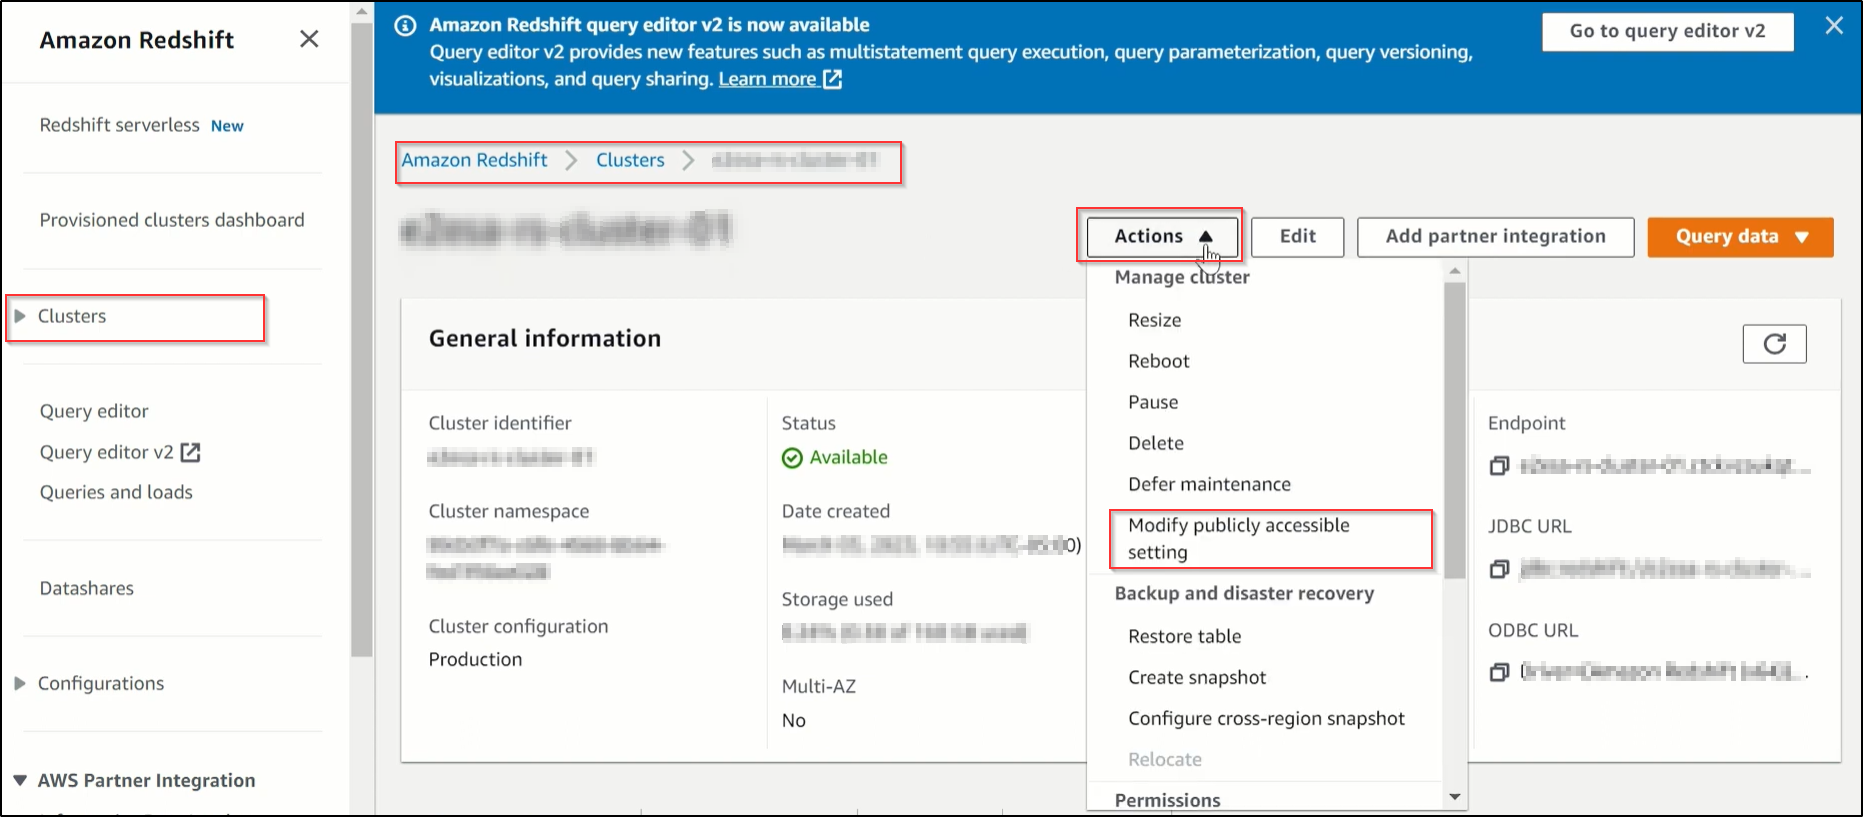
-
In the screen that appears, ensure that the feature to make the database publicly accessible is turned on.
-
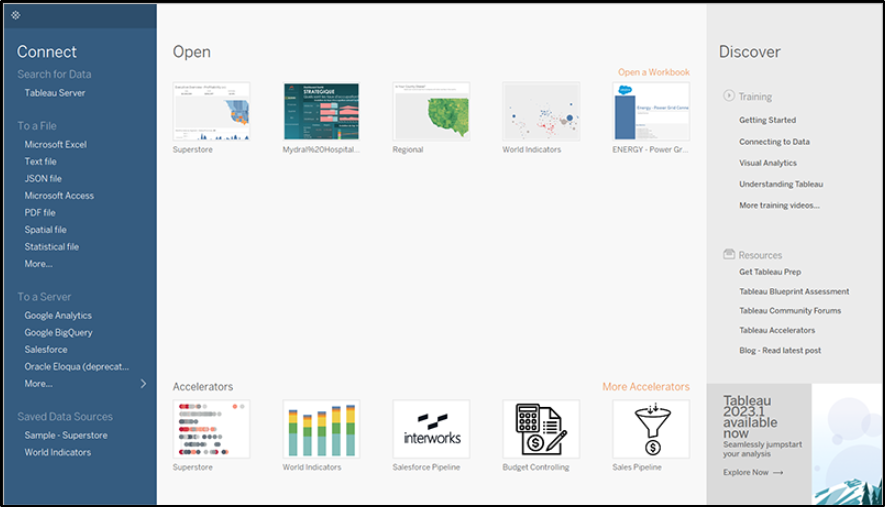
Sign in to Tableau desktop. You will reach the home page of the Tableau User Interface.
-
In order to connect to a data source use the 'Connect' option on the home screen. You may use the Search Box to search for Amazon Redshift. Else, select
Connect > To a server > More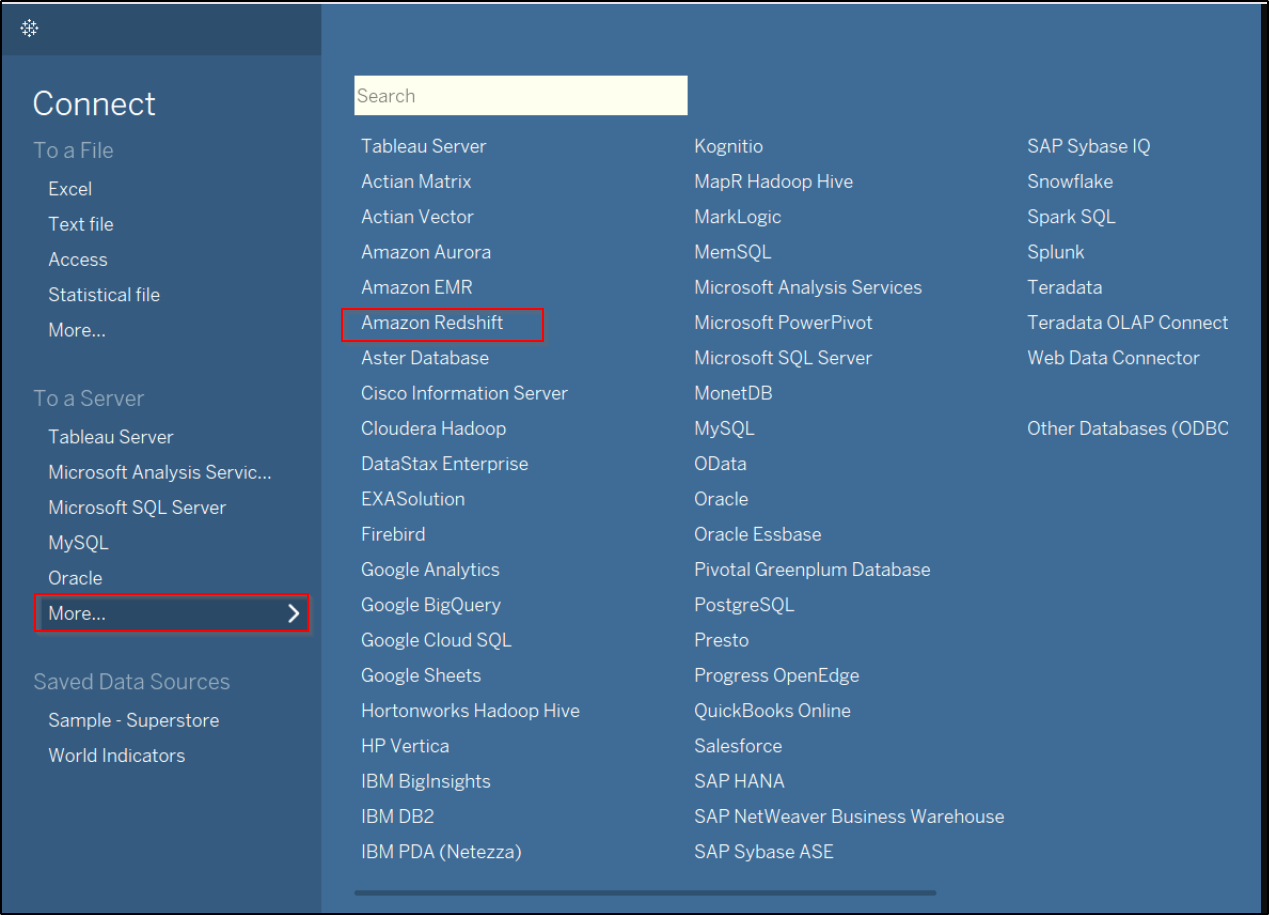
-
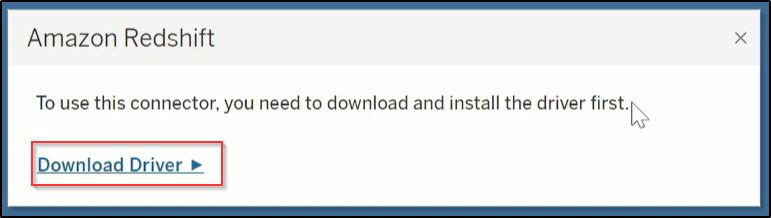
In order to connect to Amazon Redshift, you need to download and install the driver. If this is first time you are trying to integrate Redshift with Tableau on your system, you will be prompted to install and download the driver first.
-
You will be asked to login to Tableau, and guided through a step-by-step process to download and install the driver depending on your system architecture.
-
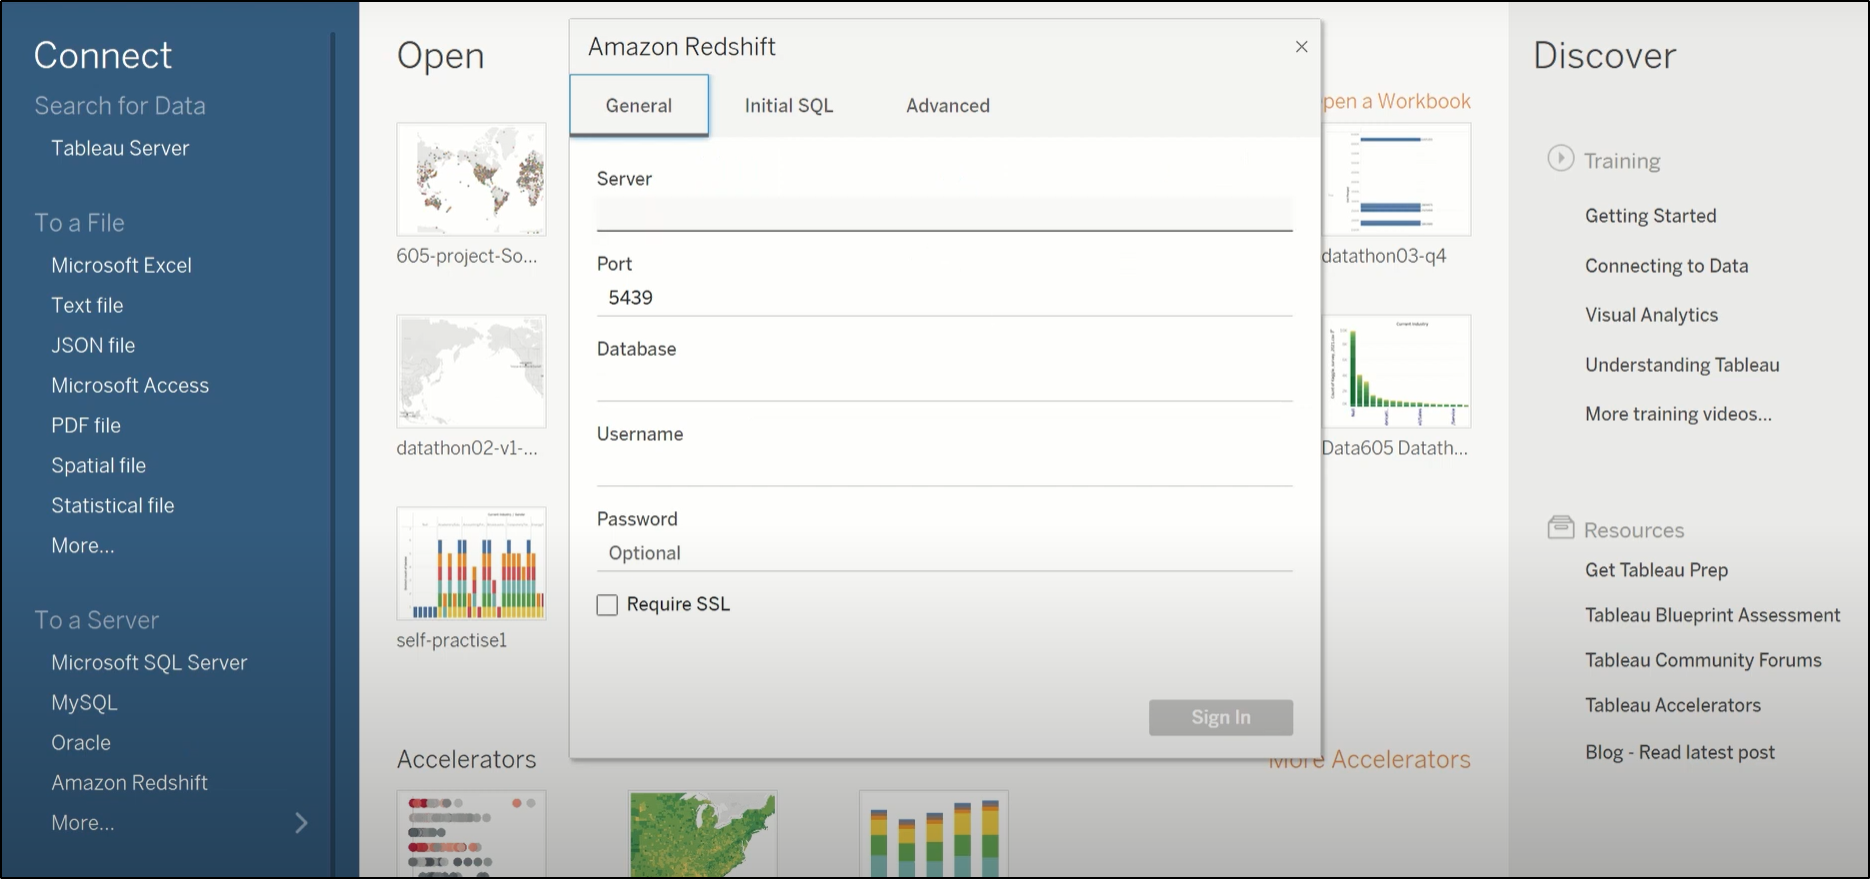
Once the driver is successfully installed, close Tableau and login once again (in order to refresh it). Connect to Amazon Redshift using the 'Connect' option on the home screen. You will be asked to fill in your Amazon Redshift details as under:
-
Enter the details of the server, port, database name, user name and password.
-
Select the Require SSL check box when connecting to an SSL server.
-
Click on Sign In.
-
-
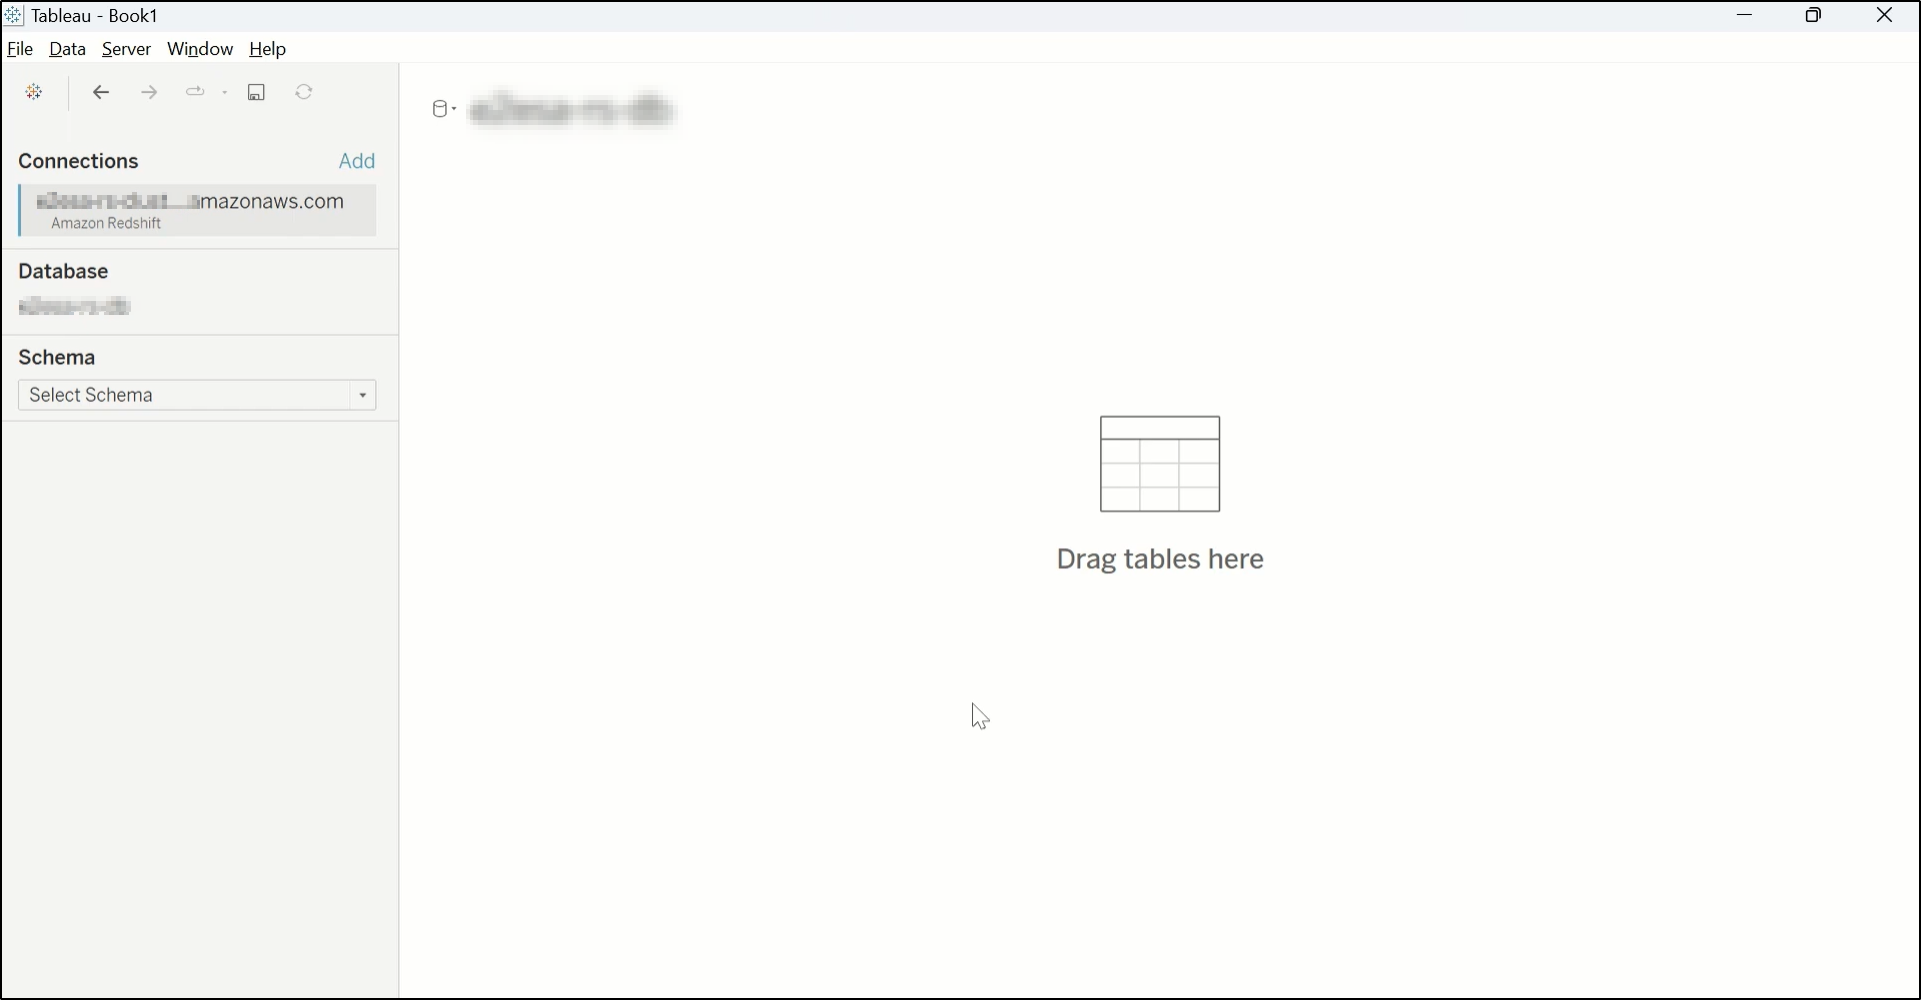
Once Tableau is able to connect to Amazon Redshift, go to the data source page.
-
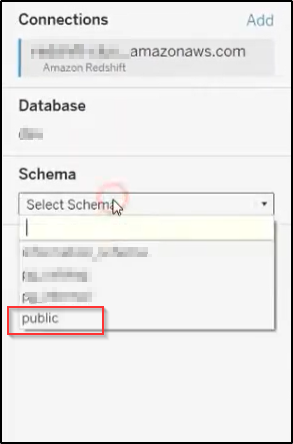
From the Schema drop-down list, select the required schema.
-
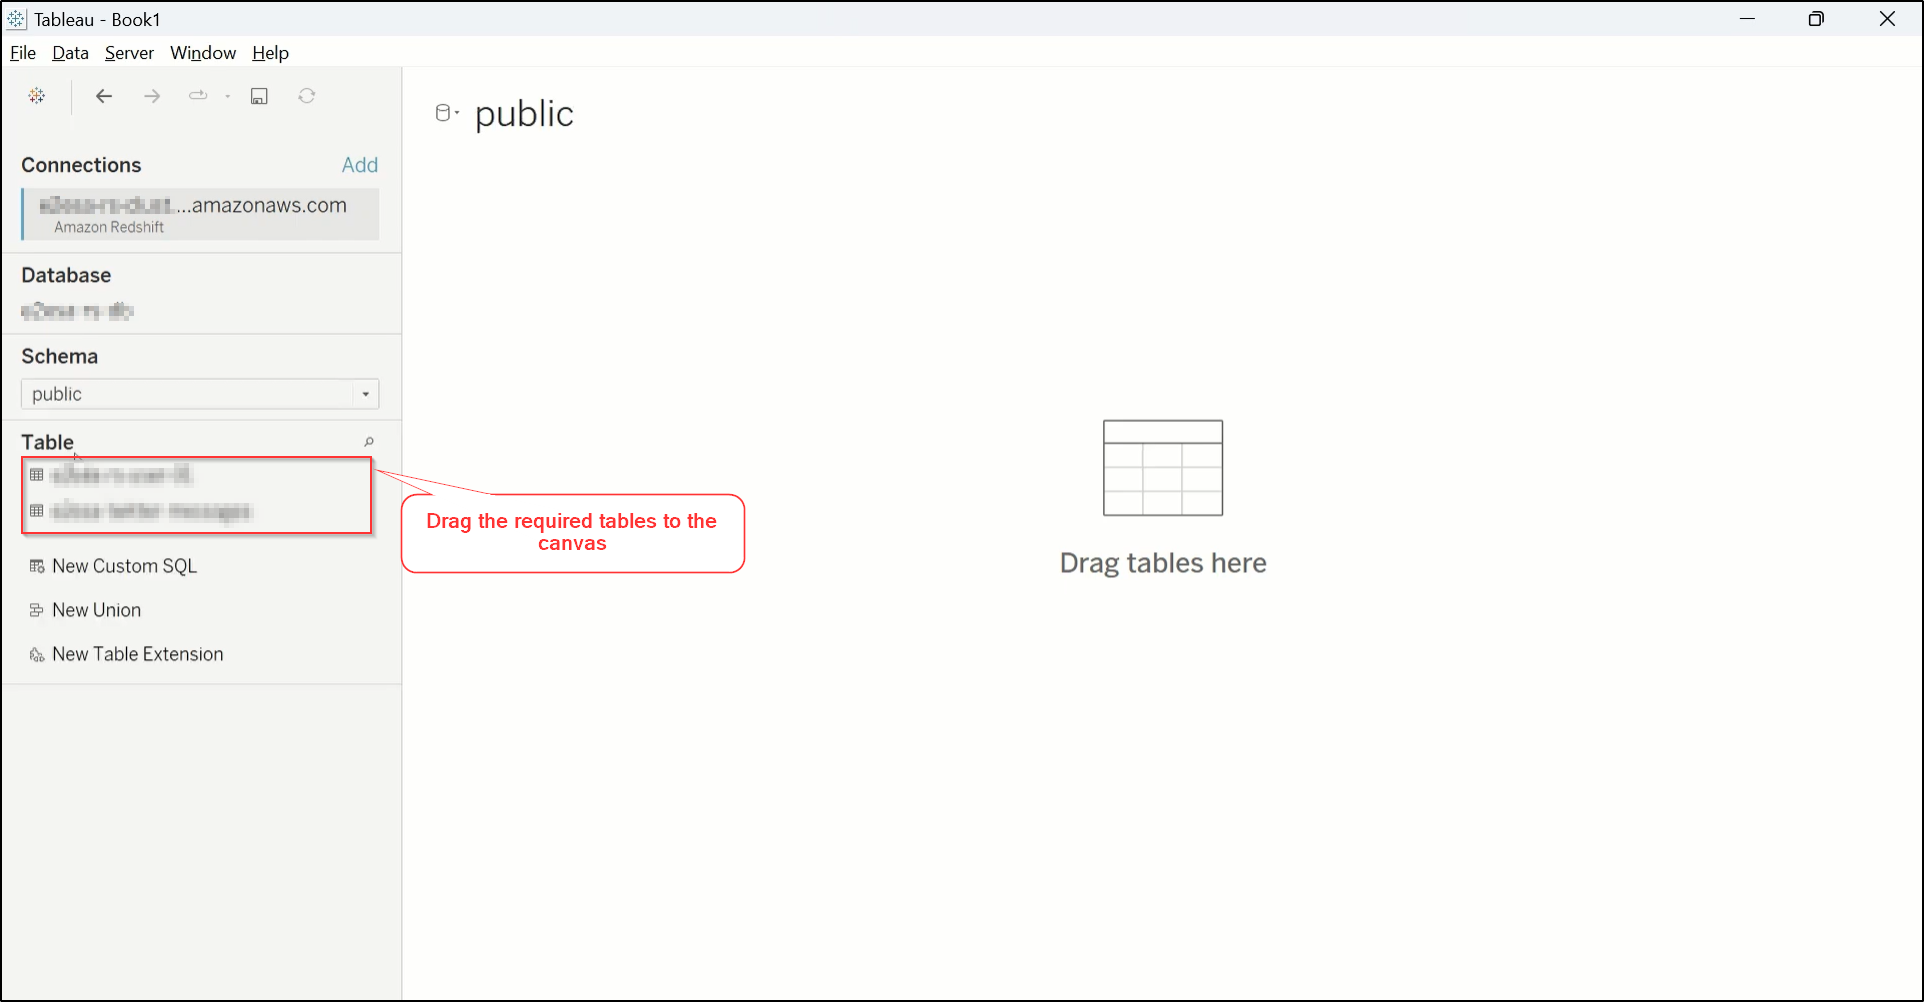
From the list of tables, drag and drop the required tables into the canvas.
-
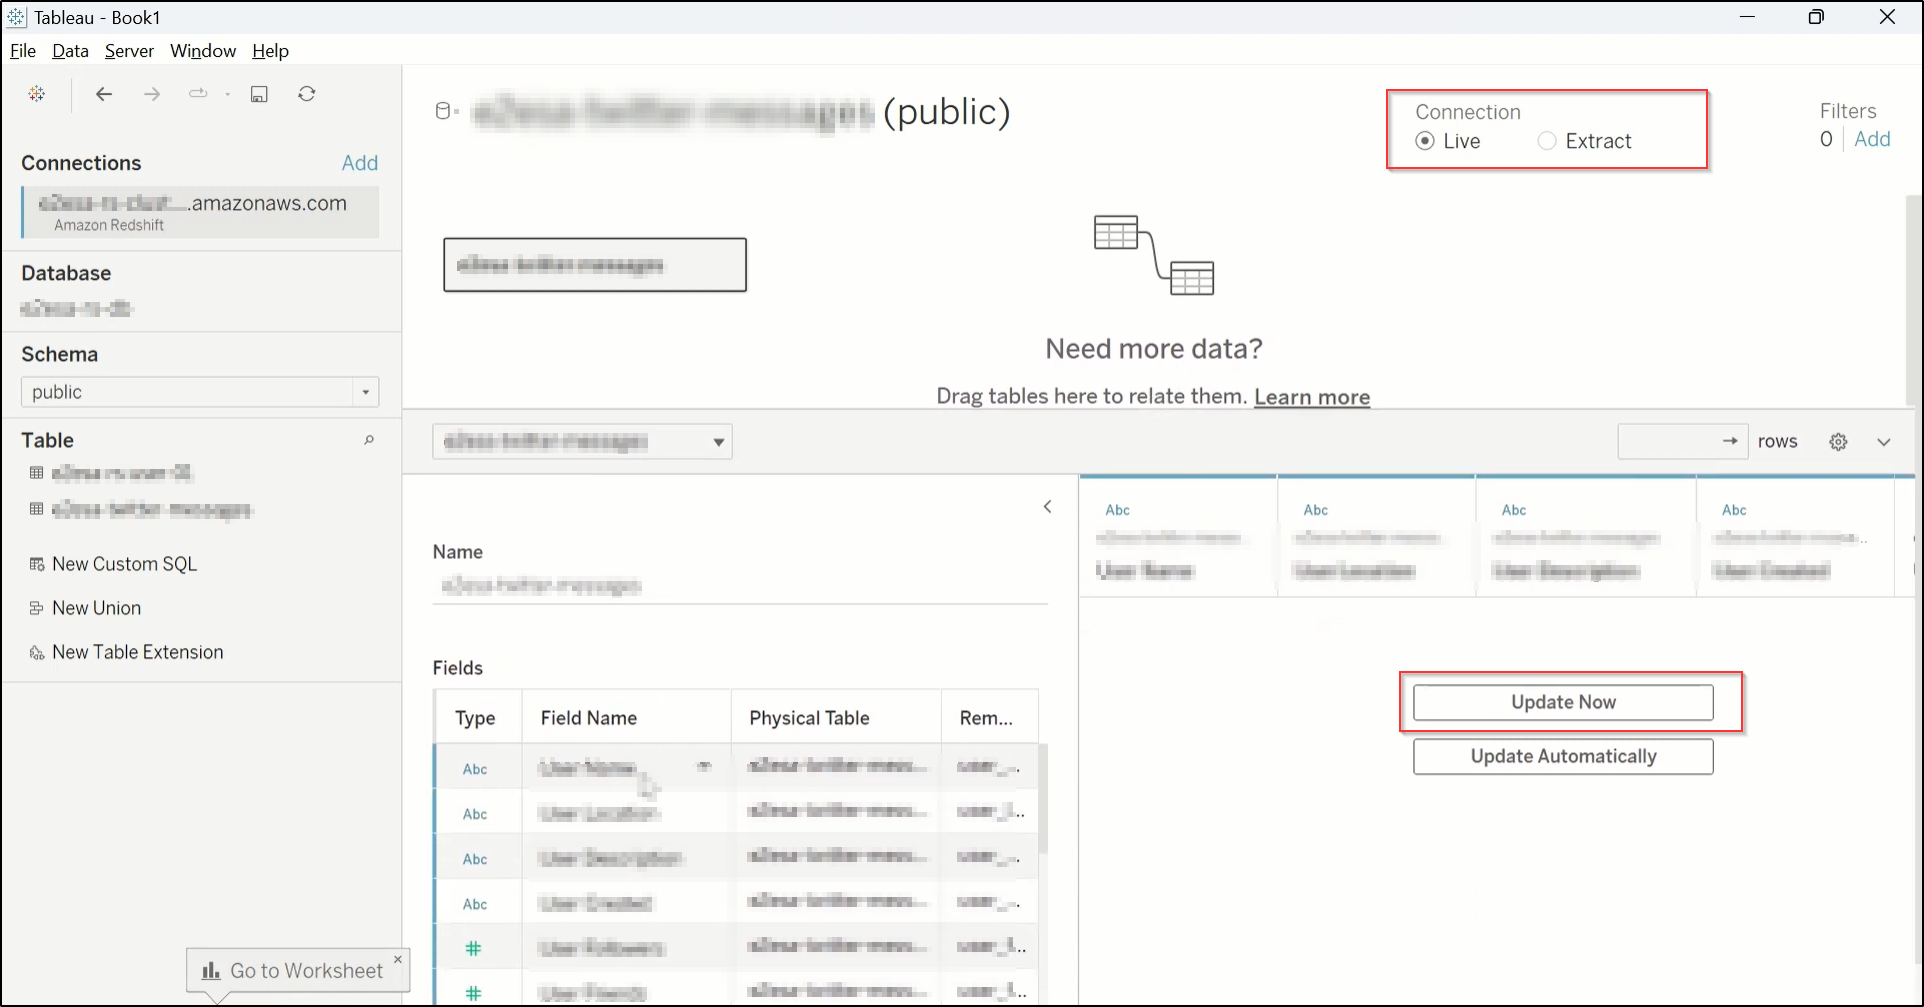
On your screen, you will be able to view the complete table structure. You can choose to set up a live connection to this dataset, or import an extract so that data from Amazon Redshift will be copied to Tableau. Once finished, click on Update Now to load your data.
-
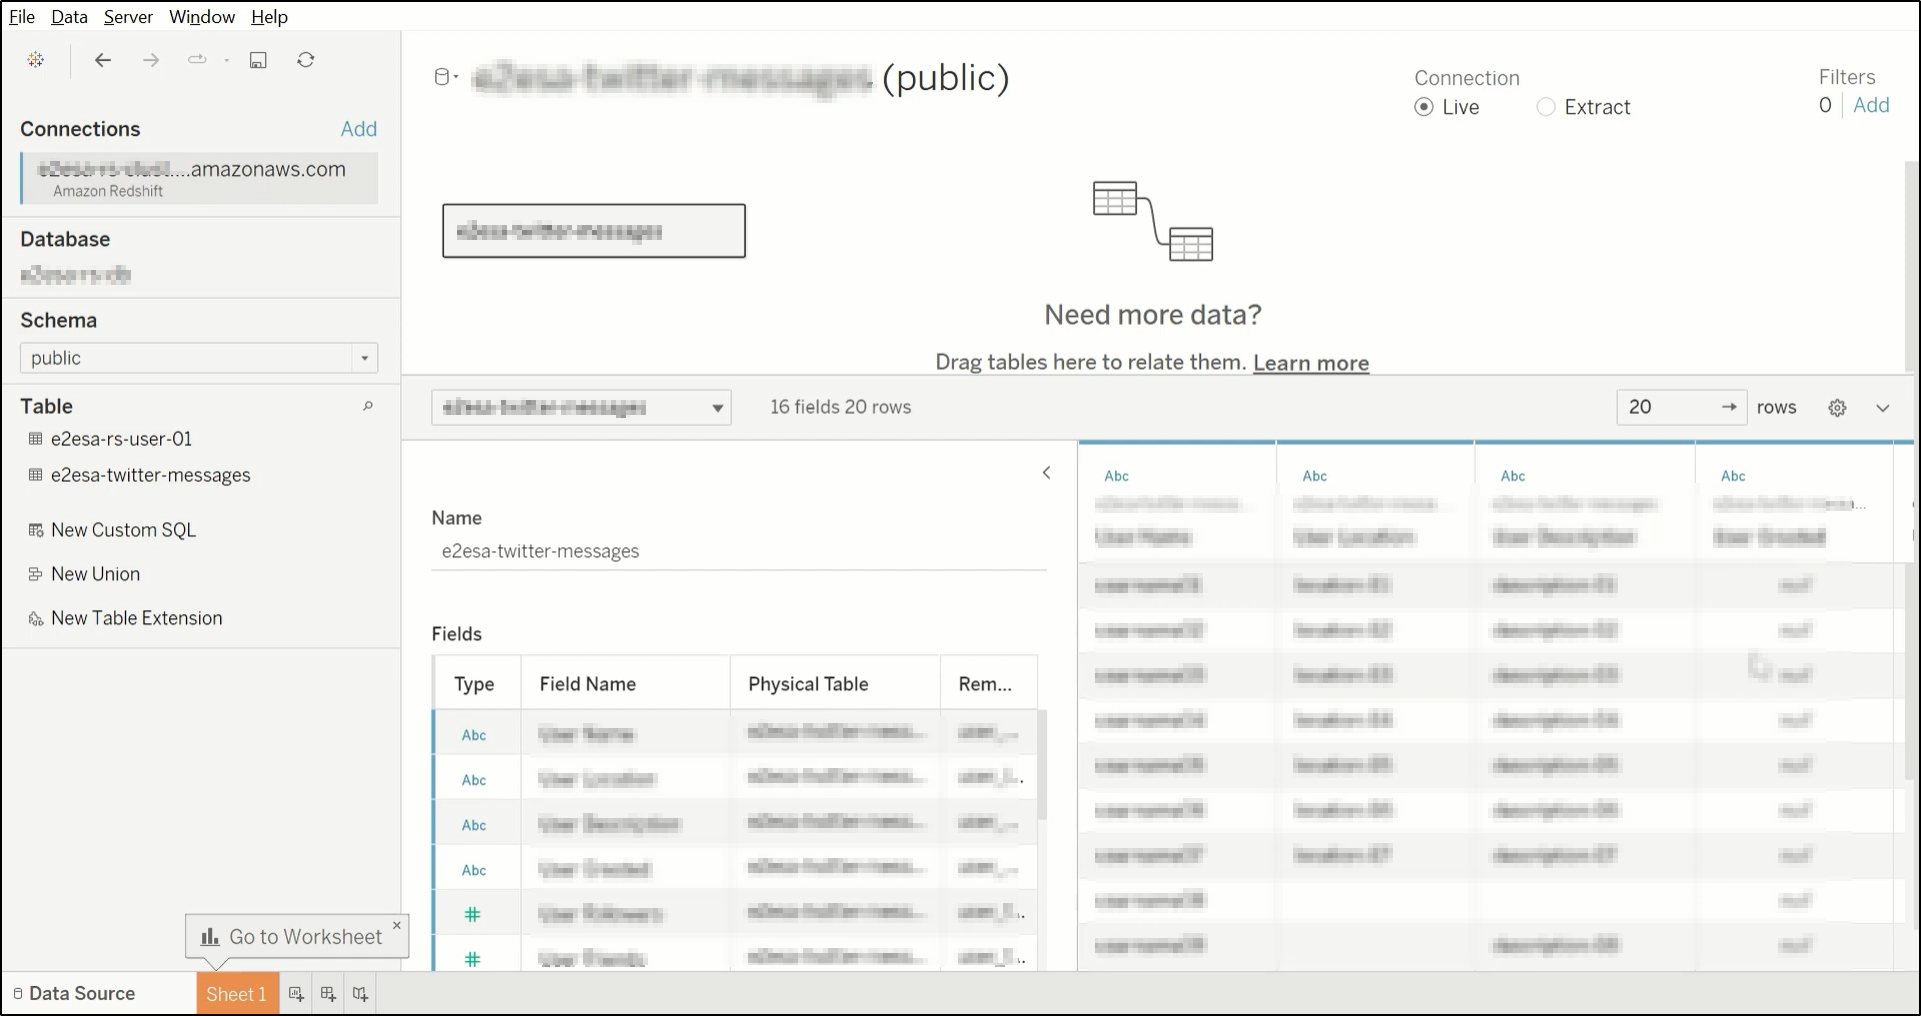
You will be able to see your data that has been pulled from Amazon Redshift to Tableau.
-
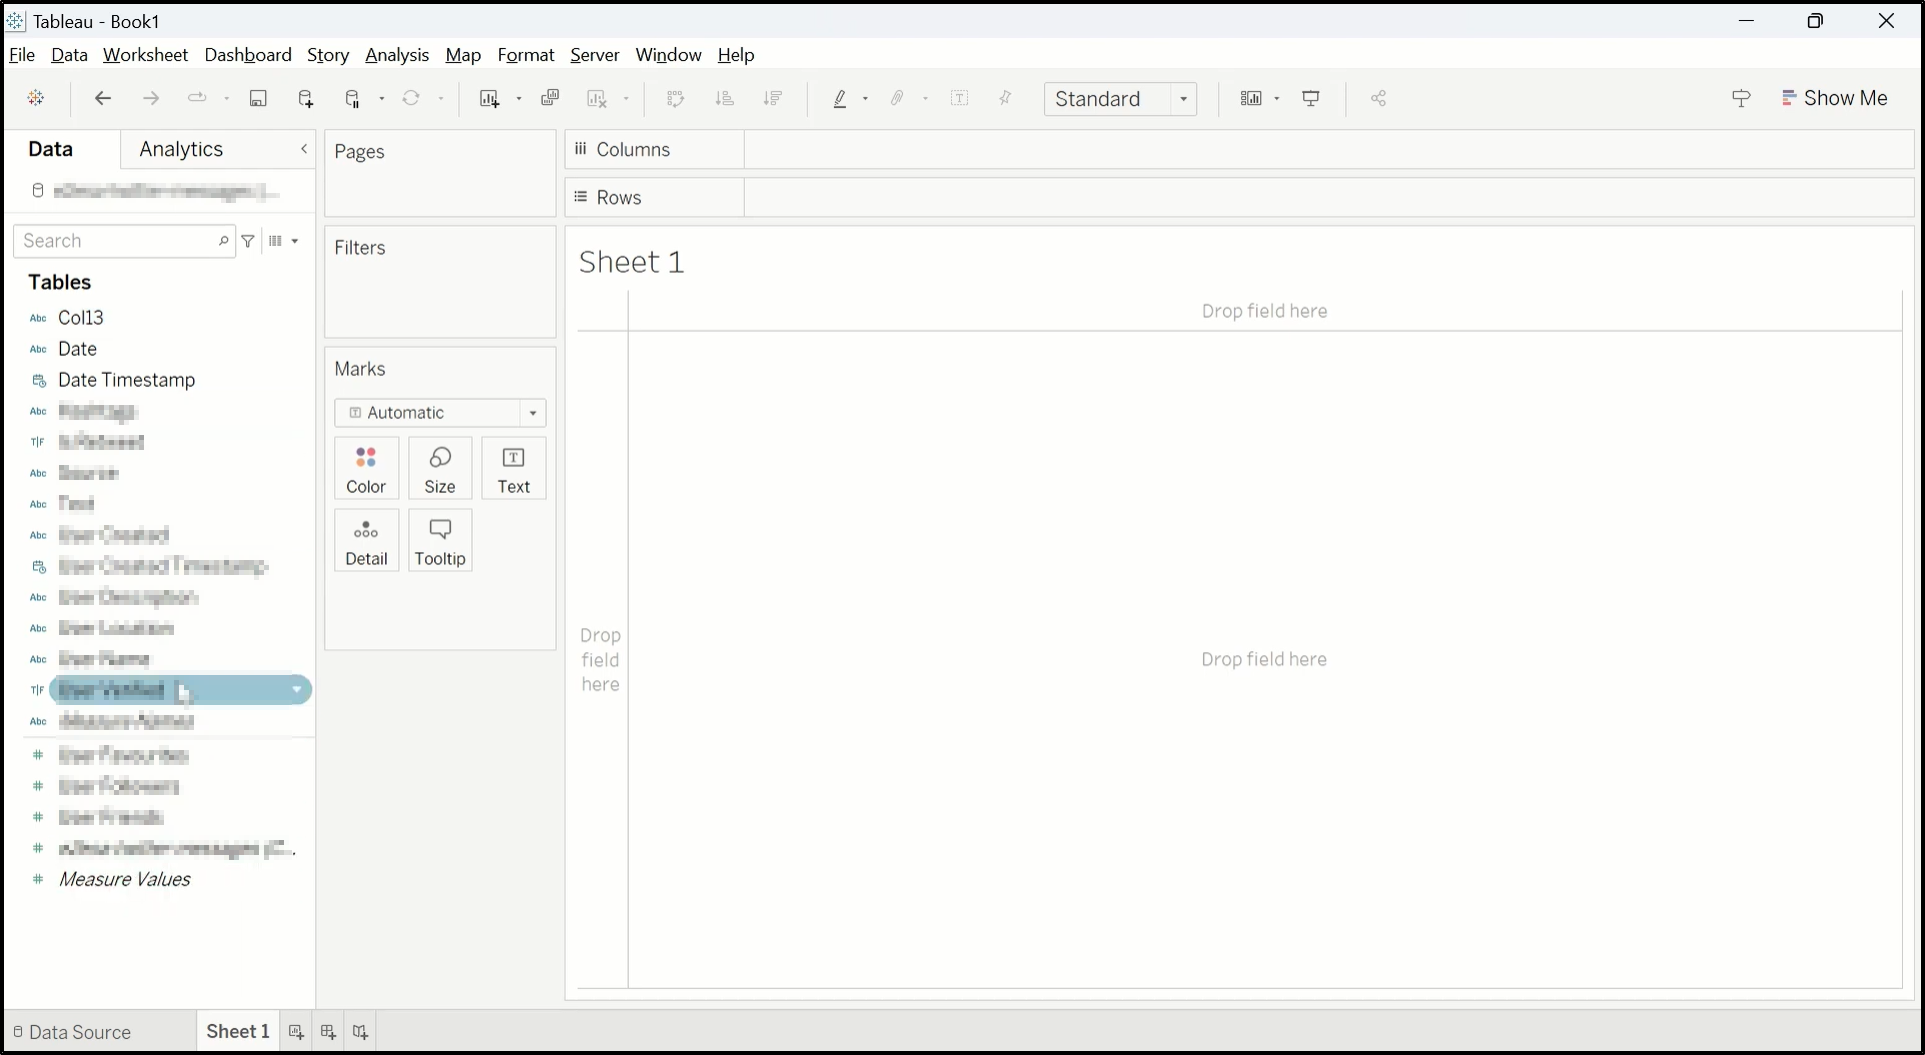
Select the sheet tab to start your analysis.
-
You can read more about connecting Amazon Redshift to Tableau here.
Finding your DataChannel managed Redshift Warehouse details
-
Login to the DataChannel Console.
-
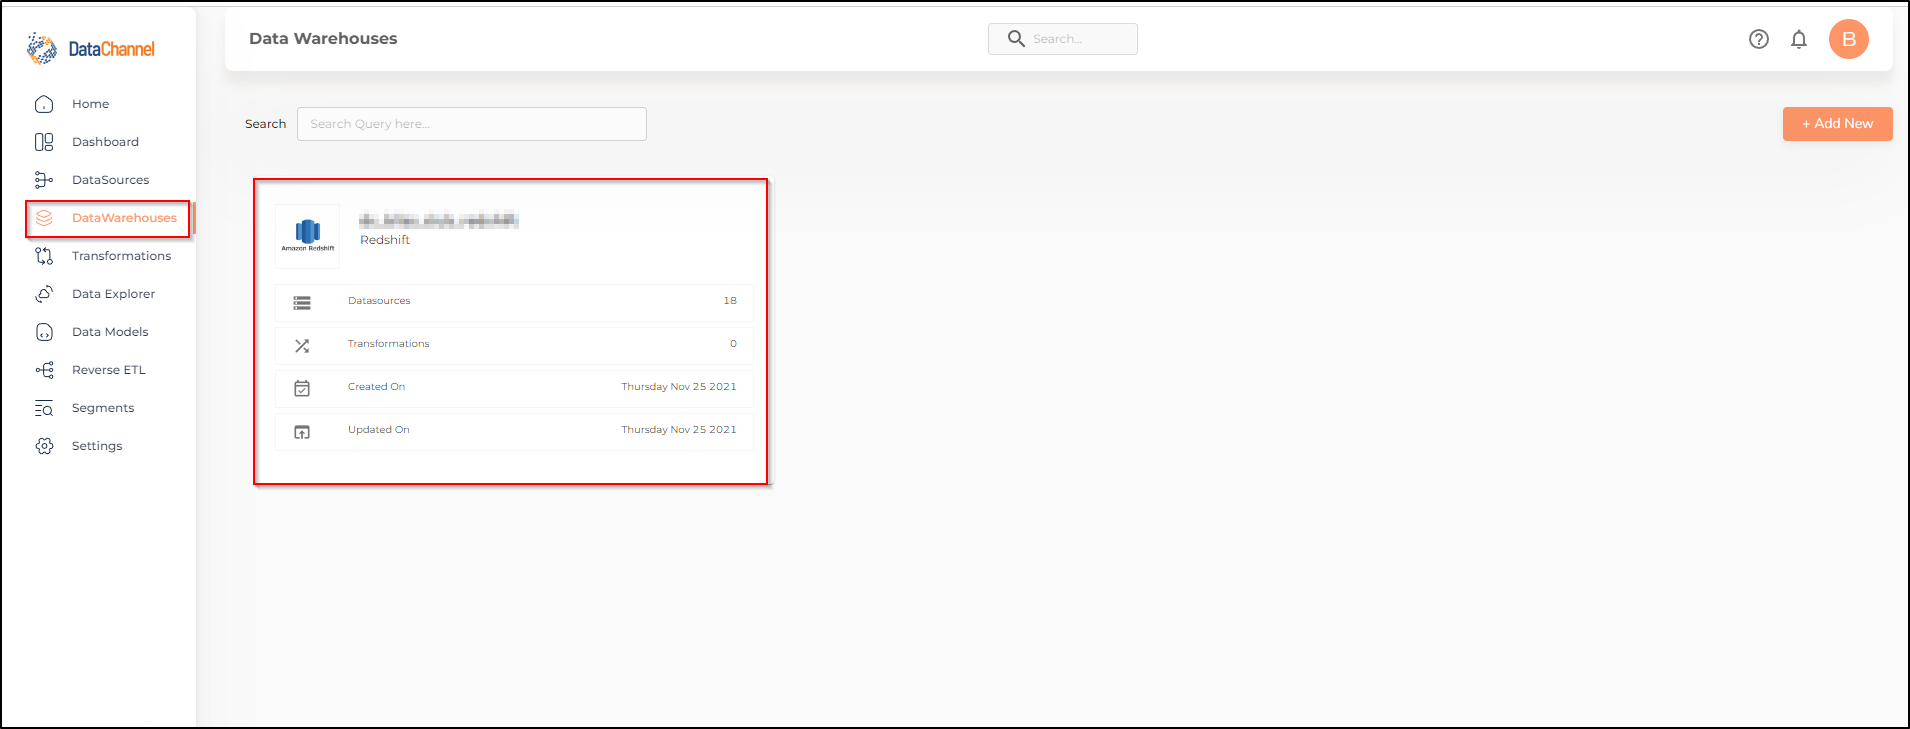
Access the Data Warehouse page by clicking on the Data Warehouse Tab on the sidebar.
-
Click on the card of the data warehouse that you want to connect to Tableau.
-
The following screen would show up. All the required details will be available in the form that opens up.
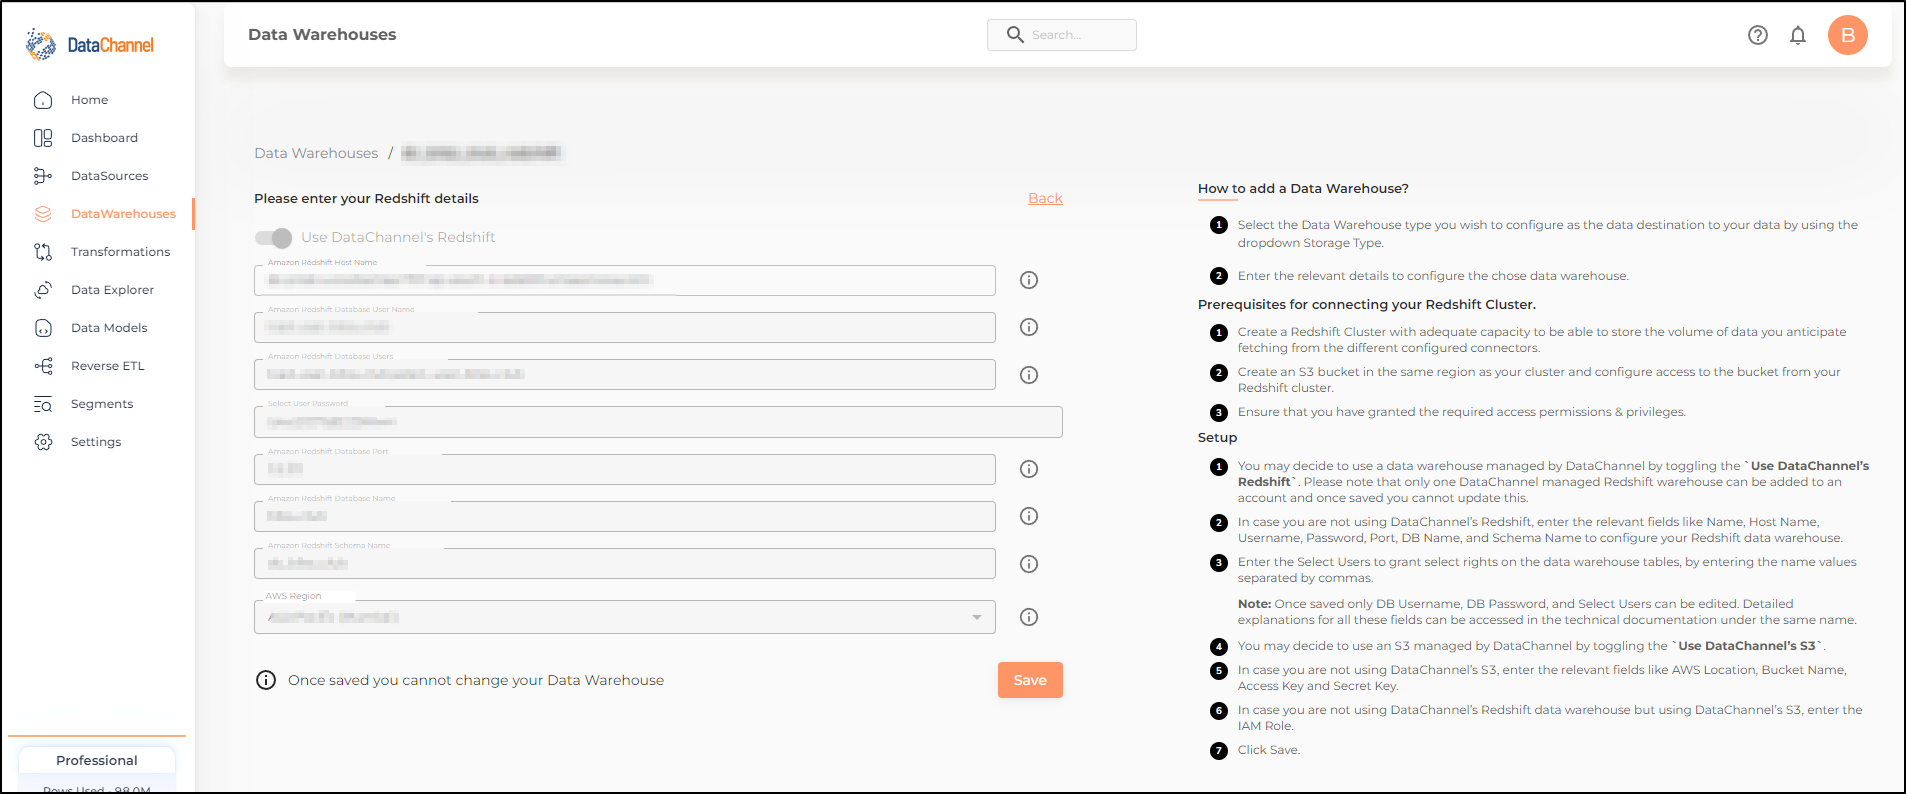
| If you are facing an issue while connecting Tableau to Redshift, you may be using VPC. In such a case, you will be required to check Network and Security Settings and add Inbound Rules in Amazon Redshift to allow all traffic. |
Still have Questions?
We’ll be happy to help you with any questions you might have! Send us an email at info@datachannel.co.
Subscribe to our Newsletter for latest updates at DataChannel.