JSON Files
JSON report enables a user to transfer data from JSON files/folders (consisting similar structured JSON files). The connector enables transfer, irrespective of whether JSON files are compressed or not .
Configuring the Credentials
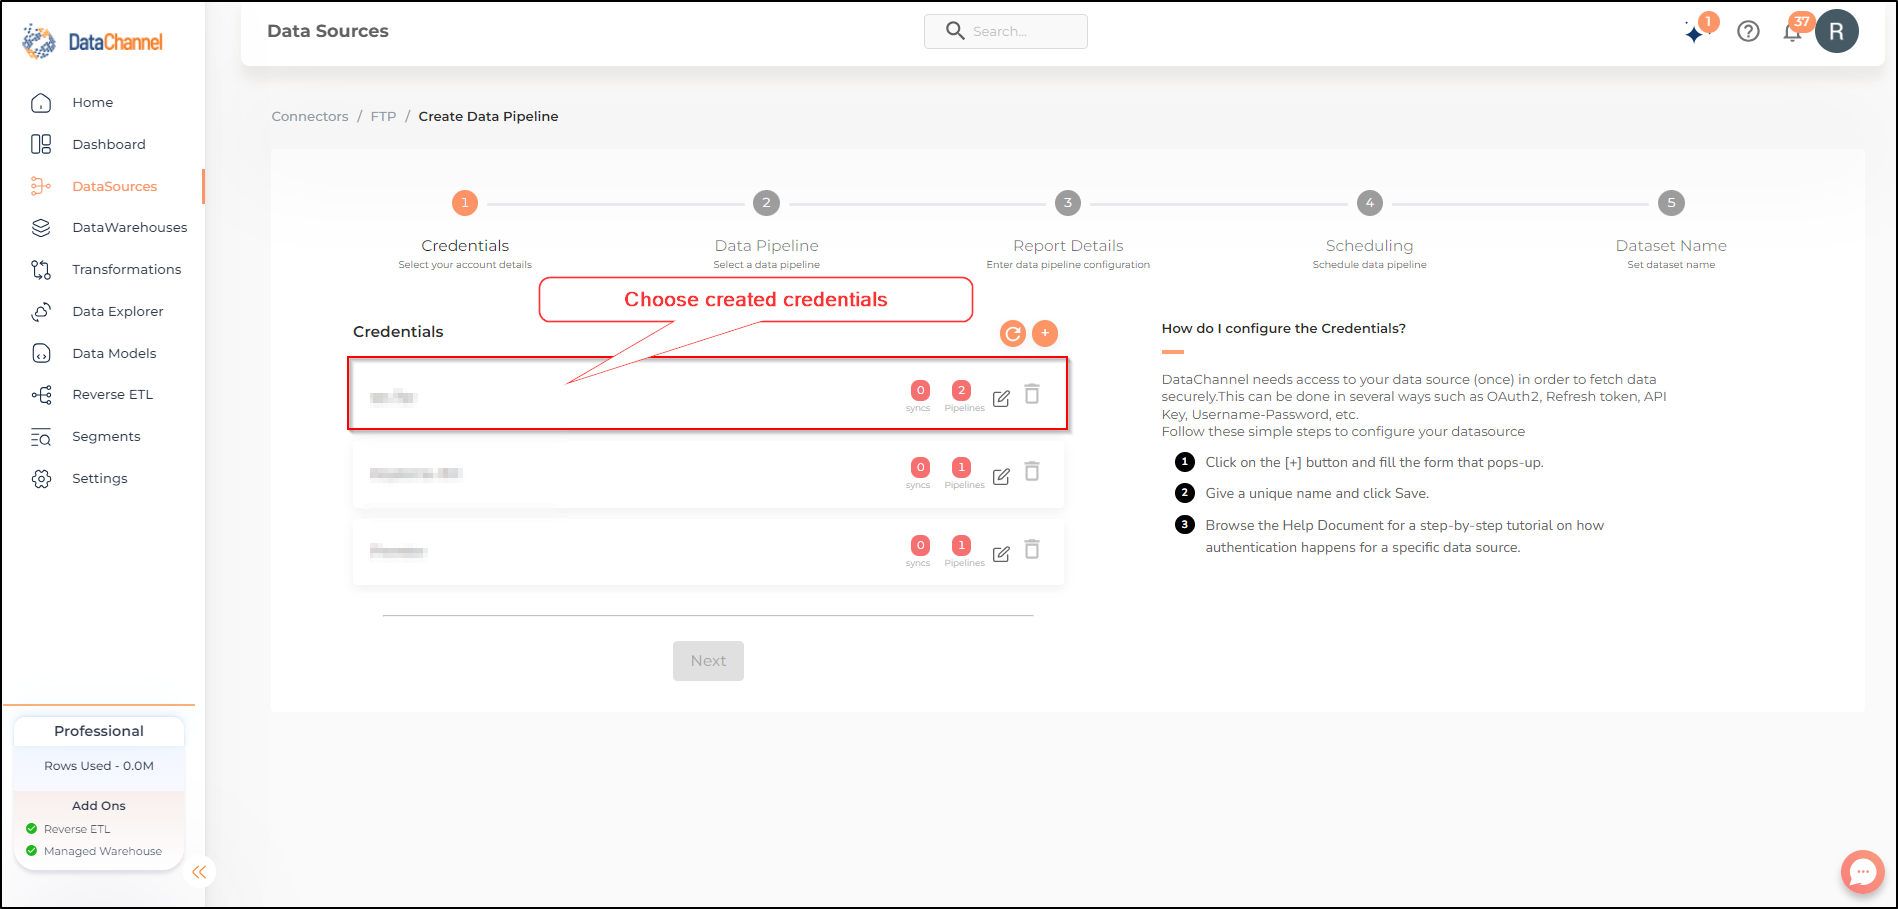
Select the account credentials which has access to relevant FTP data from the dropdown menu & Click Next

Data Pipelines Details
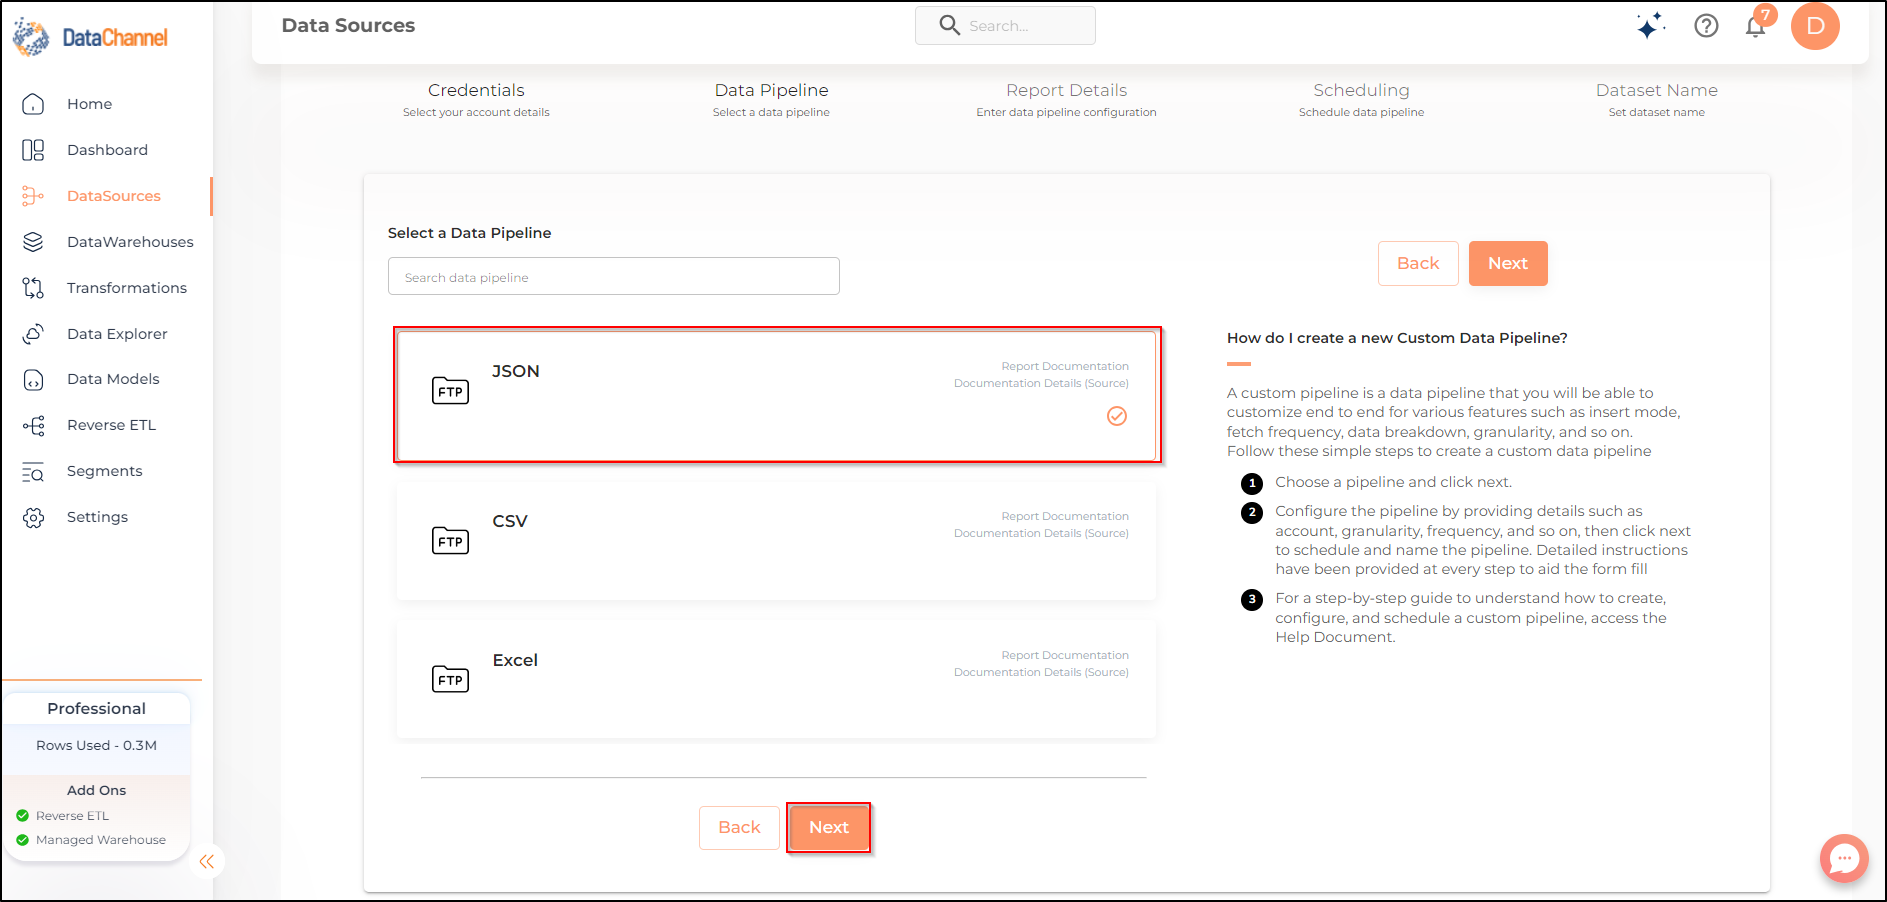
- Data Pipeline
-
Select JSON from the dropdown

- Account
-
Select one or more accounts from the drop-down
| All accounts which your credentials have access to should be available here. If they are not, please check the credentials selected / configured by you. While you can add multiple accounts, the table size may become too large and so it is advisable to add one account per pipeline and use Union queries in the data warehouse to join the data for consumption |

Setting Parameters
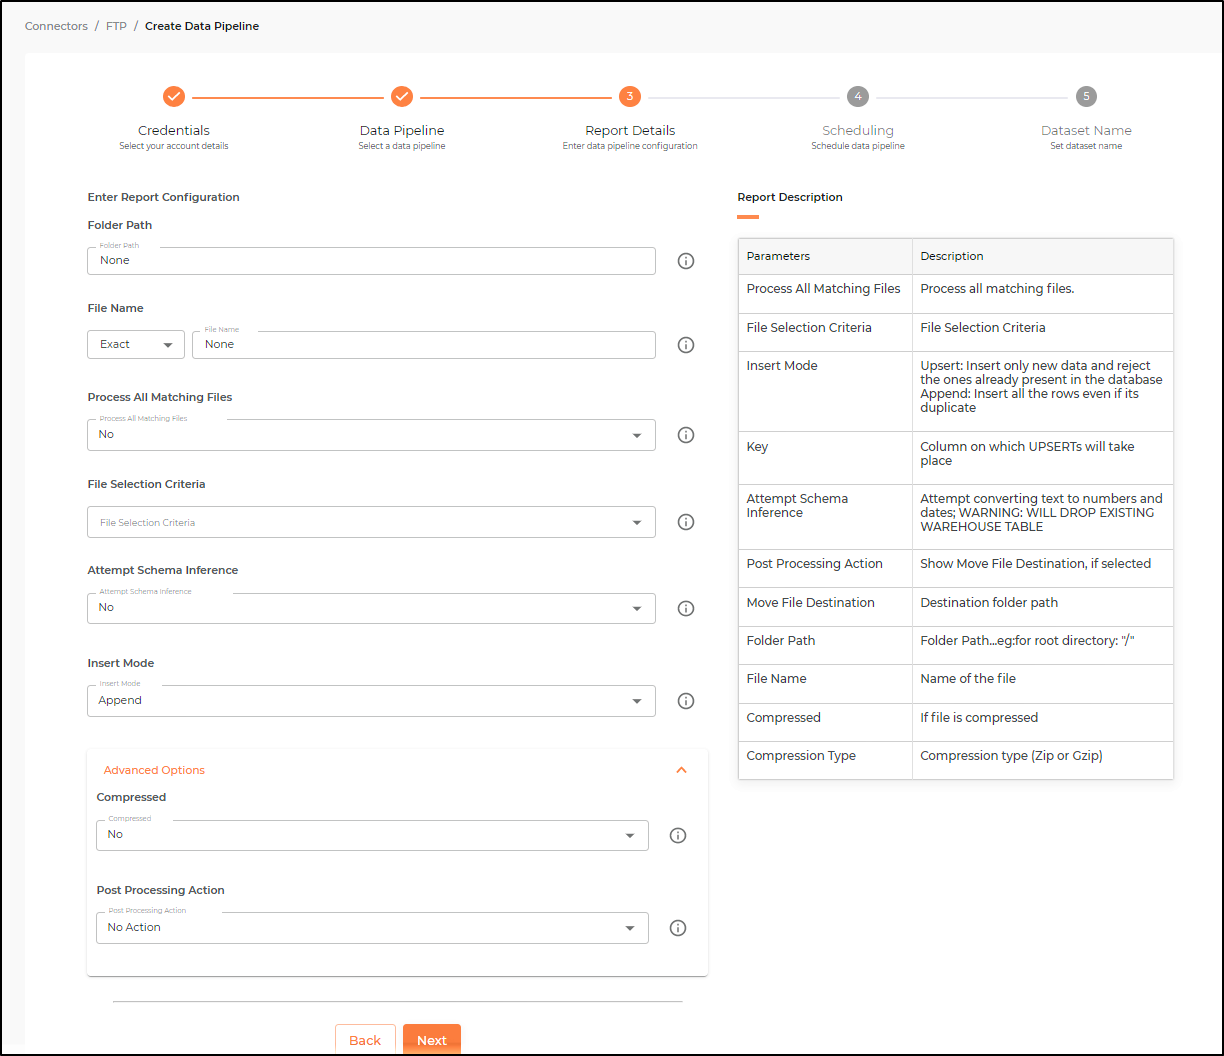
Select the fields that are necessary as per the file or folder .
| Parameter | Description | Values |
|---|---|---|
Compressed |
Required Choose Yes or No depending on the file compression |
{Yes,No} Default Value: No |
Compression Type Dependant |
Required (If Compressed = Yes) Specify the file compression type |
{Zip,Gzip} |
Folder Path |
Required Points to the path along which the files are present |
String value (eg:folder/subfolder) |
File Name |
Required Specify the File Name. In cases where the user doesn’t remember complete name of file, specify file name match type using the operator which takes values as 'Exact, Startswith, Endswith, and Contains'. |
String value (eg:abc.csv) Default Value: Exact (For the operator) |
Process All Files in Folder |
Required Select Yes or No, depending on if all files in folder are to be processed or not |
{Yes,No} Default Value: Yes |
File Selection Criteria Dependant |
Required (If Process All Files in Folder = NO) Choose File’s creation or modification Date |
{Date Created,Date Modified} Default Value: Date Created |
Post Processing Actions |
Required Actions to be performed once the file processing has been completed |
{No Action,Move Files} Default Value: No Action |
Move File Destination Dependant |
Required (If Post Processing Actions = Move Files) Specify the folder where the files are to be moved |
String value (eg:test_folder/) |
Attempt Schema Inference |
Required If Yes then value types will be fetched as it is, eg: Float will be fetched as float. If No then everything will be fetched as string irrespective of its type. |
{Yes,No} Default Value: No |
Insert Mode |
Required Specifies the manner in which data will get updated in the data warehouse : Upsert will insert only new records or records with changes, Append will insert all fetched data at the end, Replace will drop the existing table and recreate a fresh one on each run. |
{Upsert,Append,Replace} Default Value: Replace |
Key Dependant |
Required (If Upsert is chosen as the Insert Mode Type) Enter the column name based on which data is to be upserted. |
String value |
Datapipeline Scheduling
Scheduling specifies the frequency with which data will get updated in the data warehouse. You can choose between Manual Run, Normal Scheduling or Advance Scheduling.
- Manual Run
-
If scheduling is not required, you can use the toggle to run the pipeline manually.
- Normal Scheduling
-
Use the dropdown to select an interval-based hourly, monthly, weekly, or daily frequency.
- Advance Scheduling
-
Set schedules fine-grained at the level of Months, Days, Hours, and Minutes.
Detailed explanation on scheduling of pipelines can be found here
Dataset & Name
- Dataset Name
-
Key in the Dataset Name(also serves as the table name in your data warehouse).Keep in mind, that the name should be unique across the account and the data source. Special characters (except underscore _) and blank spaces are not allowed. It is best to follow a consistent naming scheme for future search to locate the tables.
- Dataset Description
-
Enter a short description (optional) describing the dataset being fetched by this particular pipeline.
- Notifications
-
Choose the events for which you’d like to be notified: whether "ERROR ONLY" or "ERROR AND SUCCESS".
Once you have finished click on Finish to save it. Read more about naming and saving your pipelines including the option to save them as templates here
Still have Questions?
We’ll be happy to help you with any questions you might have! Send us an email at info@datachannel.co.
Subscribe to our Newsletter for latest updates at DataChannel.