Create & Manage Transformations using dbt™ Cloud (Beta)
dbt™ Cloud is a highly scalable commercial product offering a fully managed SaaS platform, backed by cloud architecture. dbt Cloud provides a hosted architecture for running dbt across your organization, and it comes equipped with turnkey support for scheduling jobs, CI/CD, hosting documentation, monitoring and alerting and an integrated development environment (IDE). It allows you to develop and run dbt commands from your local command line interface (CLI) or code editor. In dbt Cloud, you can natively connect to your data platform and test its connection . It provides robust orchestration that enables you to schedule, run, and monitor dbt jobs.
Click here to know more.
Adding a new Transformation
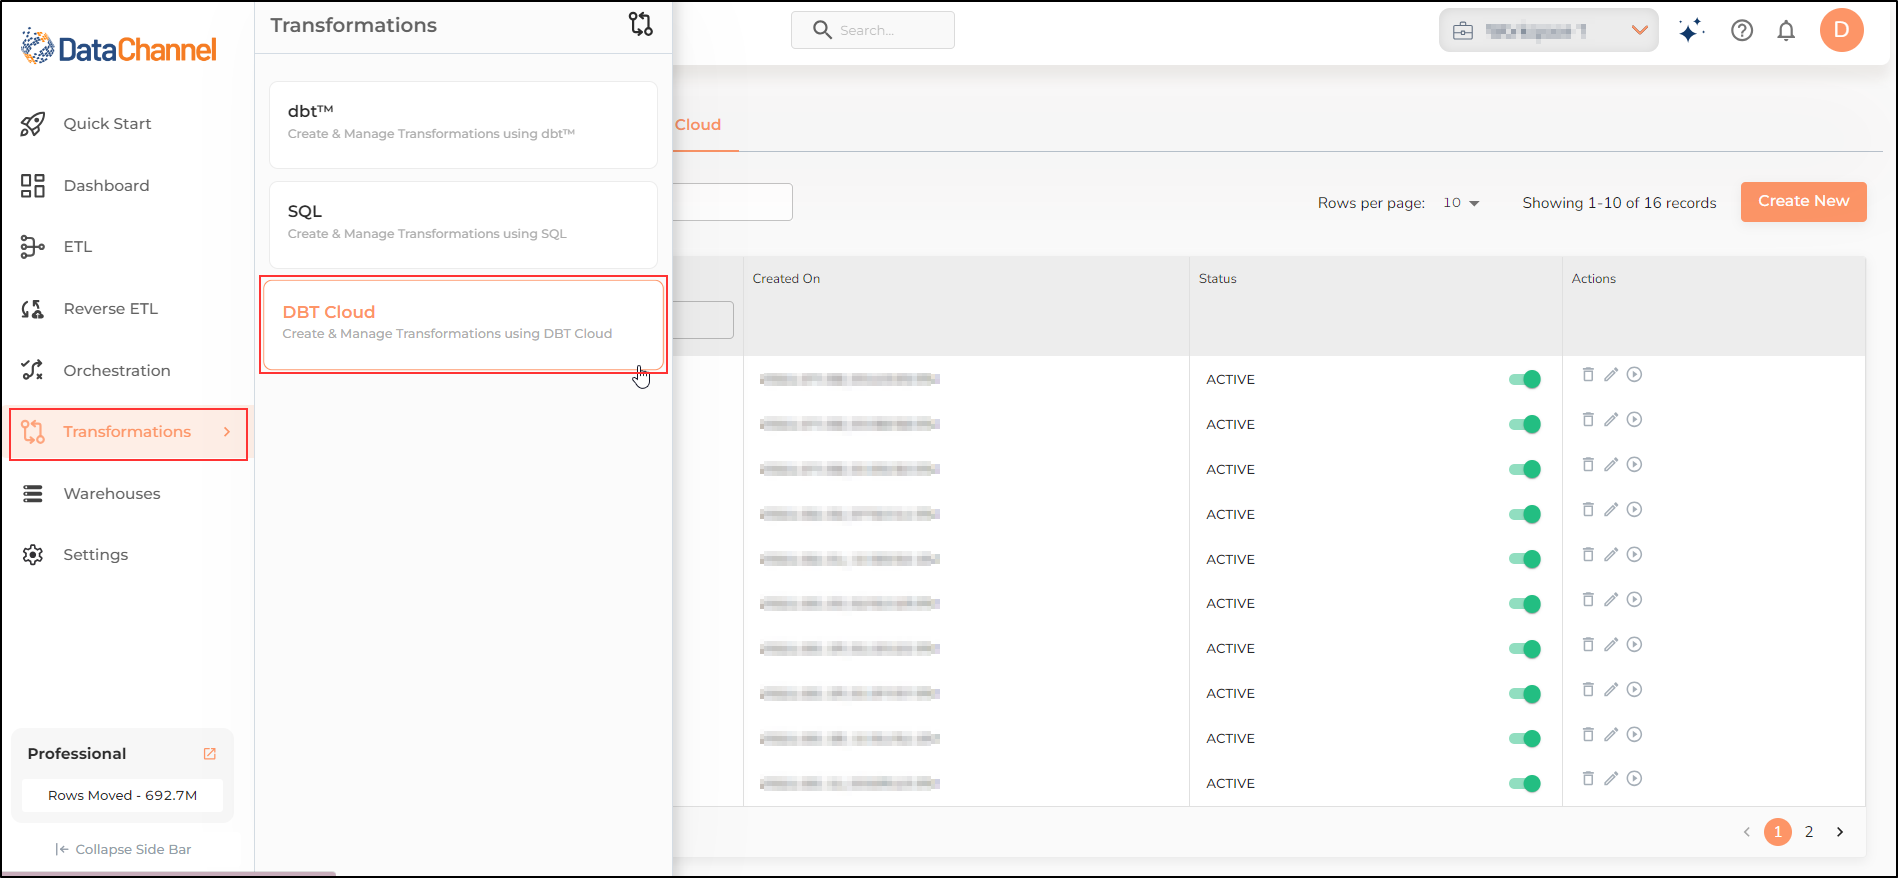
Click on the Transformations tab on the sidebar and select the dbt™ Cloud option.
|
Prerequisites (for configuring dbt™Cloud Project)
|
Step by Step Process
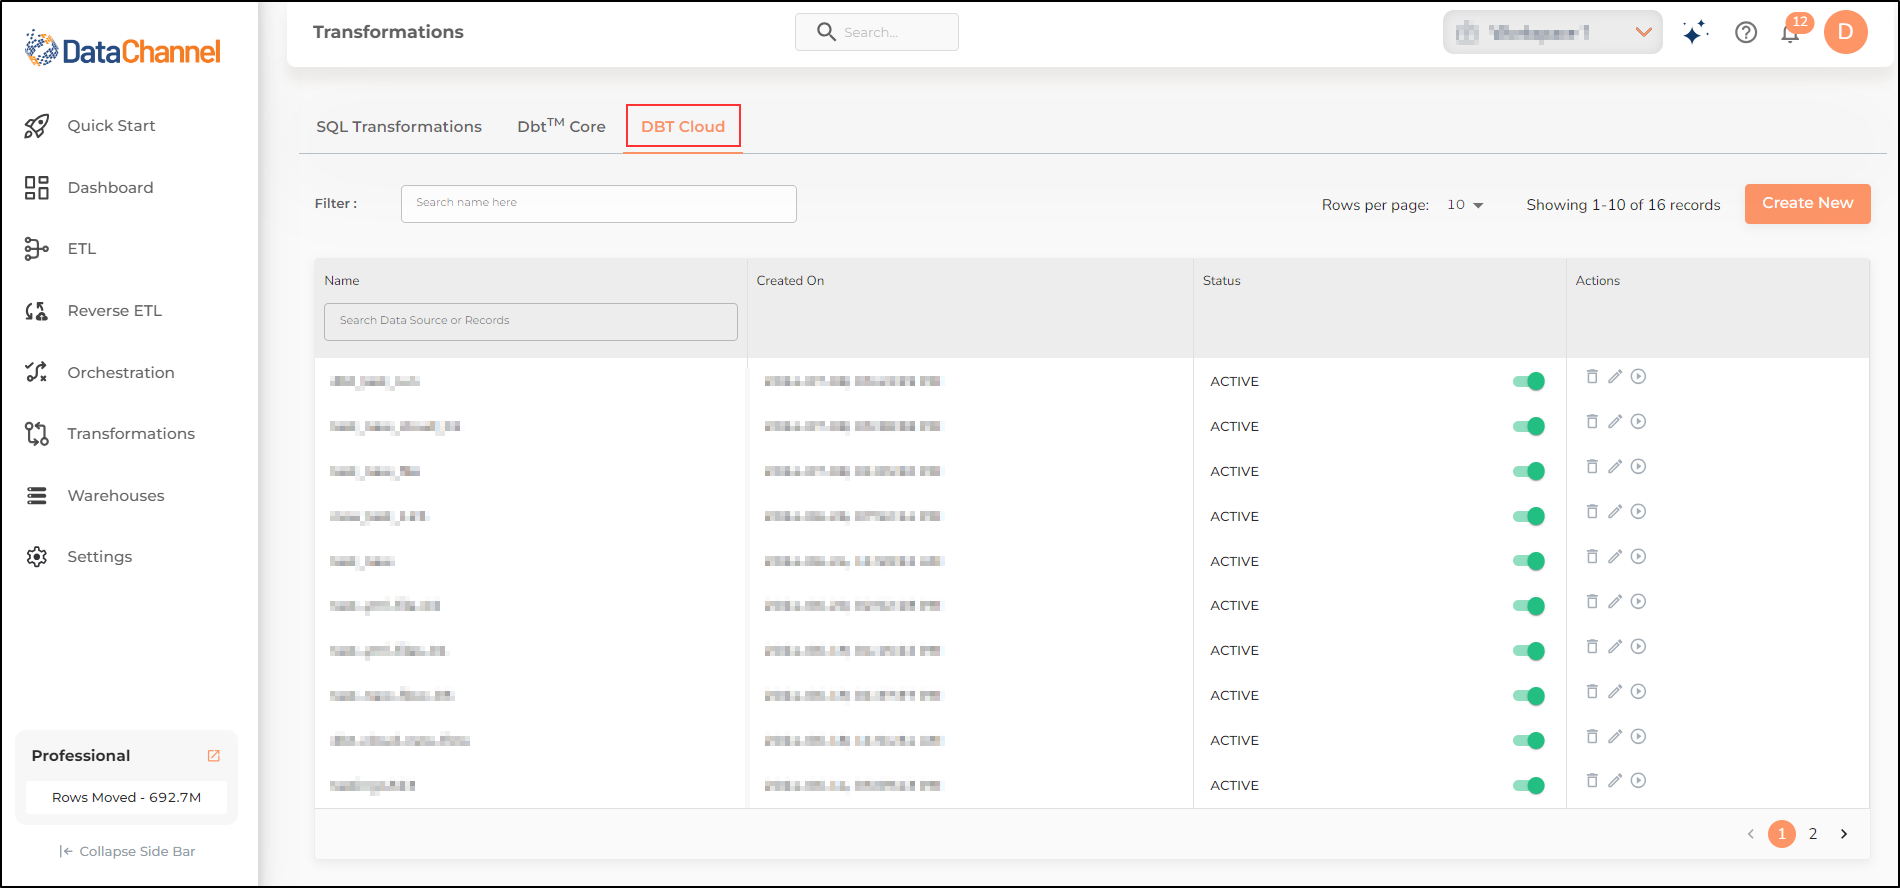
- Step 1
-
Go to the third pane which is the dbt™ Cloud Tab. You will be able to view the configured dbt™ Cloud projects list.
- Step 2
-
Click on the Create New button to create a new transformation for creating a new dbt™ Cloud Project.
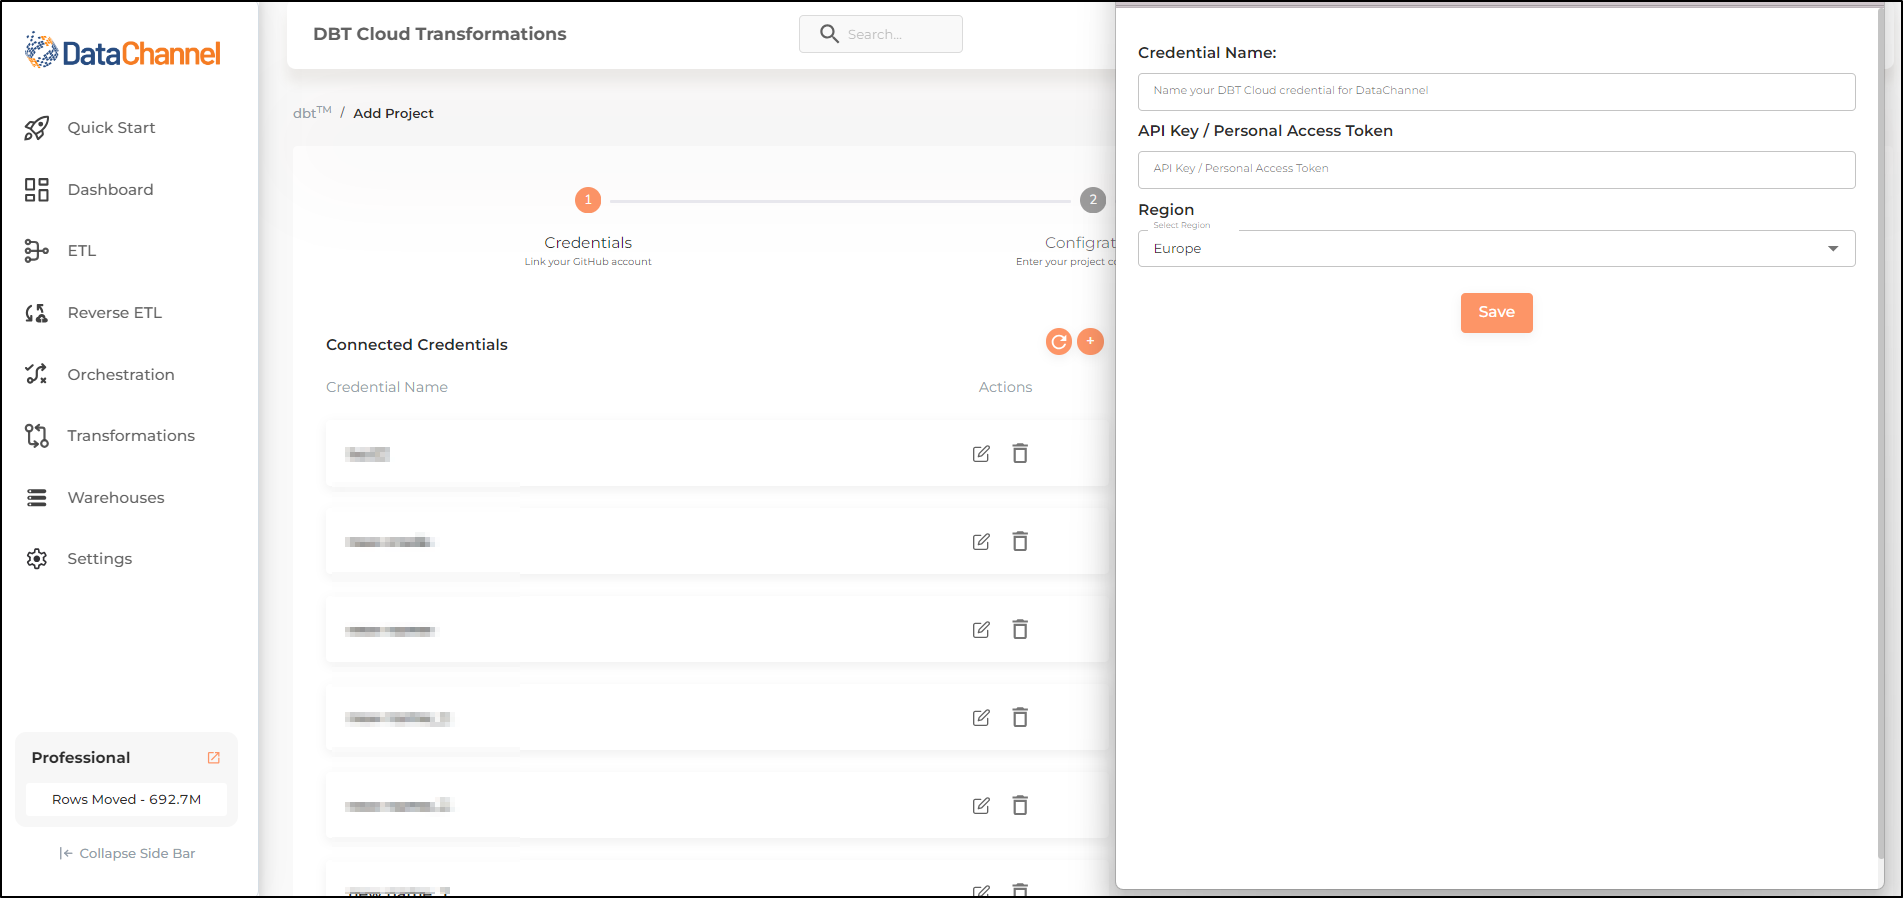
- Step 3
-
On the main UI screen you can view a list of credentials added by you. You can select existing credentials or add new credentials using the + button. You will need to enter any name for the credentials, your personal access token and region. Once credentials are saved and selected, click on Next.
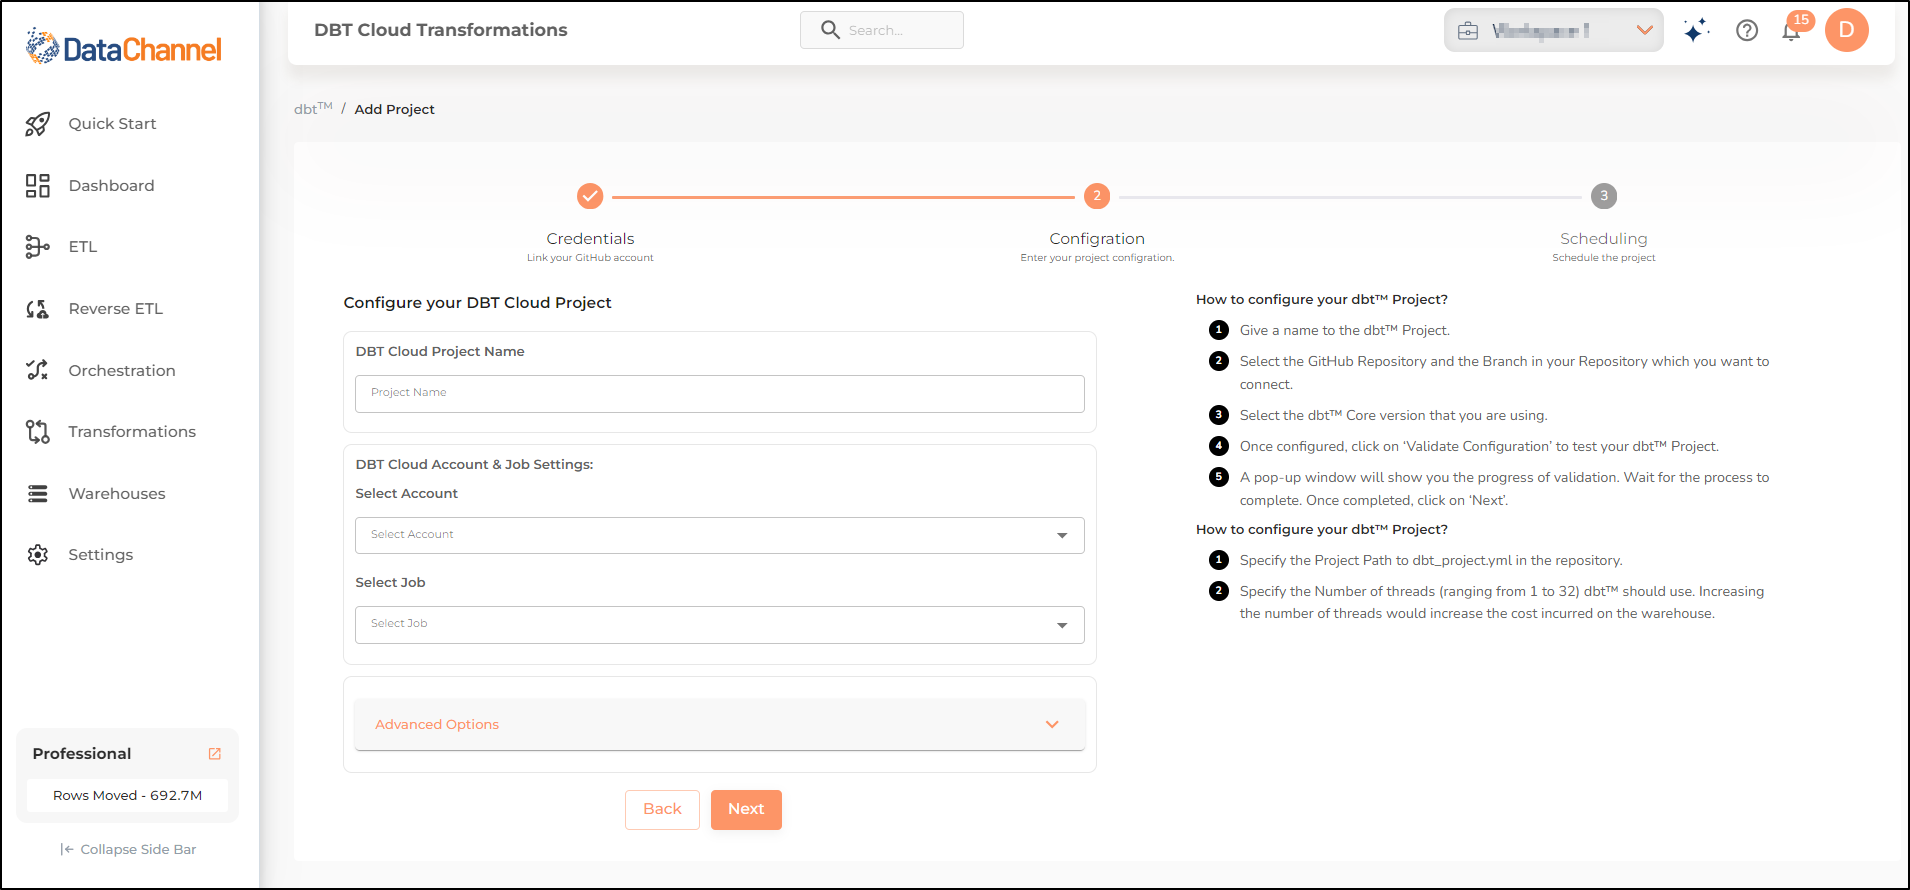
- Step 4
-
You will be prompted to configure your dbt™ Cloud project. Give your dbt™ Cloud project any name. Select account and job from dropdown.
- Step 5
-
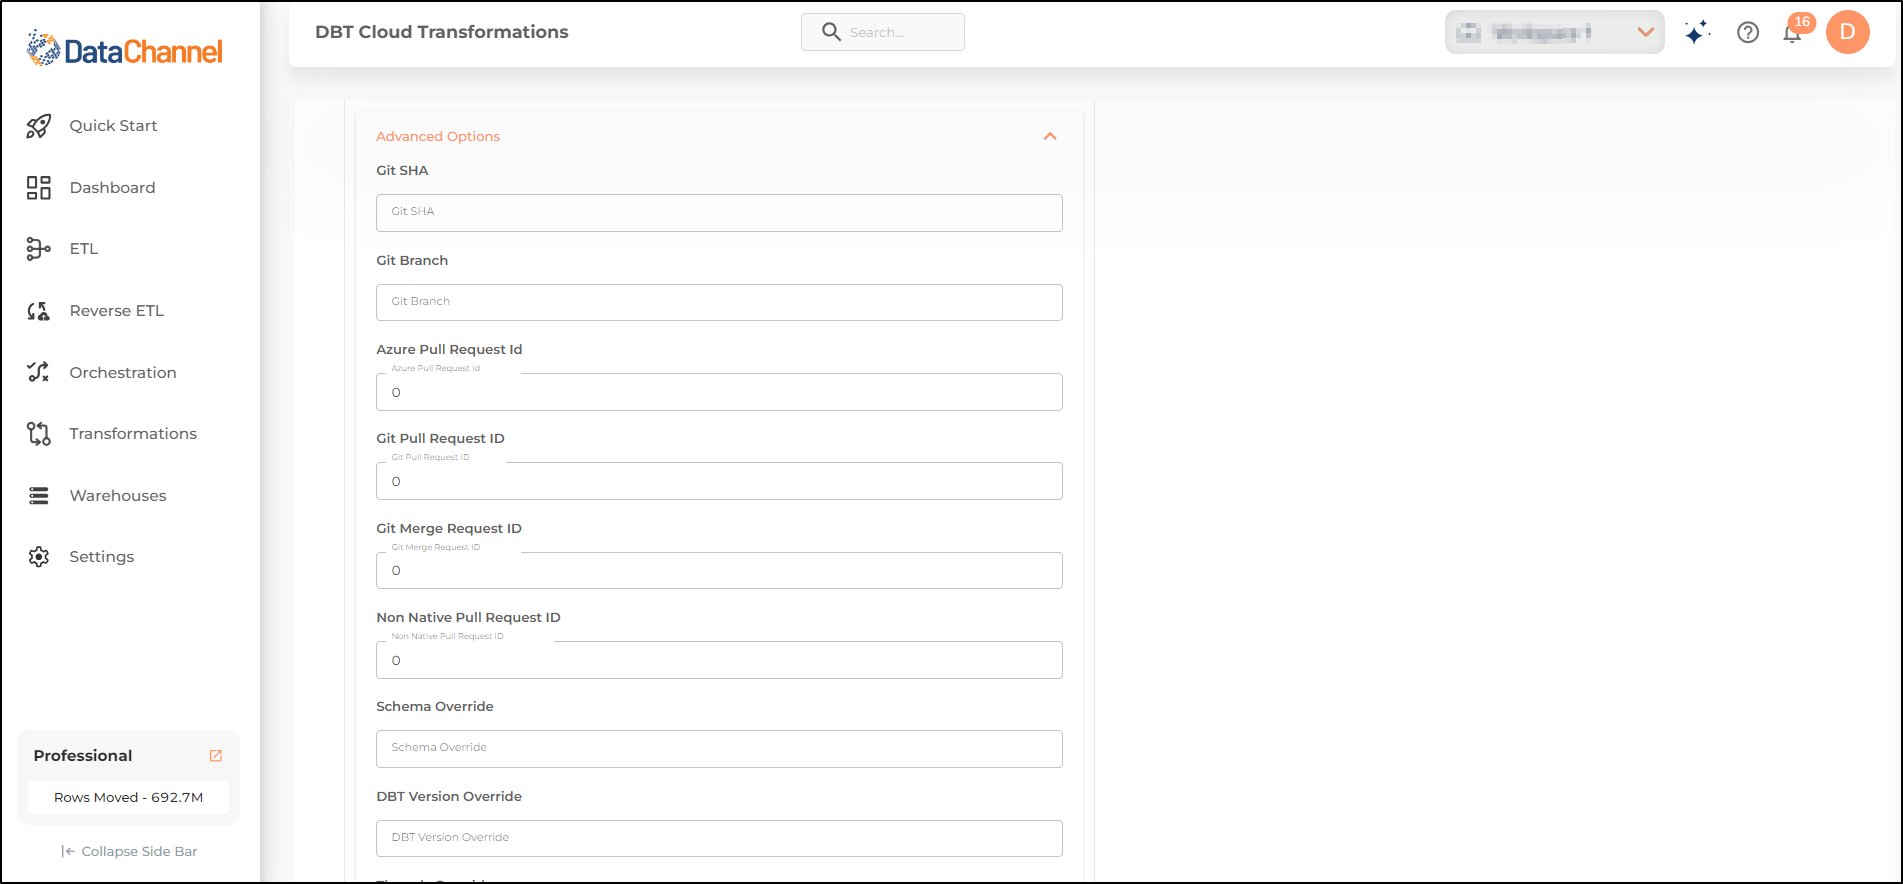
In the advanced settings (optional), specify:
-
Git SHA - a unique 40-character hexadecimal string also known as commit ID.
-
Git Branch - The name of the branch.
-
Azure Pull Request ID - The ID of the pull request to retrieve.
-
Git Pull Request ID - The ID that identifies the pull request.
-
Git Merge request ID - The ID of the job used to run the pull request merge.
-
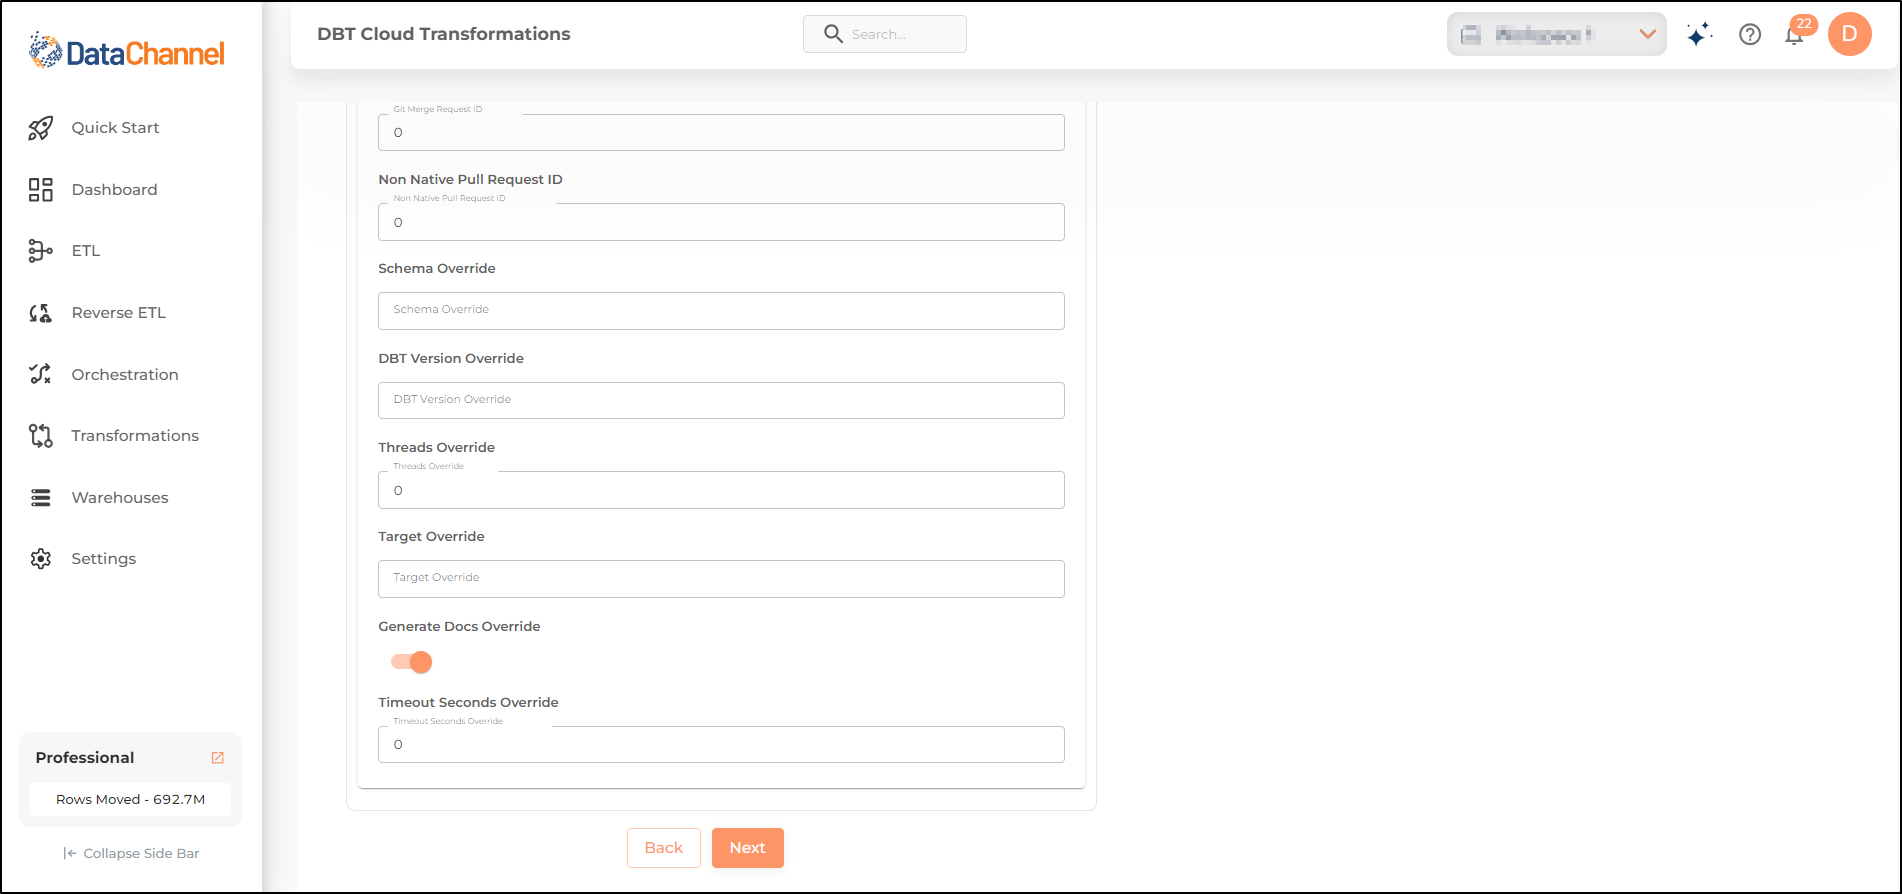
Non Native Pull request ID -
-
Schema Override - The schema is overridden in the parent dbt project.
-
dbt Version Override - The dbt version is overridden in the parent dbt project.
-
Threads override - The number of threads is overridden in the parent dbt project.
-
Target override - The target path is overridden in the parent dbt project.
-
Generate docs override - Use the toggle to override whether to generate the documentation for your project.
-
Timeout seconds override - Override the number of seconds dbt should wait for queries to complete, after being submitted successfully.
-
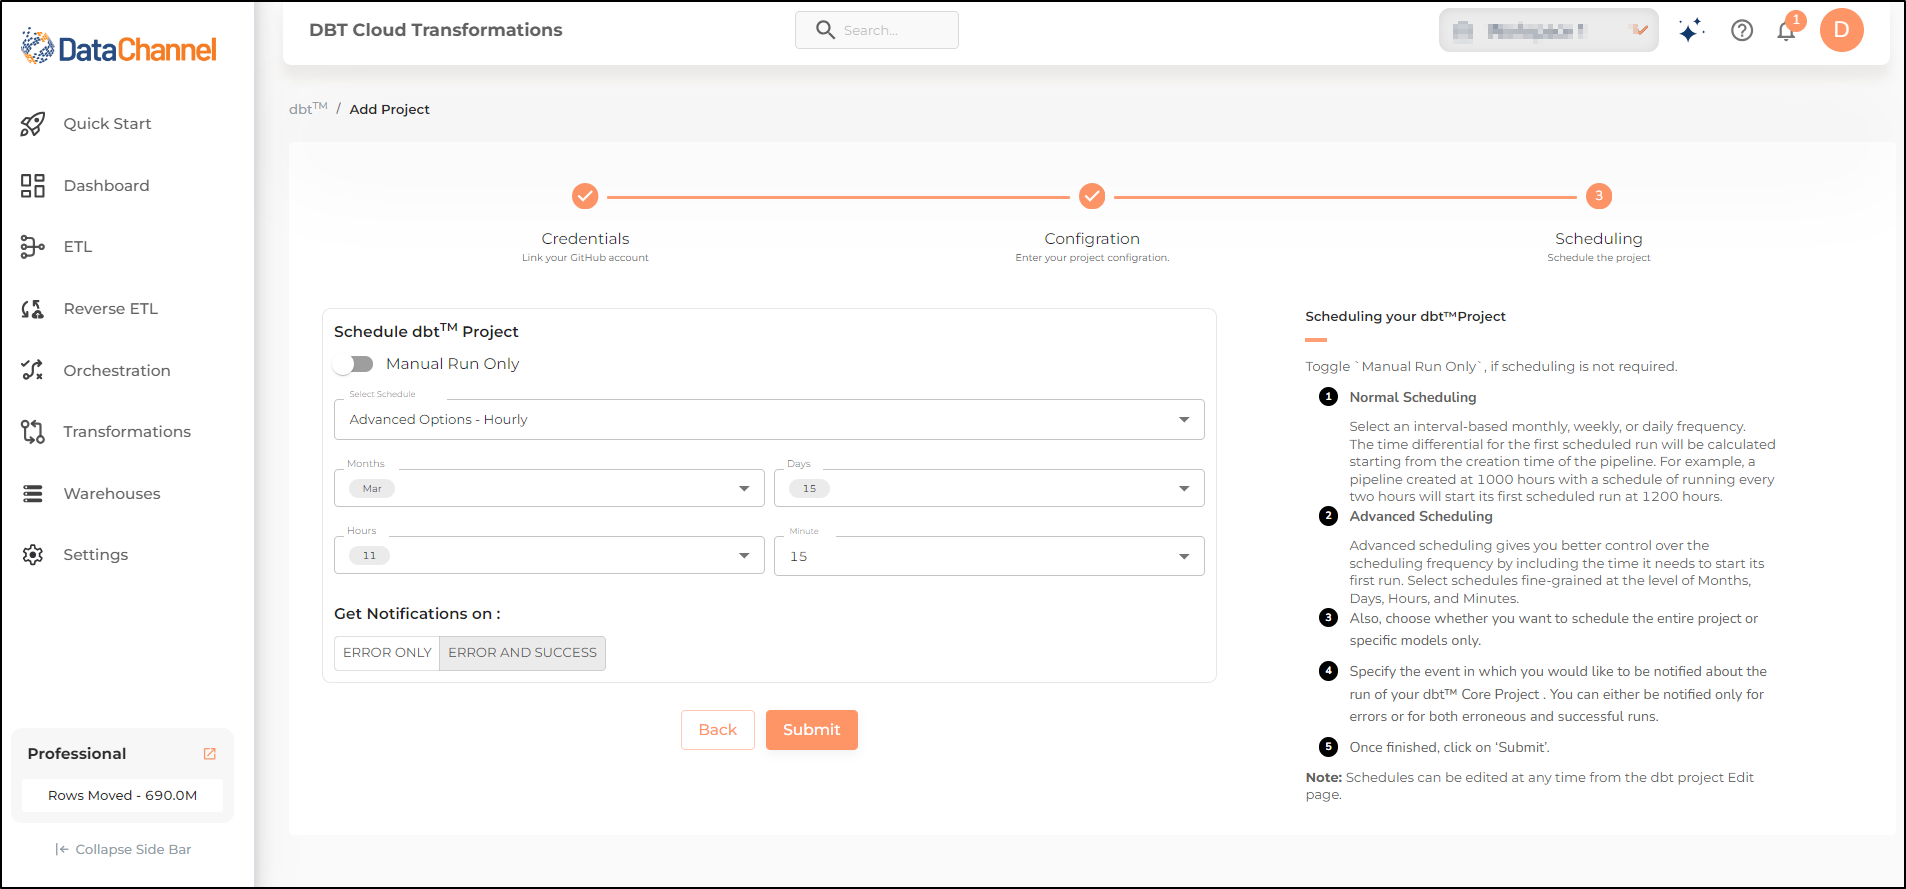
- Step 6
-
Using the toggle, you can choose between Manual run and automatic run. Specify the schedule of run for automatic run. Also, select the desired notification settings. Once finished, click on Submit.
Viewing/Editing your dbt™Cloud Project after configuration
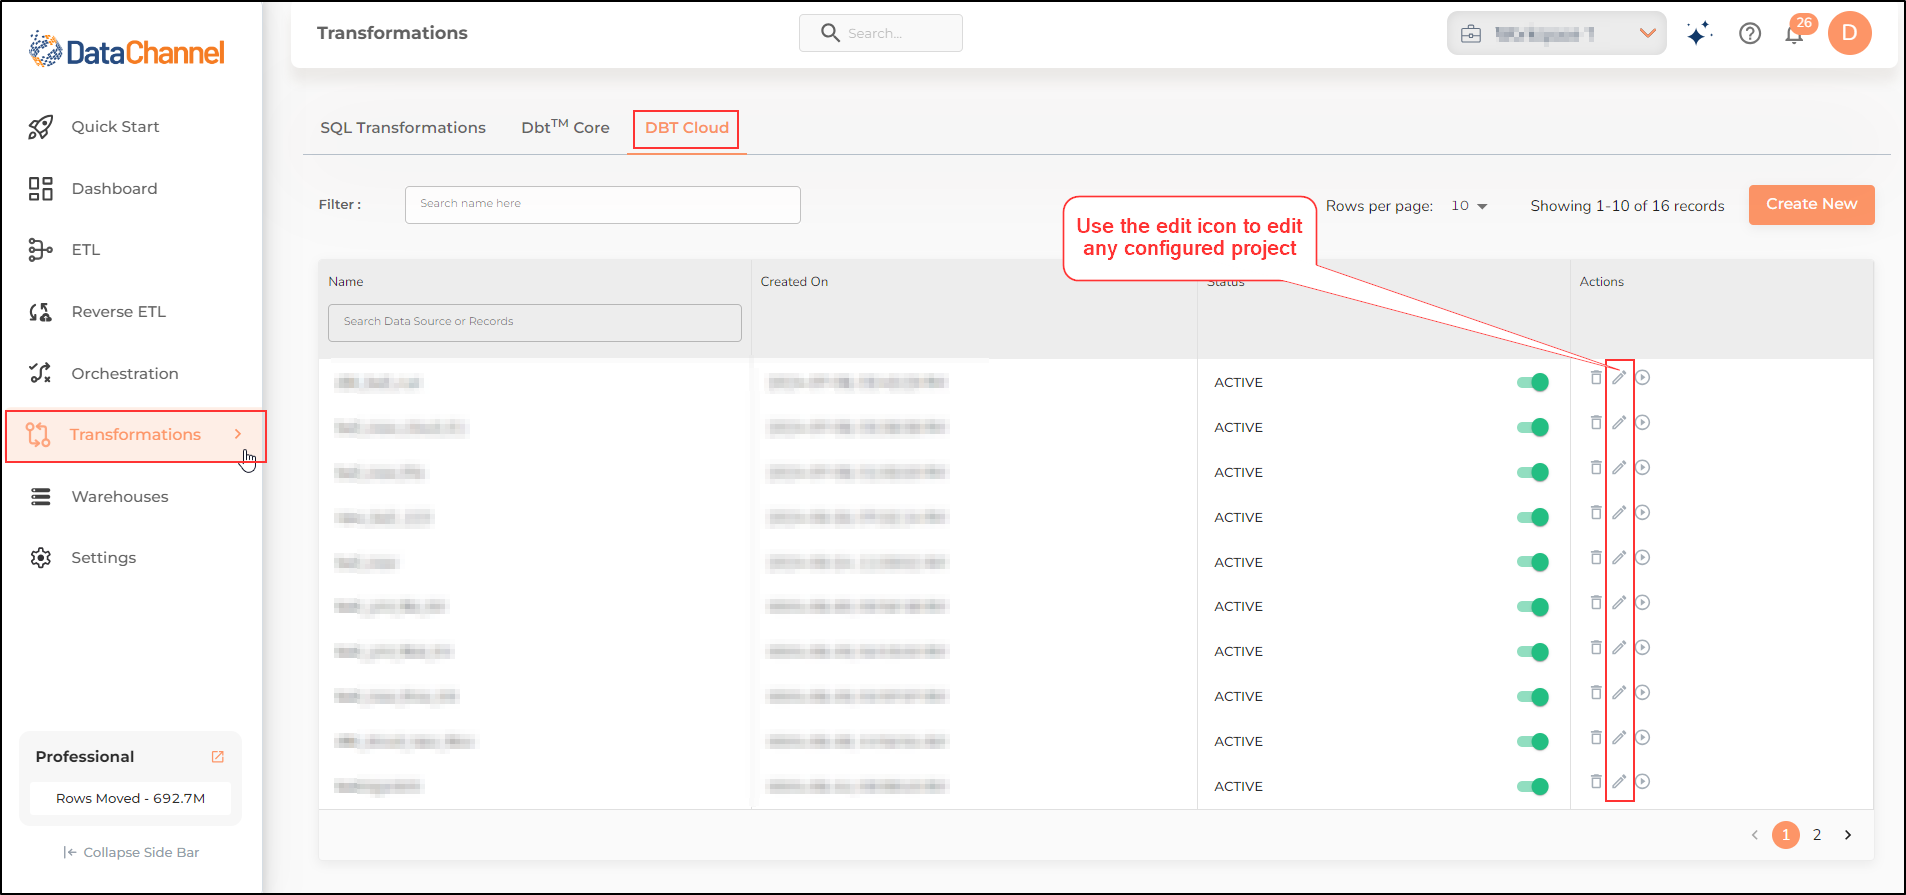
-
Once you have finished configuring your dbt™Cloud project, you will be redirected back to the main transformation screen where you can view a list of configured dbt™ Cloud transformations. On the screen, you will notice an actions column wherein you can see an Edit icon.
-
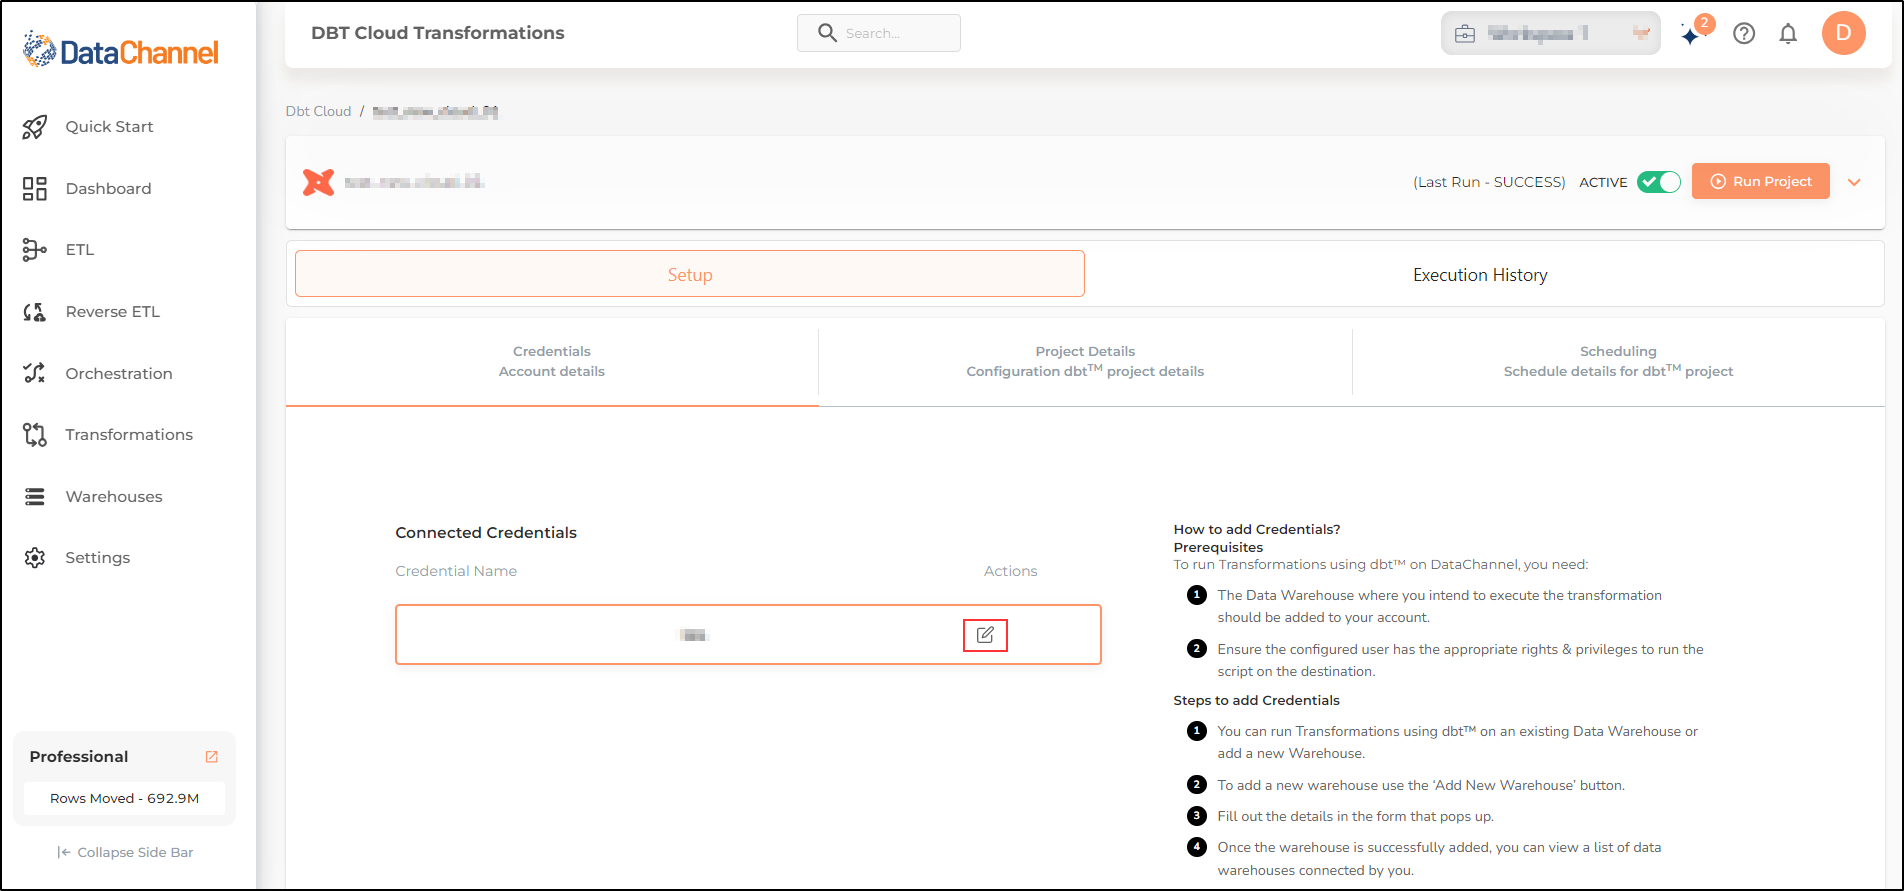
Clicking on the Edit icon will redirect you to the following ‘Edit dbt™ project’ screen. You will notice that the screen is divided into two side-by-side tabs namely, ‘Setup’ and ‘Execution History’ . You will also be able to view ‘Last Run’ Status to ascertain whether the previous run was successful.
-
The ‘Setup’ Tab is further subdivided into three sections:
-
The ‘Credentials’ section shows your connected credentials and allows you to edit the credentials using the Edit icon.
-
The ‘Project Details’ section shows your Configured dbt™Cloud project details and allows you to change your dbt™Cloud project name, Account, Job and the other advanced settings. Once you have made the changes, you can click on Save.

-
The ‘Scheduling’ section shows the details regarding scheduling of your configured dbt™Cloud project and allows you to change its schedule . Do be mindful to click the Save button if you have made changes to scheduling.

-
-
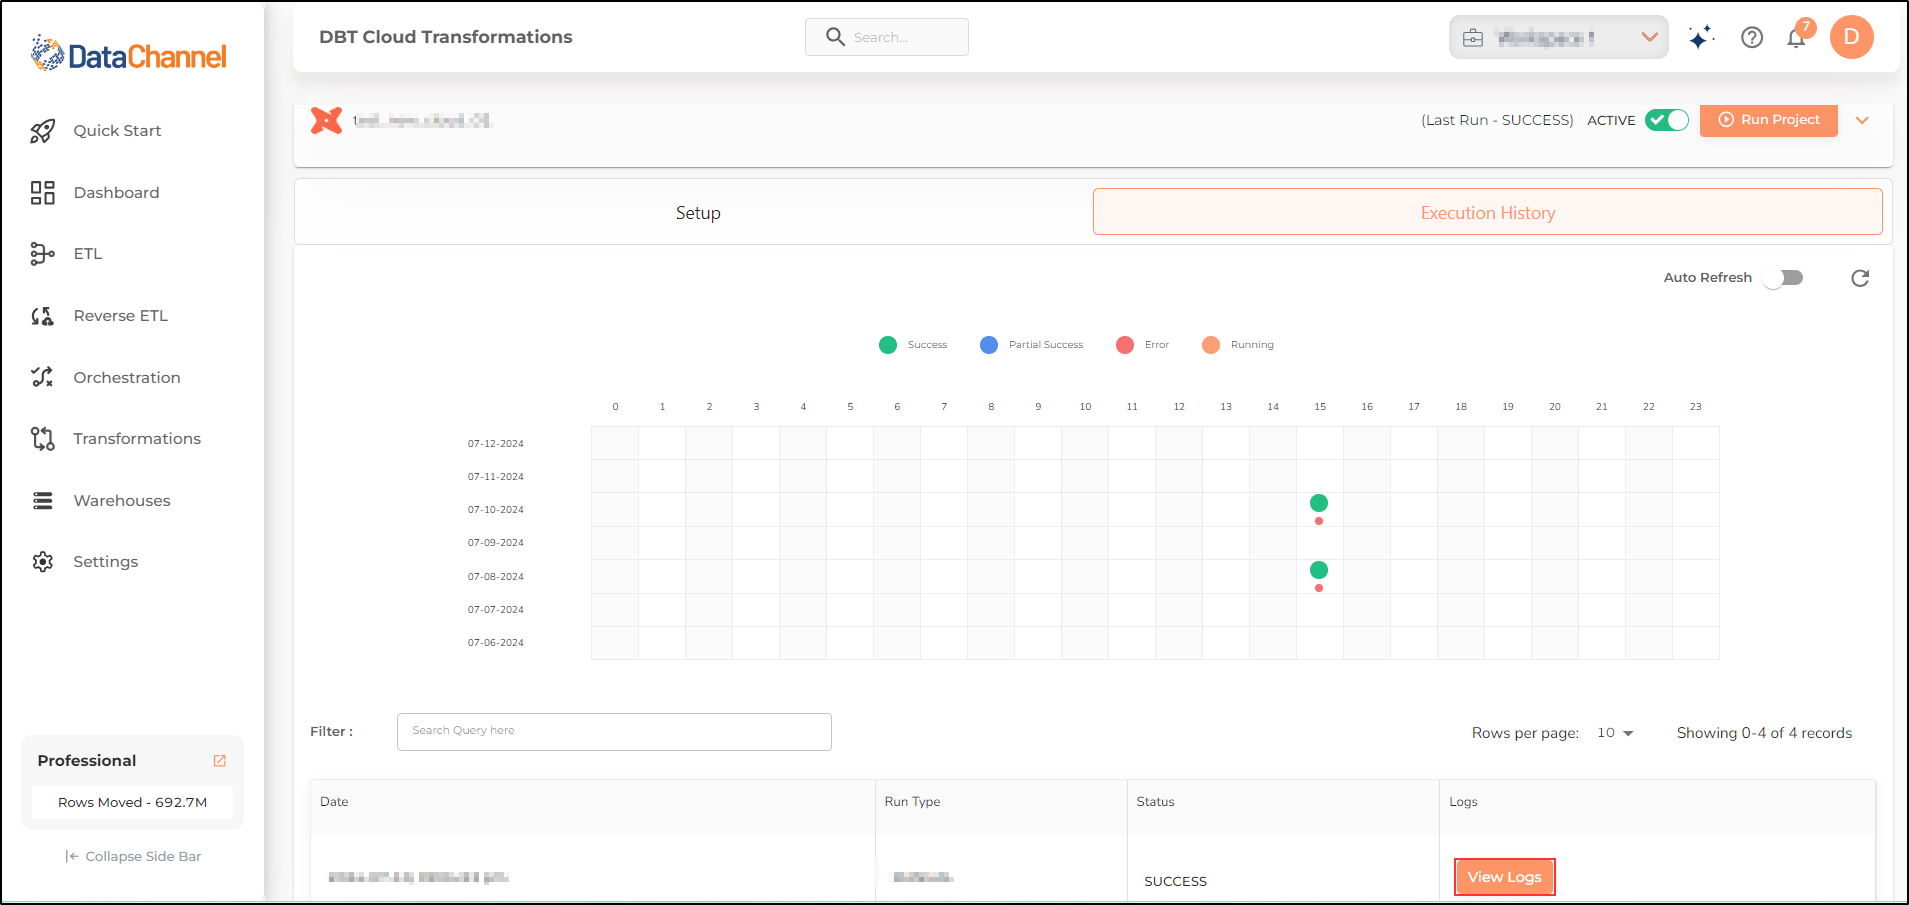
The ‘Execution History’ Tab displays the execution details of the configured dbt™Cloud project/ models in reverse chronological order in a tabular format. You can view the status of run from the ‘Status’ column. The rightmost column contains the link to view logs for the particular run.
Quick snapshot your dbt™Cloud Project Details
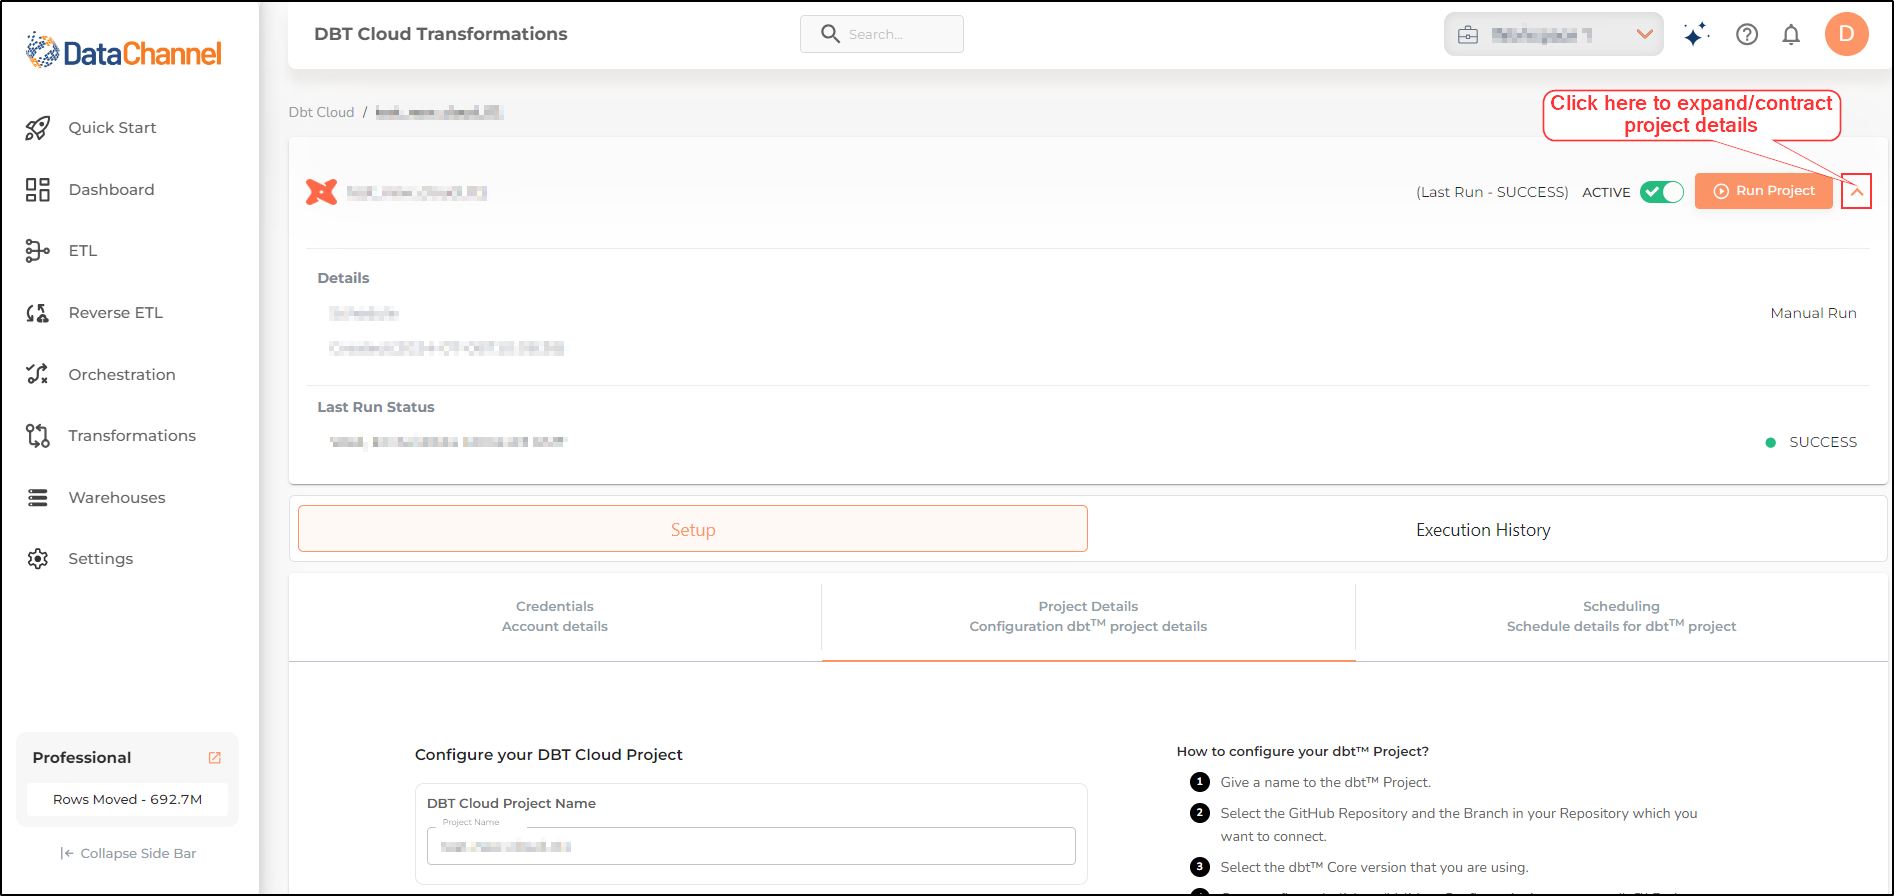
Clicking on the Arrow icon near the top right corner ( in the ‘Edit dbt™ project’ screen) allows you to collapse / expand the accordion at any time to view your dbt™Cloud Project Details. Clicking on this icon provides the details about scheduling of the dbt™Cloud Project and the status of last run.
| dbt™Cloud is a trademark of dbt Labs, Inc. All rights therein are reserved to dbt Labs, Inc. DataChannel is not a product or service of or endorsed by dbt Labs, Inc. |
Still have Questions?
We’ll be happy to help you with any questions you might have! Send us an email at info@datachannel.co.
Subscribe to our Newsletter for latest updates at DataChannel.