Create & Manage Transformations using dbt™ Core (Beta)
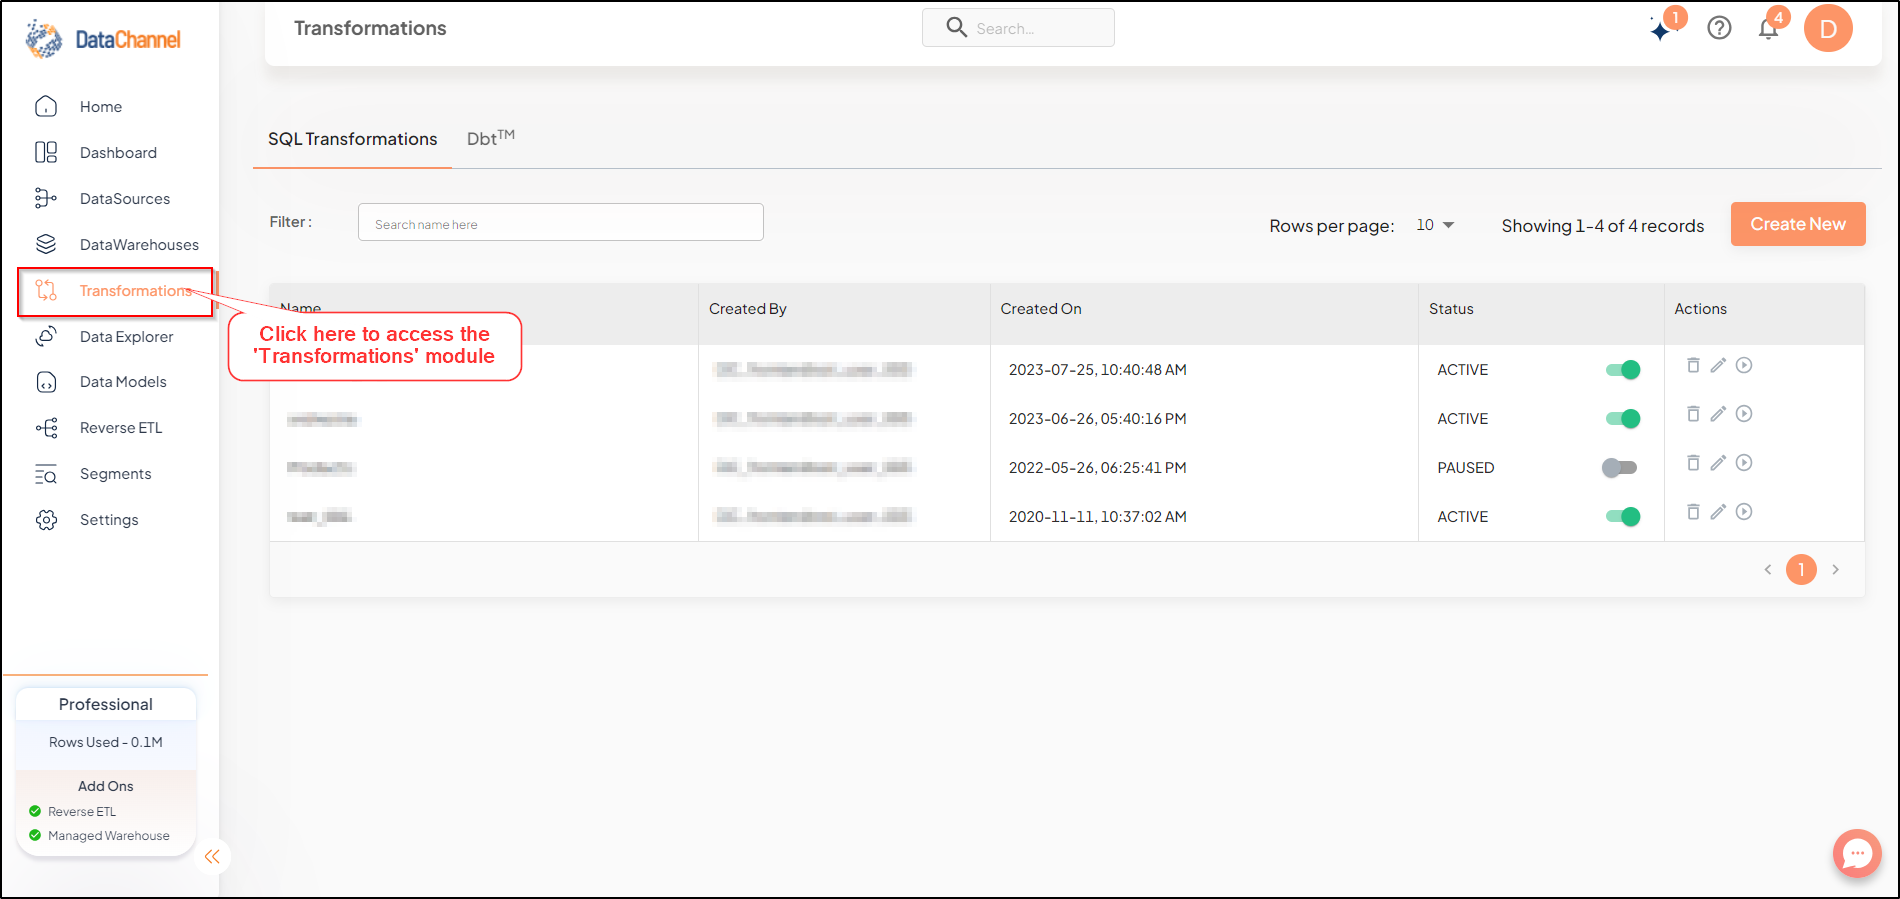
Click on the Transformations link in the Sidebar as shown below:
Adding a new Transformation
|
Prerequisites (for configuring dbt™Core Project)
|
Step by Step Process
- Step 1
-
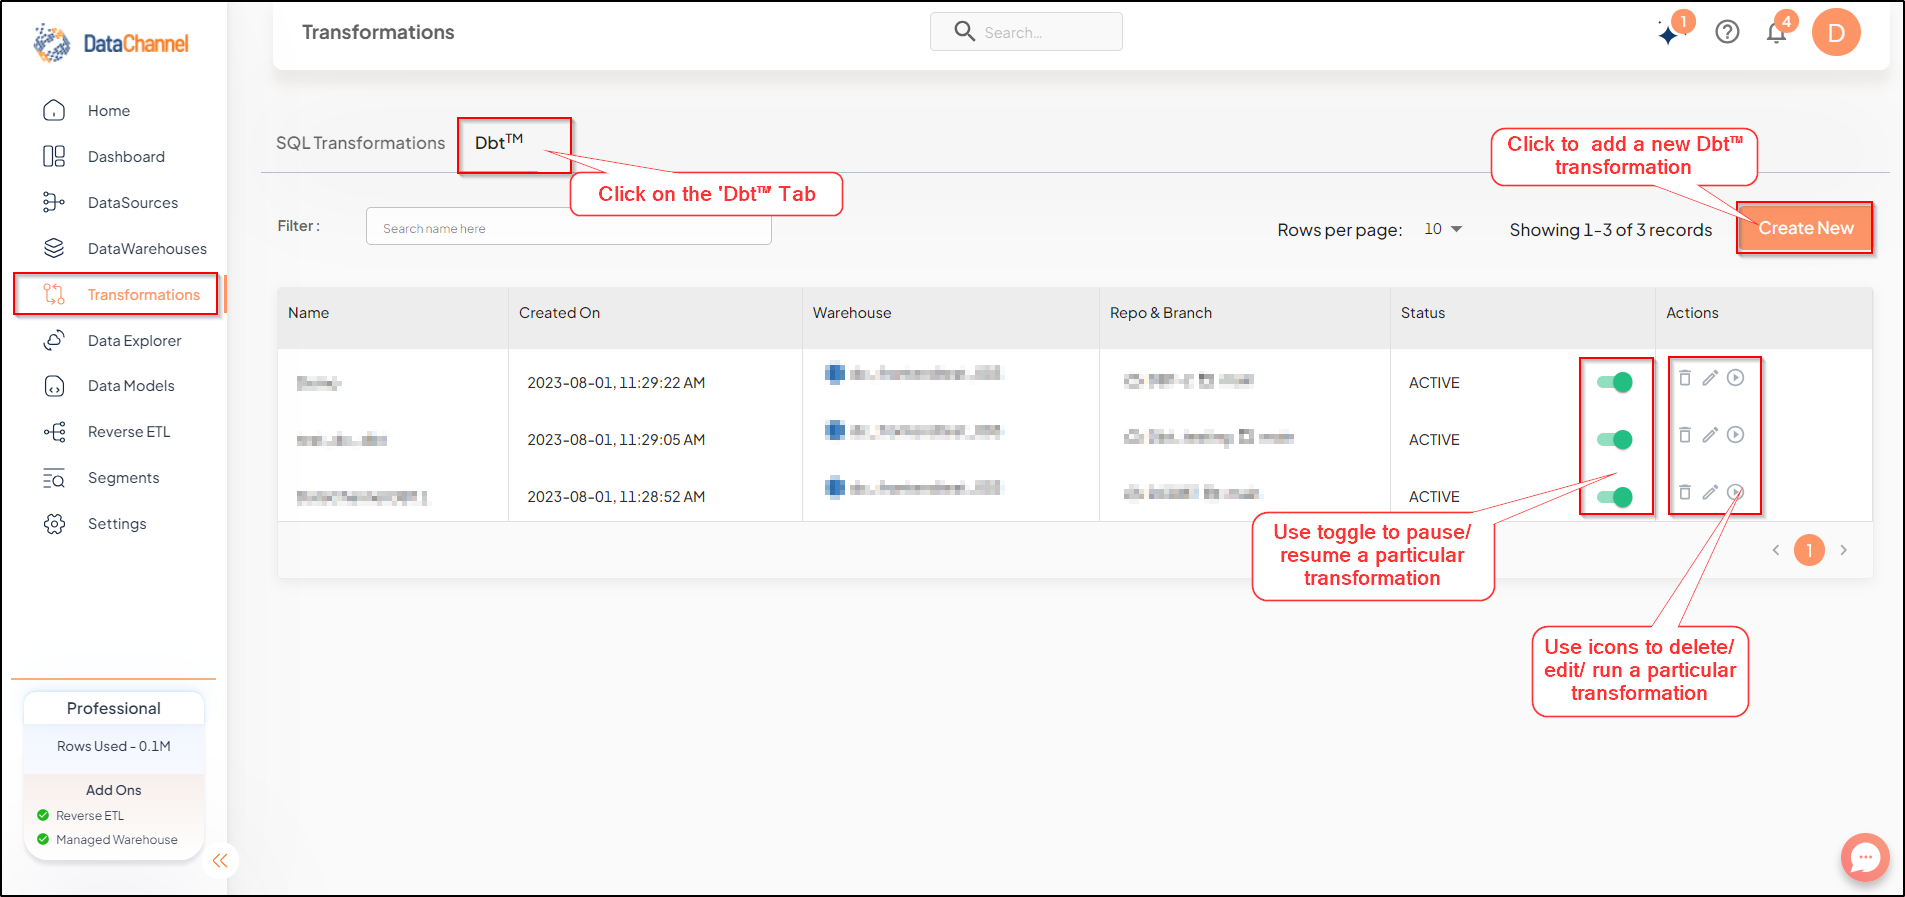
Go to the second pane which is the Dbt™ Core Tab. You will be able to view the configured dbt™Core projects list.
- Step 2
-
Click on the Create New button to create a new transformation for applying to your data in the data warehouse.

- Step 3
-
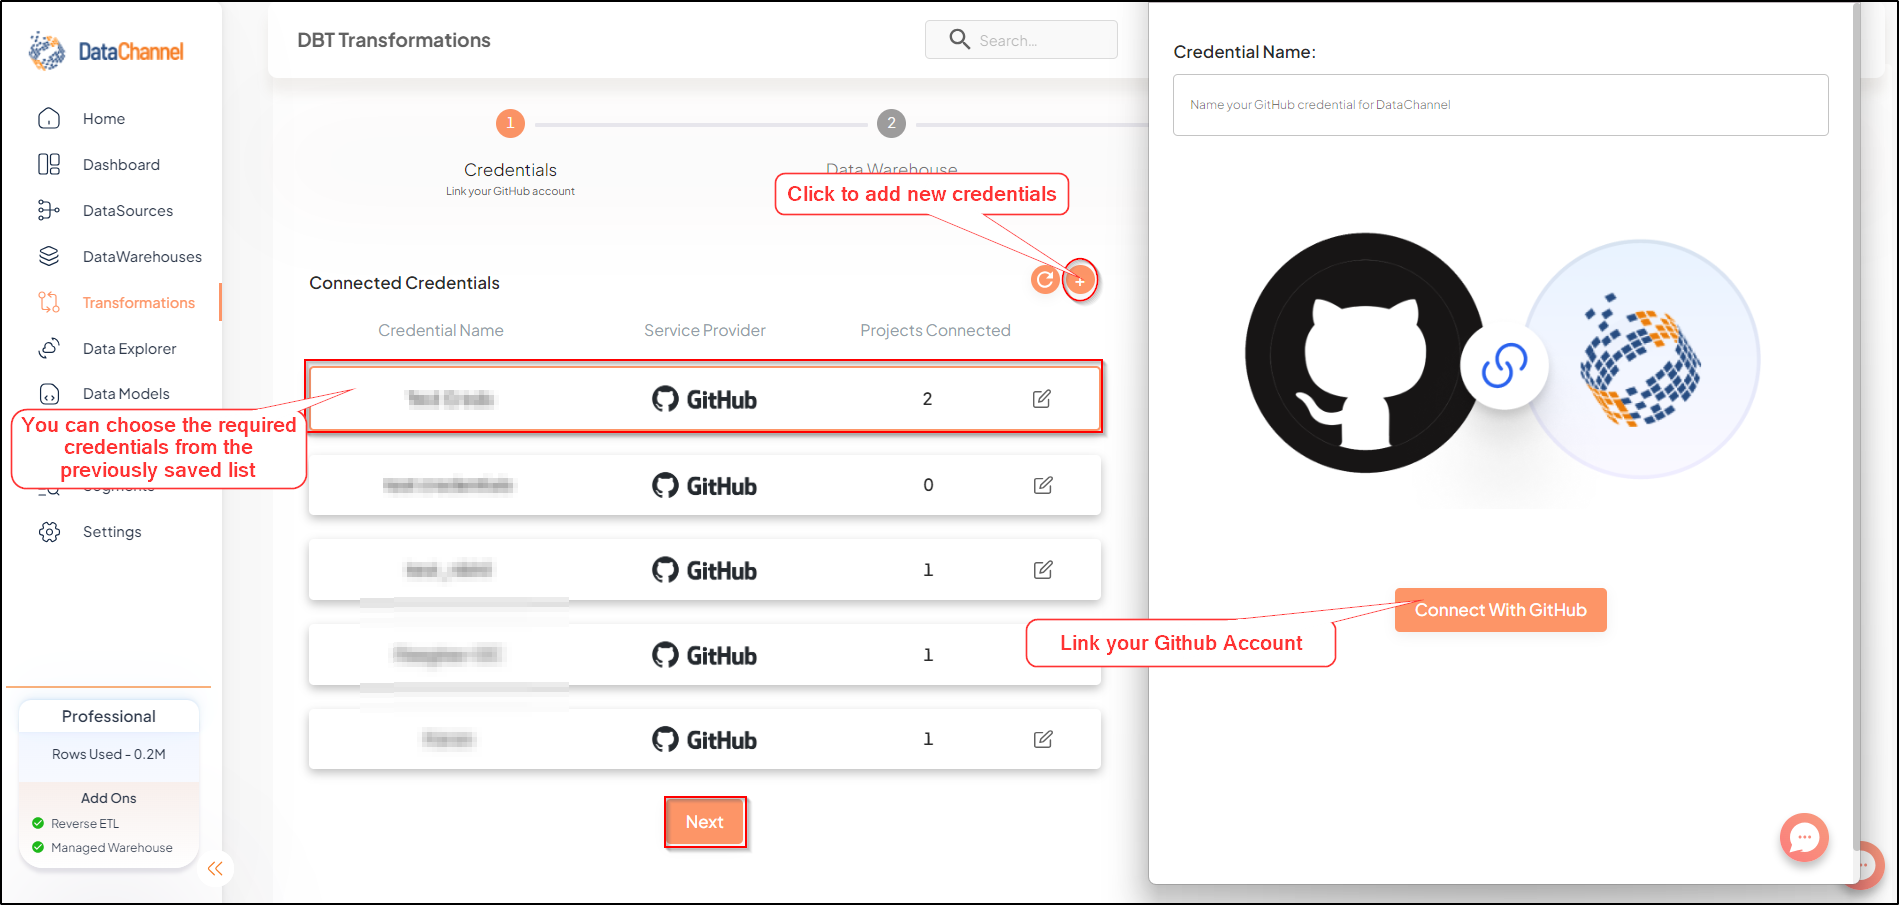
You will be prompted to add the credentials of your GitHub Account. Don’t forget to click the Connect with GitHub button. You will be redirected to the OAuth popup to authorize access to your data. Once the authorization is complete, you’ll be able to view a list of connected credentials. To update your credentials use the edit icon. Once selected click on Next.
- Step 4
-
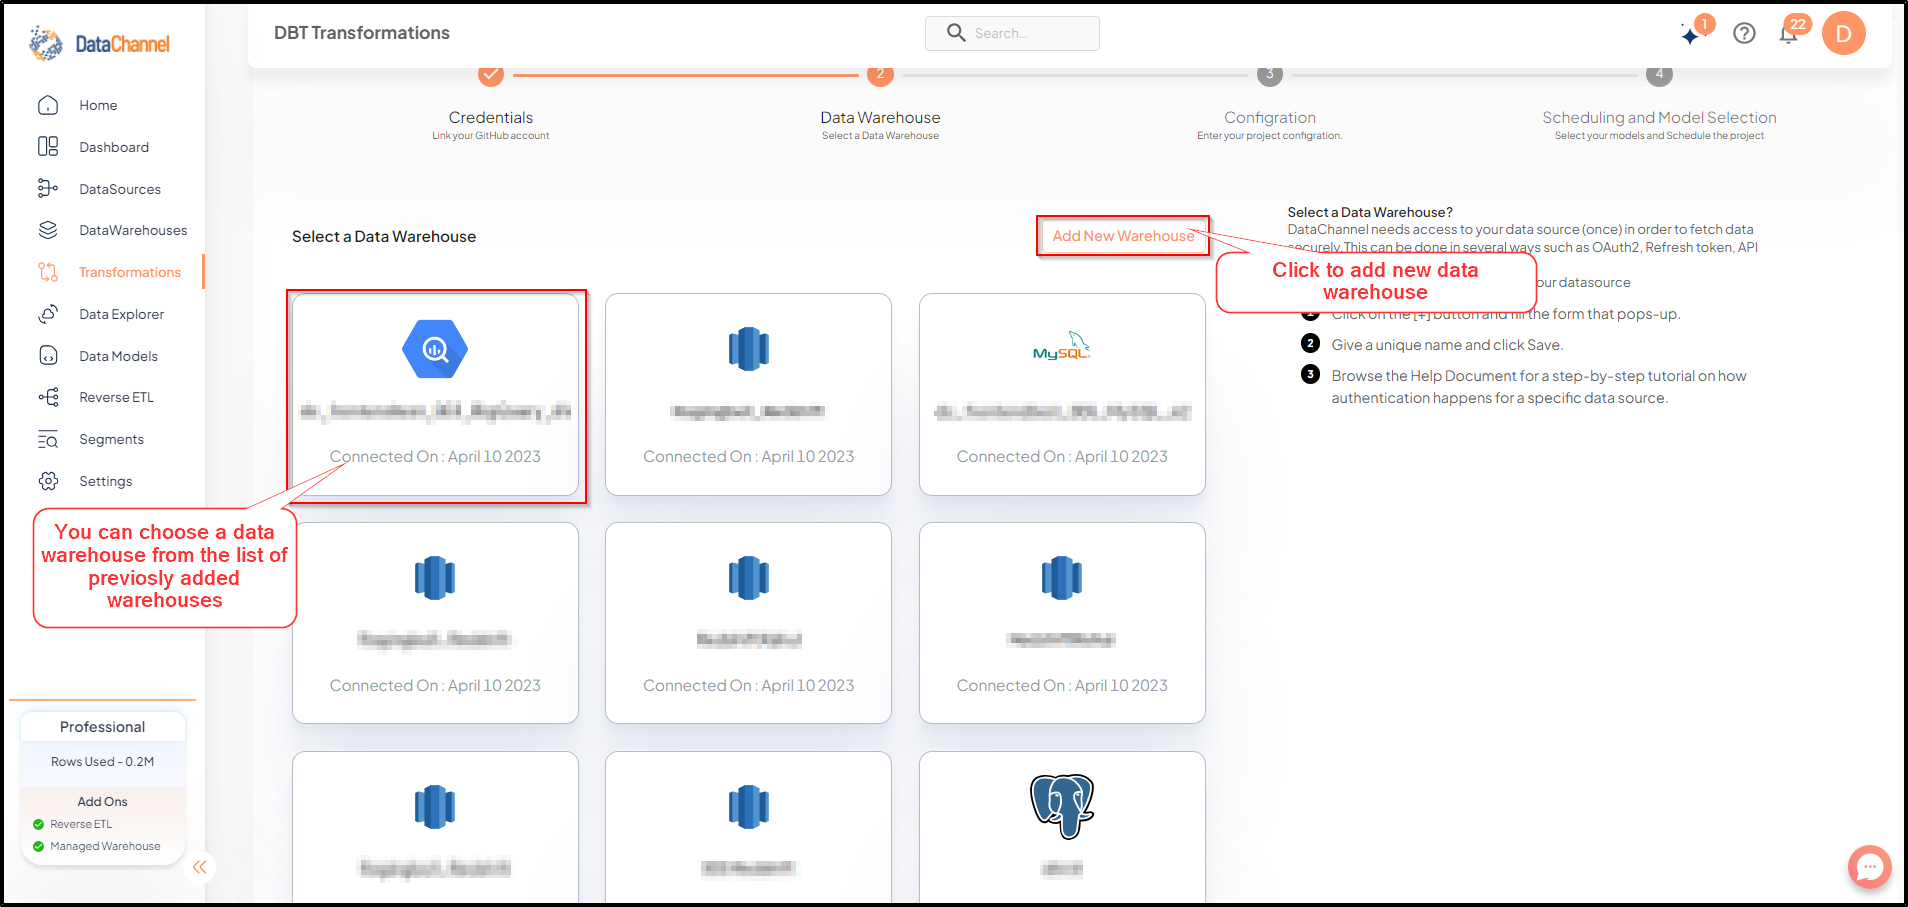
On the main UI screen you can view a list of data warehouses connected by you. You can connect the warehouse where you wish to run the transformation. You may also add a new warehouse using the Add New Warehouse button and fill out the details in the form that pops up. Refer the How-to-guides section for detailed instructions on adding your warehouse. Once the required warehouse is selected click on Next.
- Step 5
-
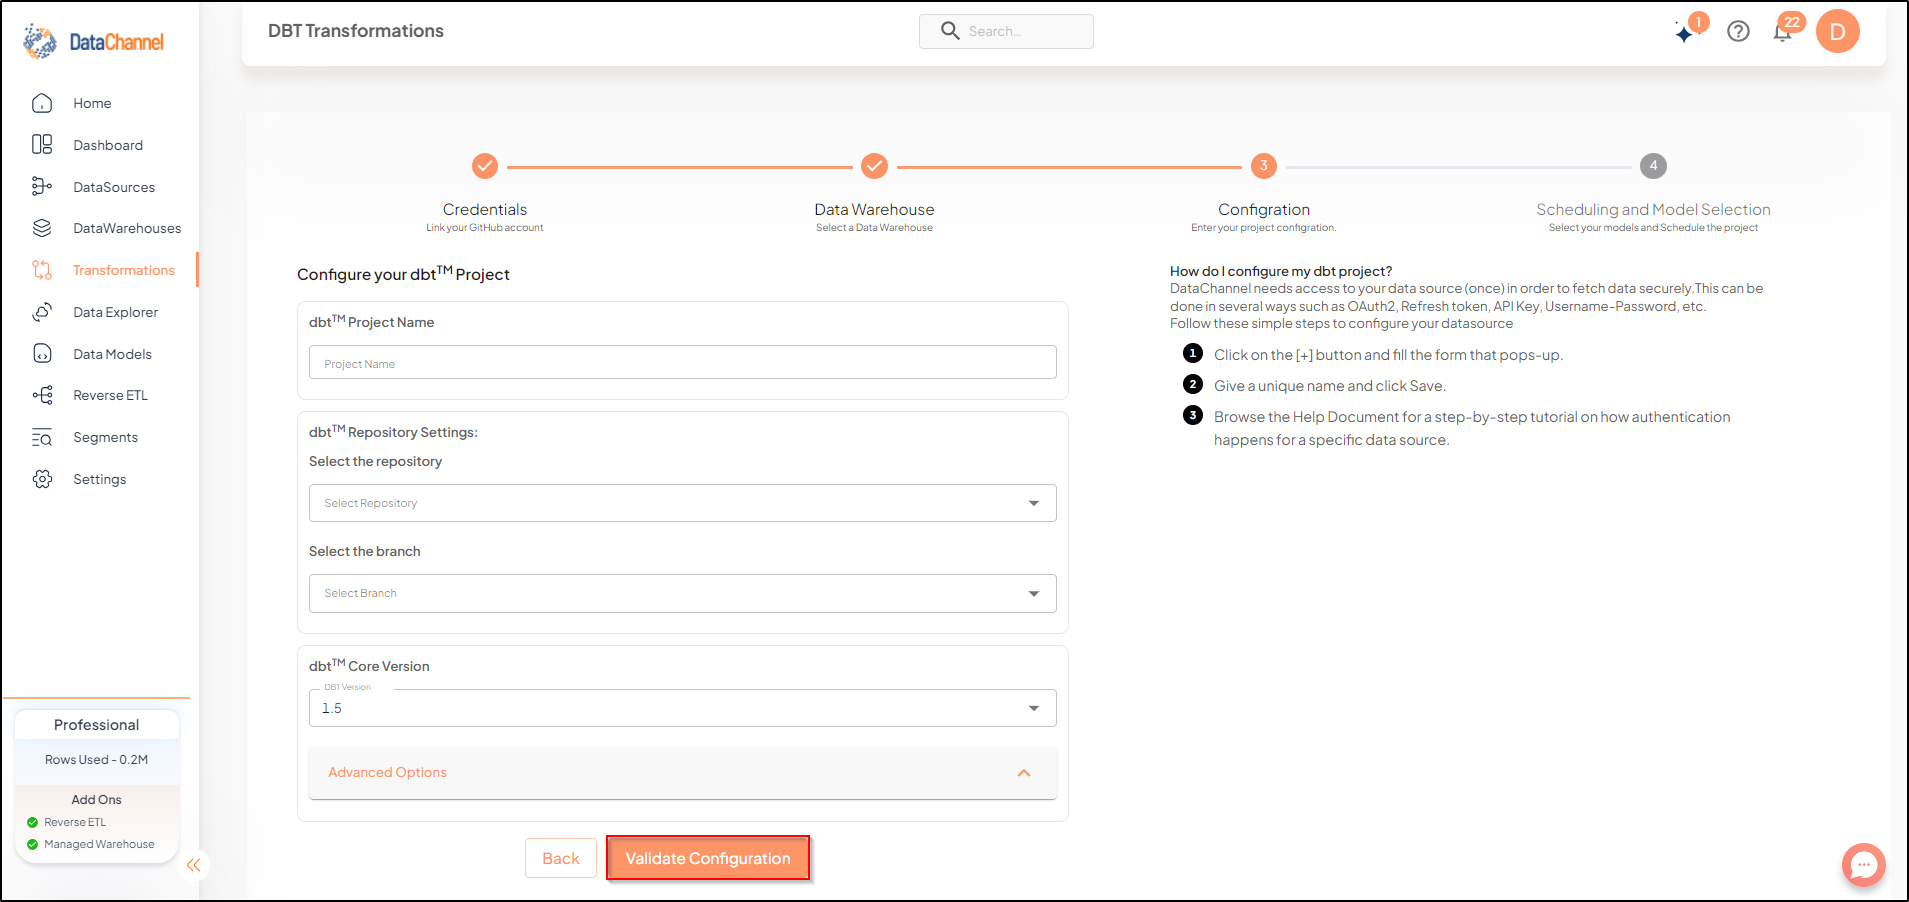
Enter the dbt™ Project configuration in the fields that appear on the screen. Give a name to the dbt™ Project and select the GitHub Repository and the Branch in your Repository which you want to connect to. Select the dbt™Core version that you are using. Also, specify which command would you like to run (defaults to dbt run):
-
build - build and test all selected resources (models, seeds, snapshots, tests).
-
run - runs the models in a project.
-
test - executes tests defined in a project.
-
snapshot - executes "snapshot" jobs defined in a project.
-
- Step 6
-
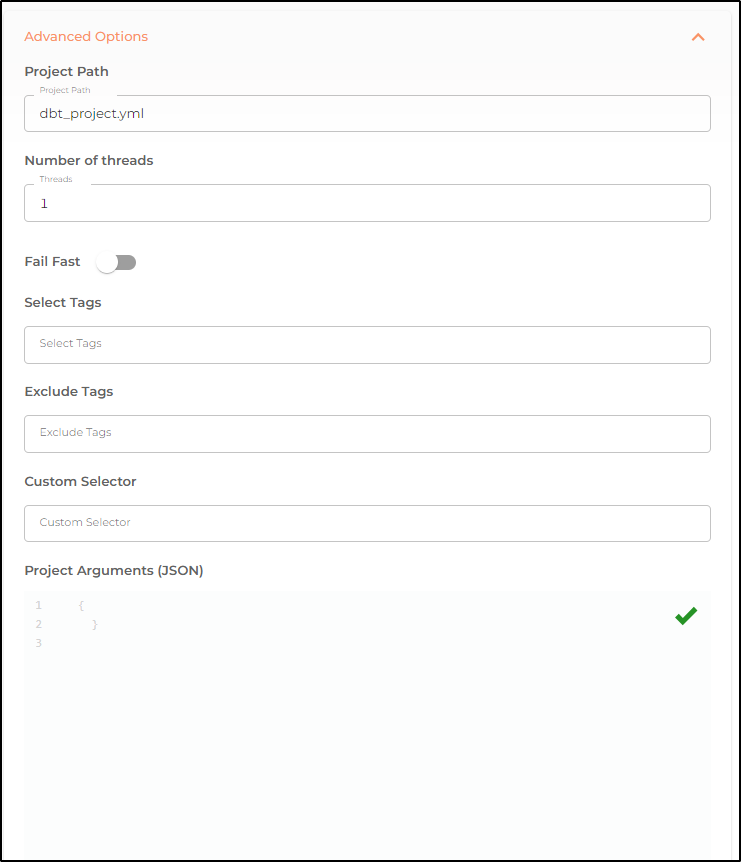
You can also make use of the advanced options which are:
-
Project Path - Specify the Project Path to dbt_project.yml in the repository.
-
Number of threads - Specify the number of threads (ranging from 1 to 32). Increasing the number of threads would increase the cost incurred on the warehouse.
-
Fail Fast - Supply the
--fail-fastflag todbt runto make dbt exit immediately if a single resource fails to build. If other models are in-progress when the first model fails, then dbt will terminate the connections for these still-running models. -
Tags - Apply a tag to a resource and use tags to run parts of your project. These tags can be used when running the dbt model to run parts of your project.
-
Select Tag - The
--selectflag is used to specify a subset of nodes to execute. The--selectflag will include a specific resource by its tag. -
Exclude Tag - The
--excludeflag will exclude a specific resource by its tag. Models specified with the--excludeflag will be removed from the set of models selected with--select. -
Custom Selector - As your selection logic gets more complex, and becomes unwieldy to type out as command-line arguments, consider using a custom selector. You can use a predefined definition with the
--selectorflag. Note that when you’re using--selector, most other flags (namely--selectand--exclude) will be ignored. -
Project Variables - dbt™ provides a mechanism, variables, to provide data to models for compilation. Variables can be used to configure timezones, avoid hardcoding table names or otherwise provide data to models to configure how they are compiled.
Variables can be passed from your dbt_project.yml file into models during compilation. These variables are useful for configuring packages for deployment in multiple environments, or defining values that should be used across multiple models within a package.
To use a variable in a model, hook, or macro, use the
{{ var('…') }}function.E.g.: To add a variable to a model, use the var() function:
select * from events where event_type = '{{ var("event_type") }}'Now in the Datachannel Console you can define the value of the above project variable as:
{event_type:'signup'}Once configured, you can click on Validate Configuration to test your dbt™ project.
-
- Step 7
-
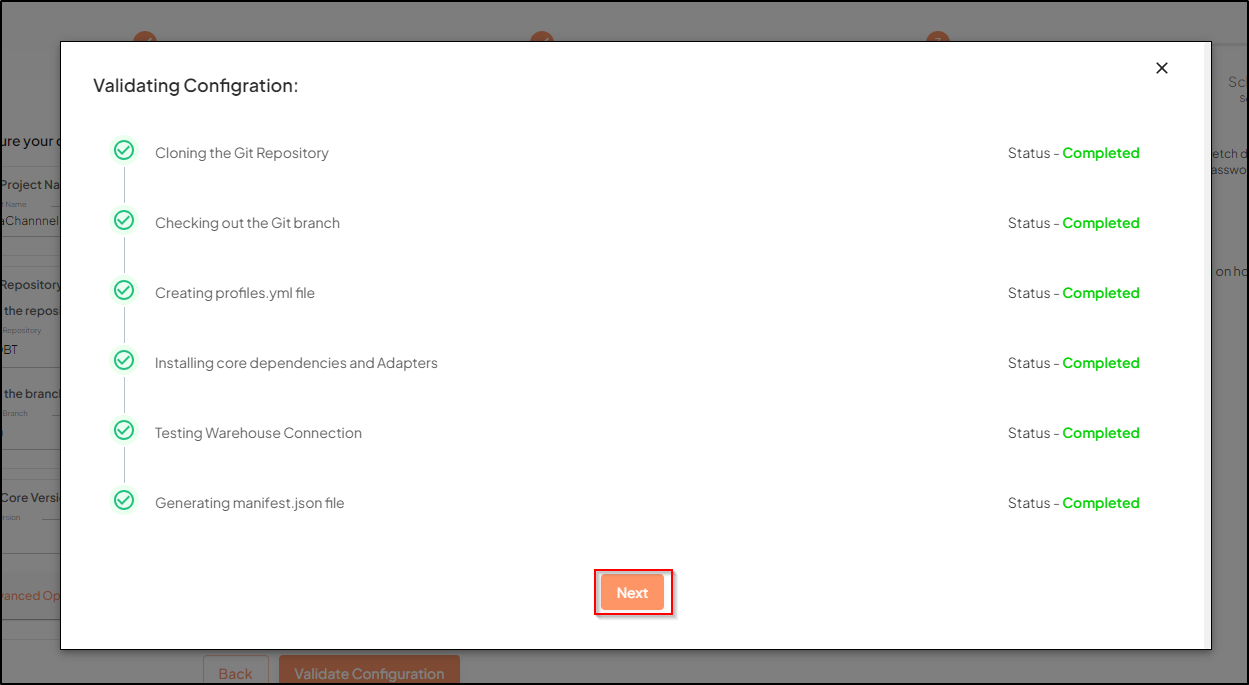
A pop up window will show you the progress of validation. Please wait till the process is completed.Once the details are validated, click Next.
- Step 8
-
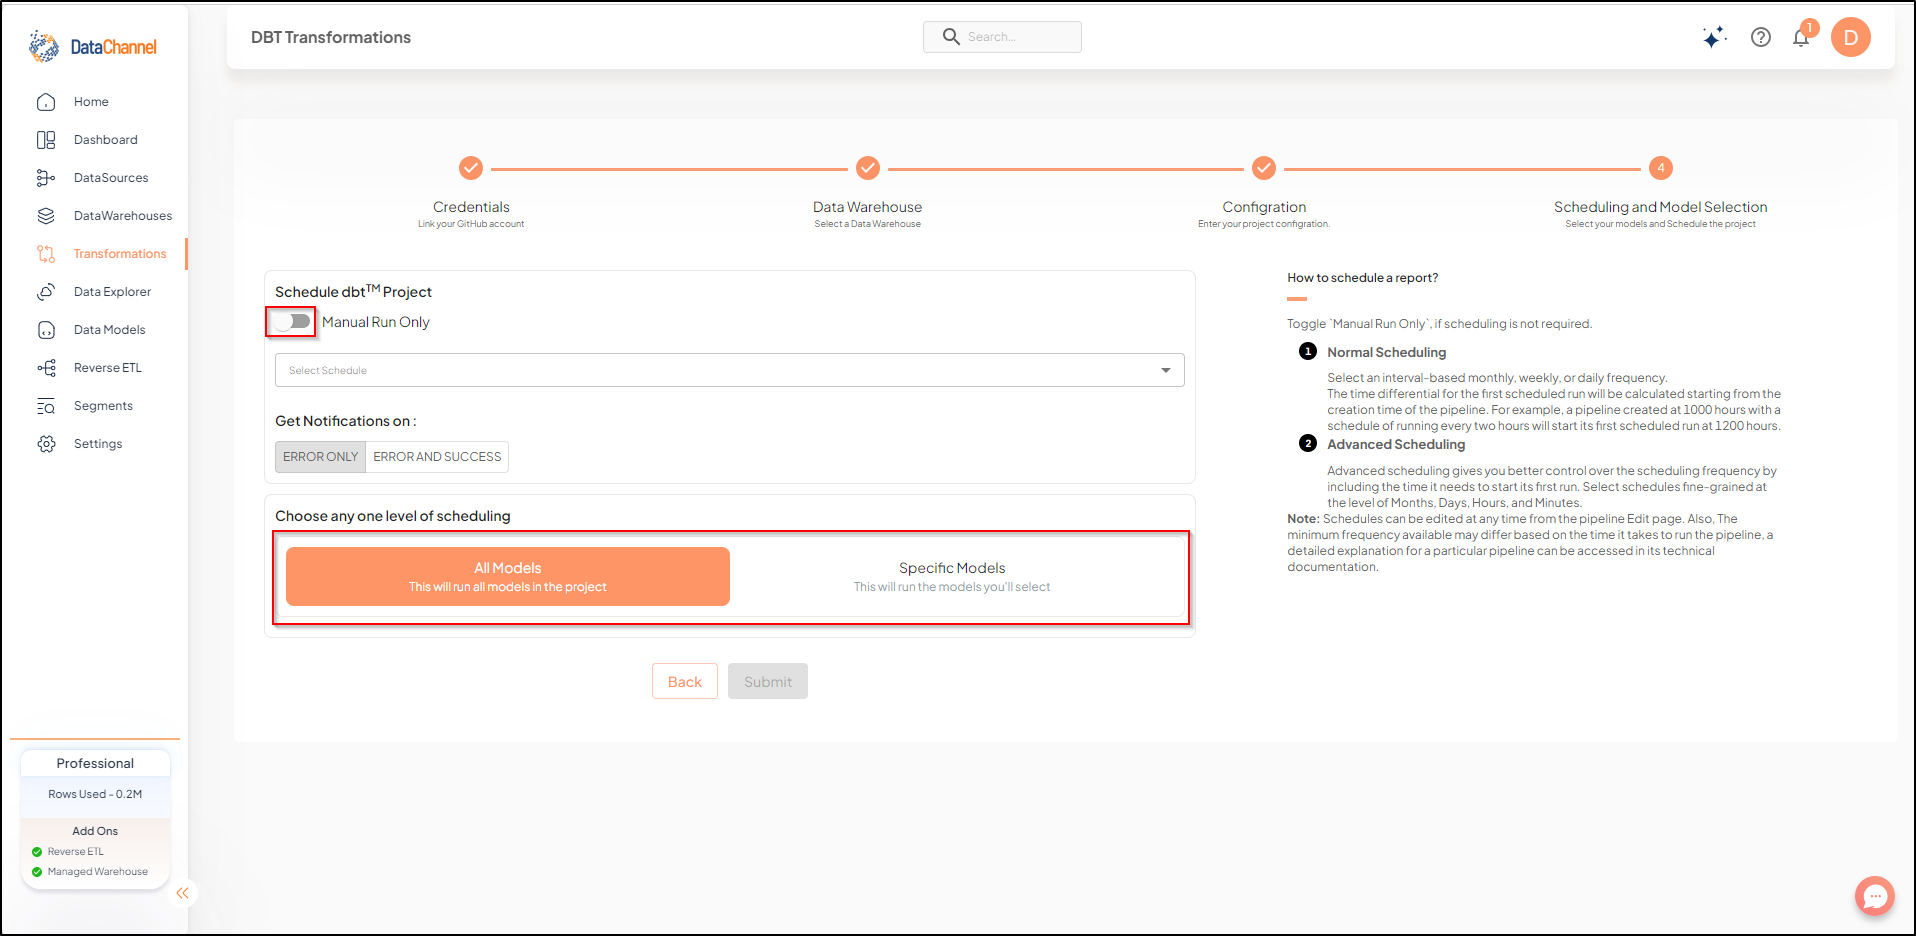
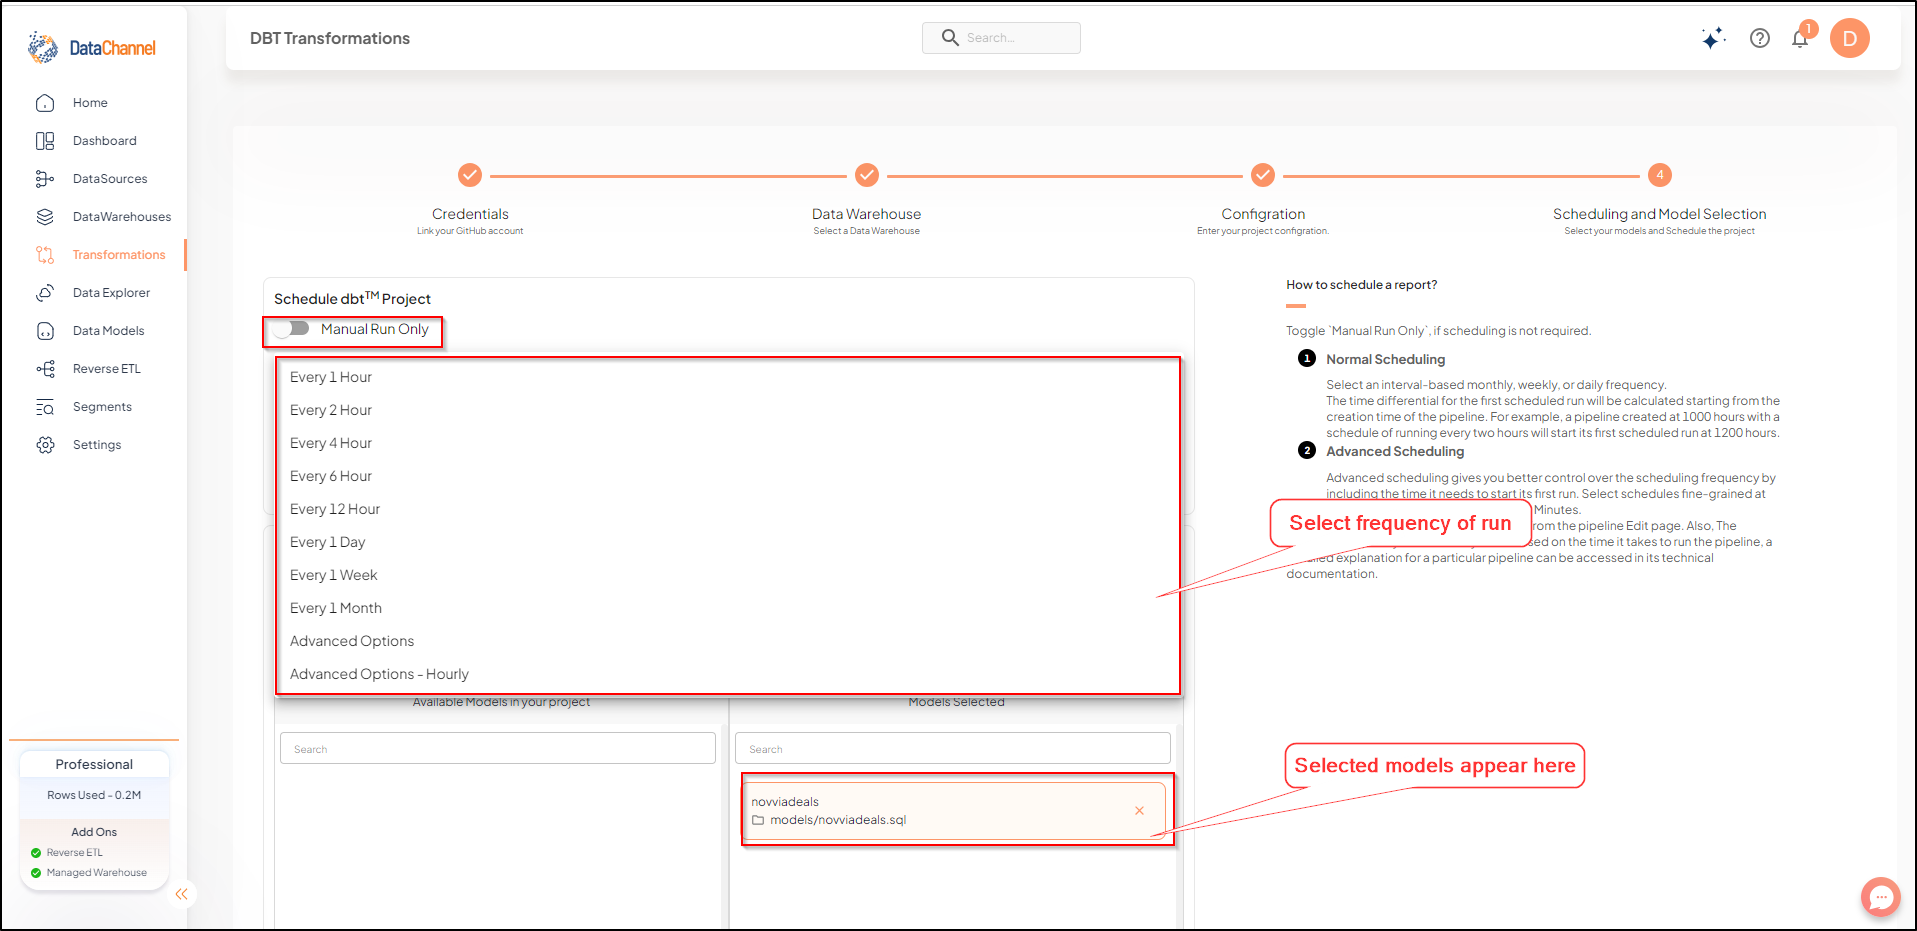
Using the toggle, you can choose between Manual run and Scheduled run. Also, you can choose to either schedule the entire project or schedule specific models only. You need to select the frequency of running as per your business requirements. Once finished, click on Submit.
- Step 9
-
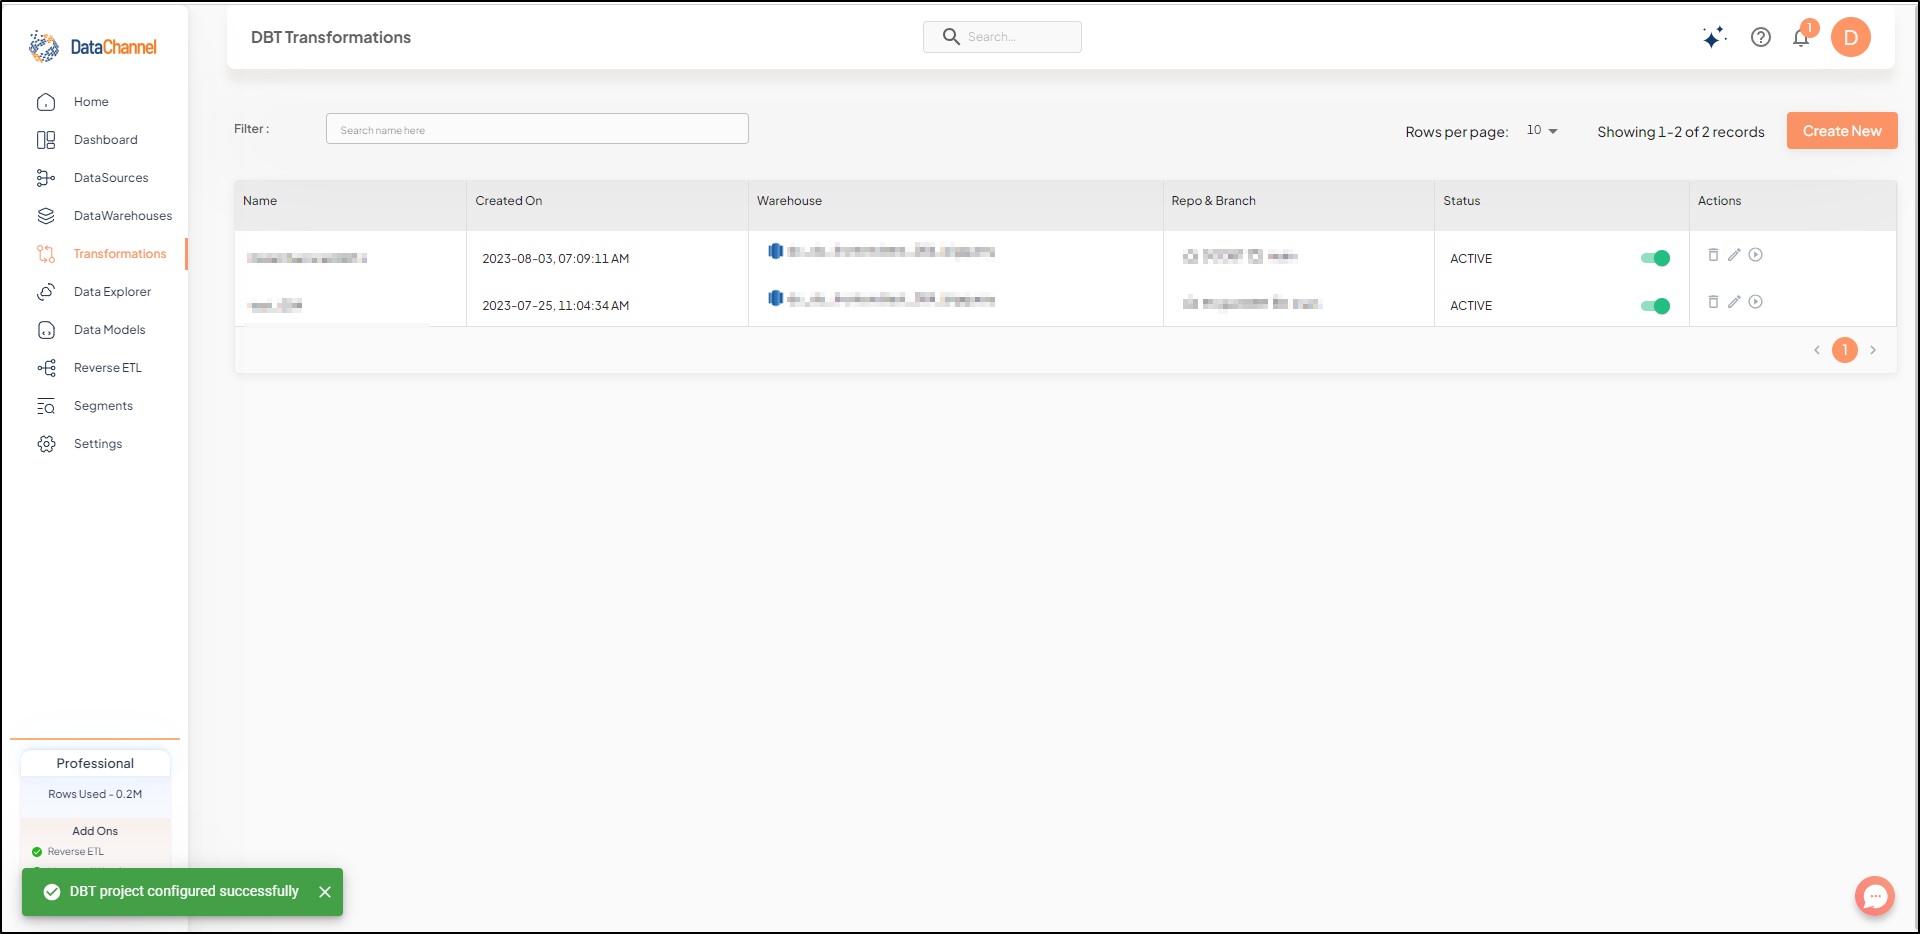
Once you have finished configuring your dbt™Core project, you will be redirected to the following screen:
Scheduling the run for your dbt™Core project
DataChannel offers various modes of running / executing your dbt™Core project. The most common way is to schedule the dbt™Core project/selected models to run on a predefined time schedule, but you also have the option of manual run of a dbt™Core project/selected models.
Manual Run
In order to run a dbt™Core project only when needed, you can use the toggle to set its schedule to Manual Run only. Thereafter, you can choose whether you want to schedule the entire dbt™Core project or run only selected models.
-
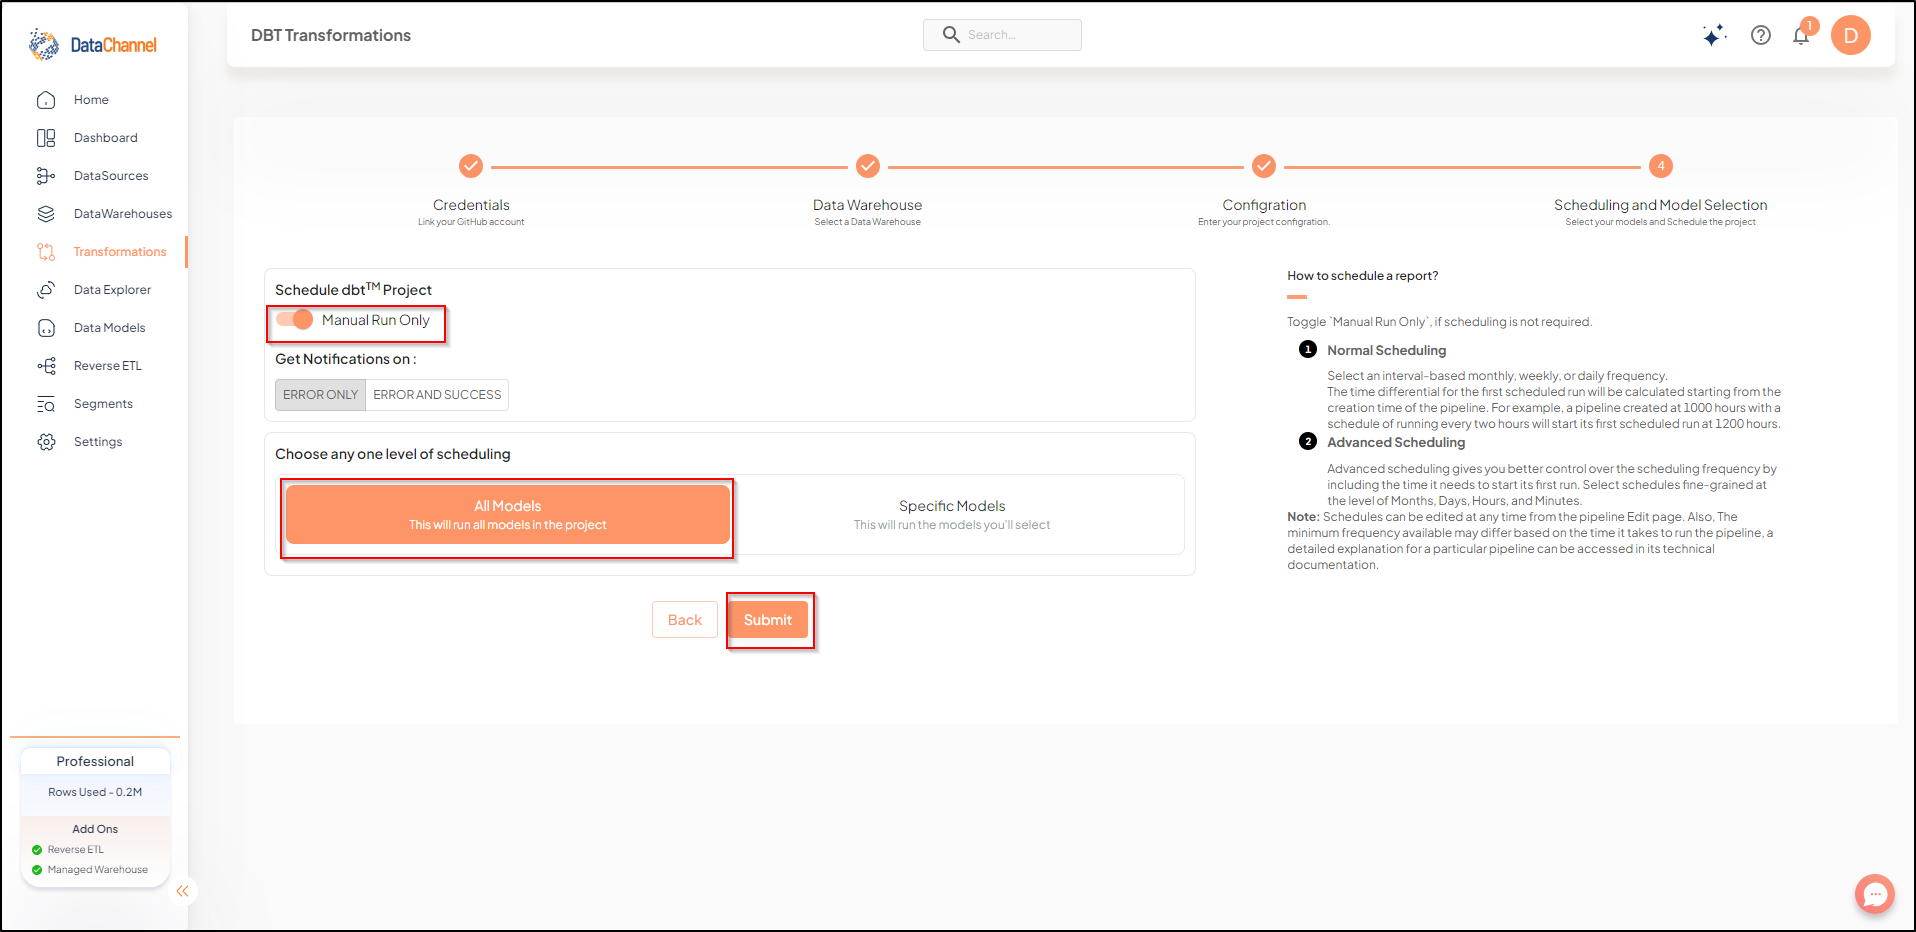
If opting for manual run of the entire dbt™Core project, the following screen will be visible. Set the toggle as shown in image below, choose level of scheduling as 'All Models' and, click on Submit.
-
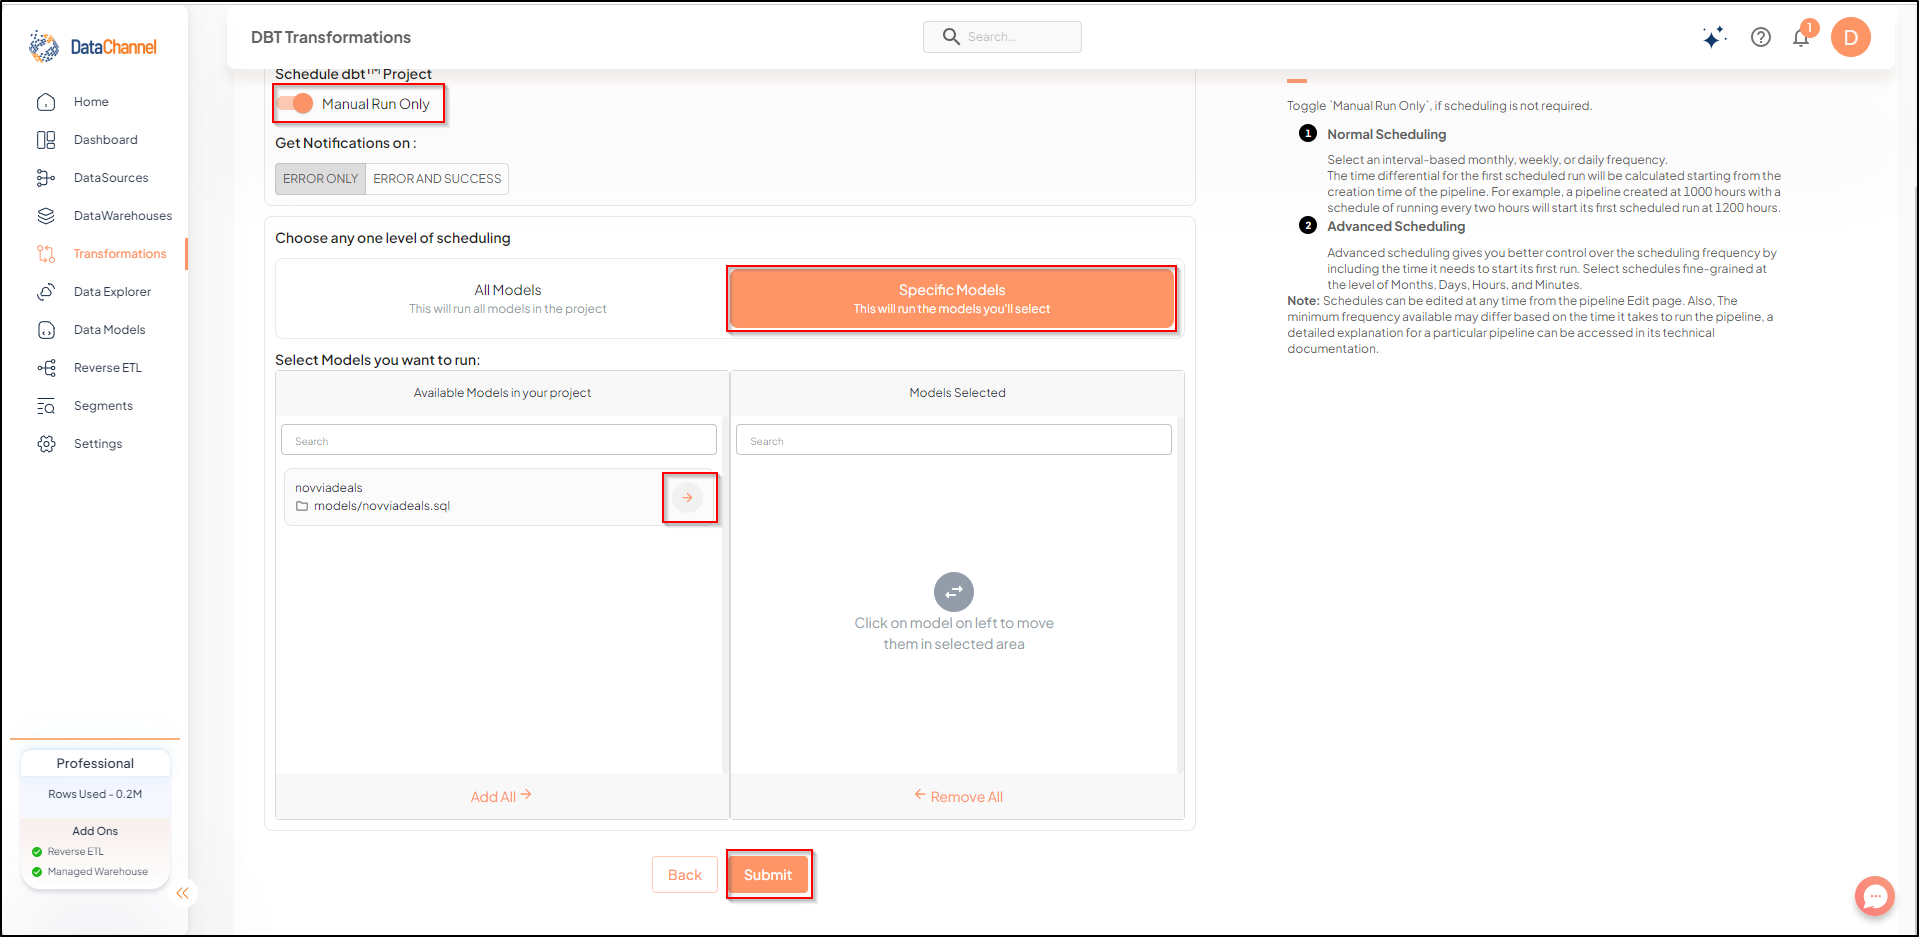
If manually scheduling only selected models, the following screen will be visible. Select the models you would like to schedule. Set the toggle as shown in image below and, click on Submit
Scheduled Run
In order to run a dbt™Core project to run on schedule, you can use the toggle to turn off Manual Run. This scheduling option gives you a fine grained control over when to run your transformation.
-
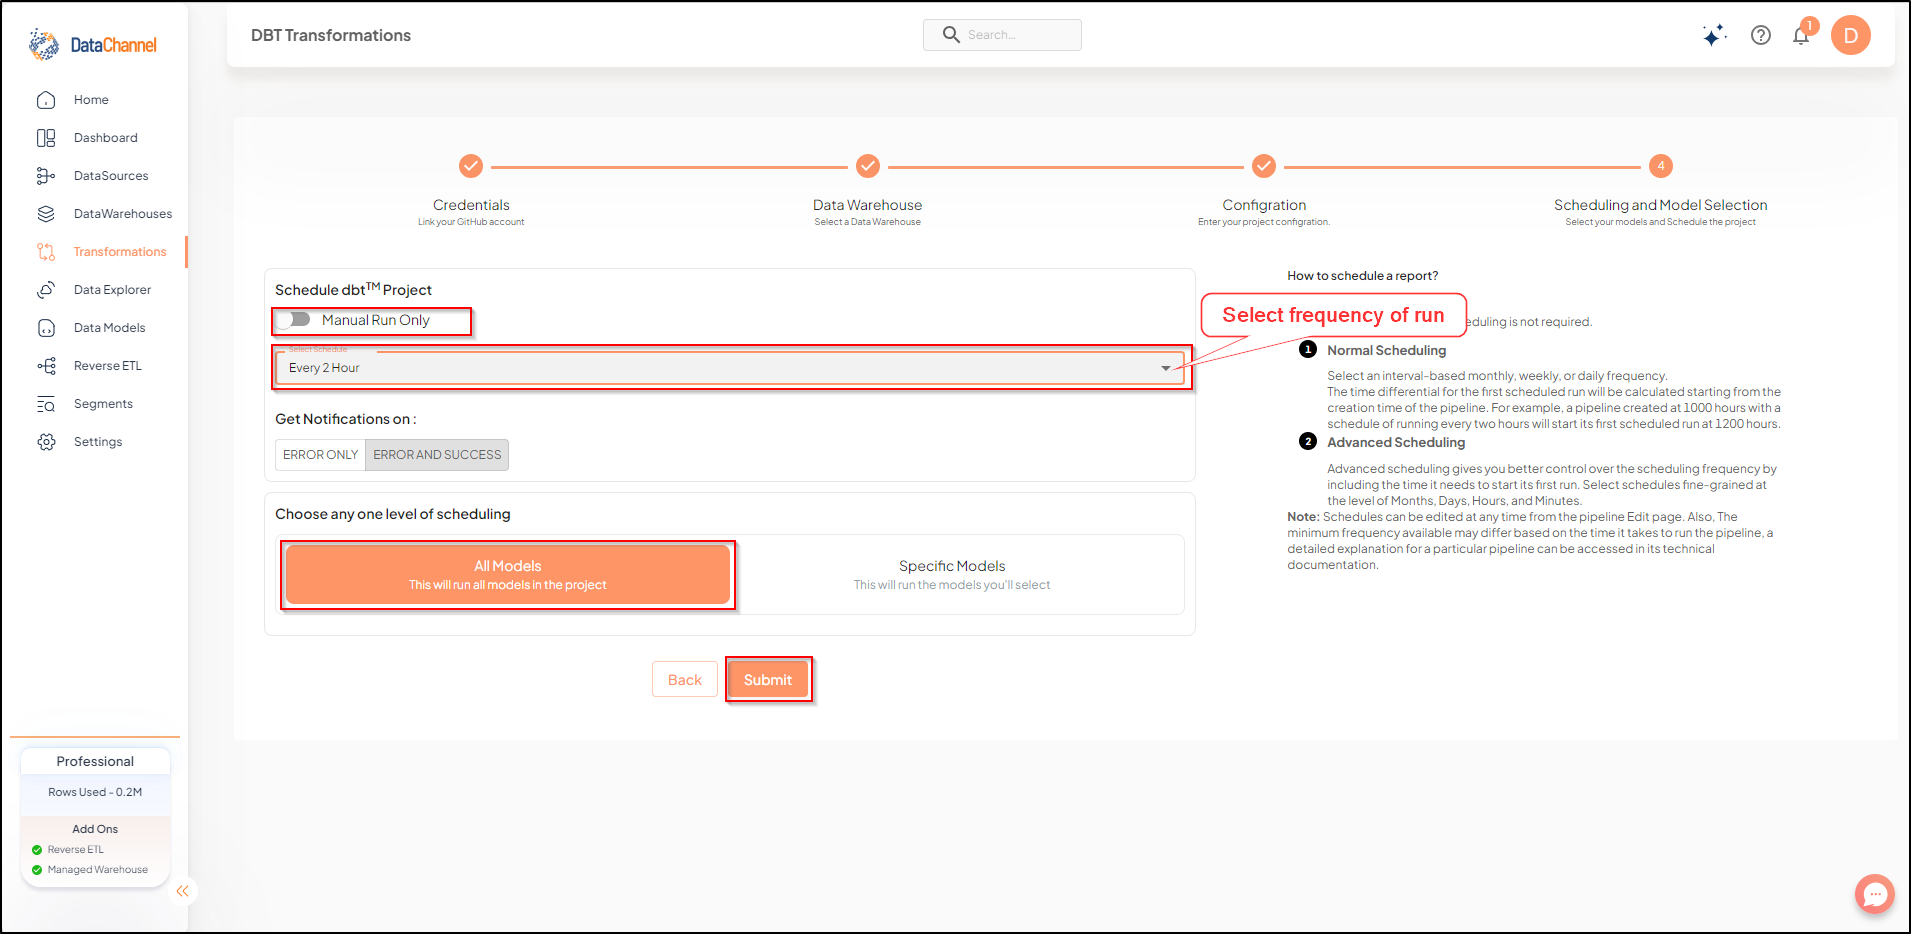
If opting for predefined scheduling of the entire dbt™Core project, the following screen will be visible. Set the toggle as shown in image below and define the frequency of run in the fields below based on your business requirements. Once finished, click on Submit.
-
If choosing predefined scheduling of selected models only, the following screen will be visible. Select the models you would like to schedule. Set the toggle as shown in image below and define the frequency of run in the fields below based on your business requirements. Once finished, click on Submit
Editing your dbt™Core Project after configuration
-
Once you have finished configuring your dbt™Core project, you will be redirected back to the main transformation screen where you can view a list of configured dbt™ transformations. On the screen, you will notice an actions column wherein you can see an Edit icon.

-
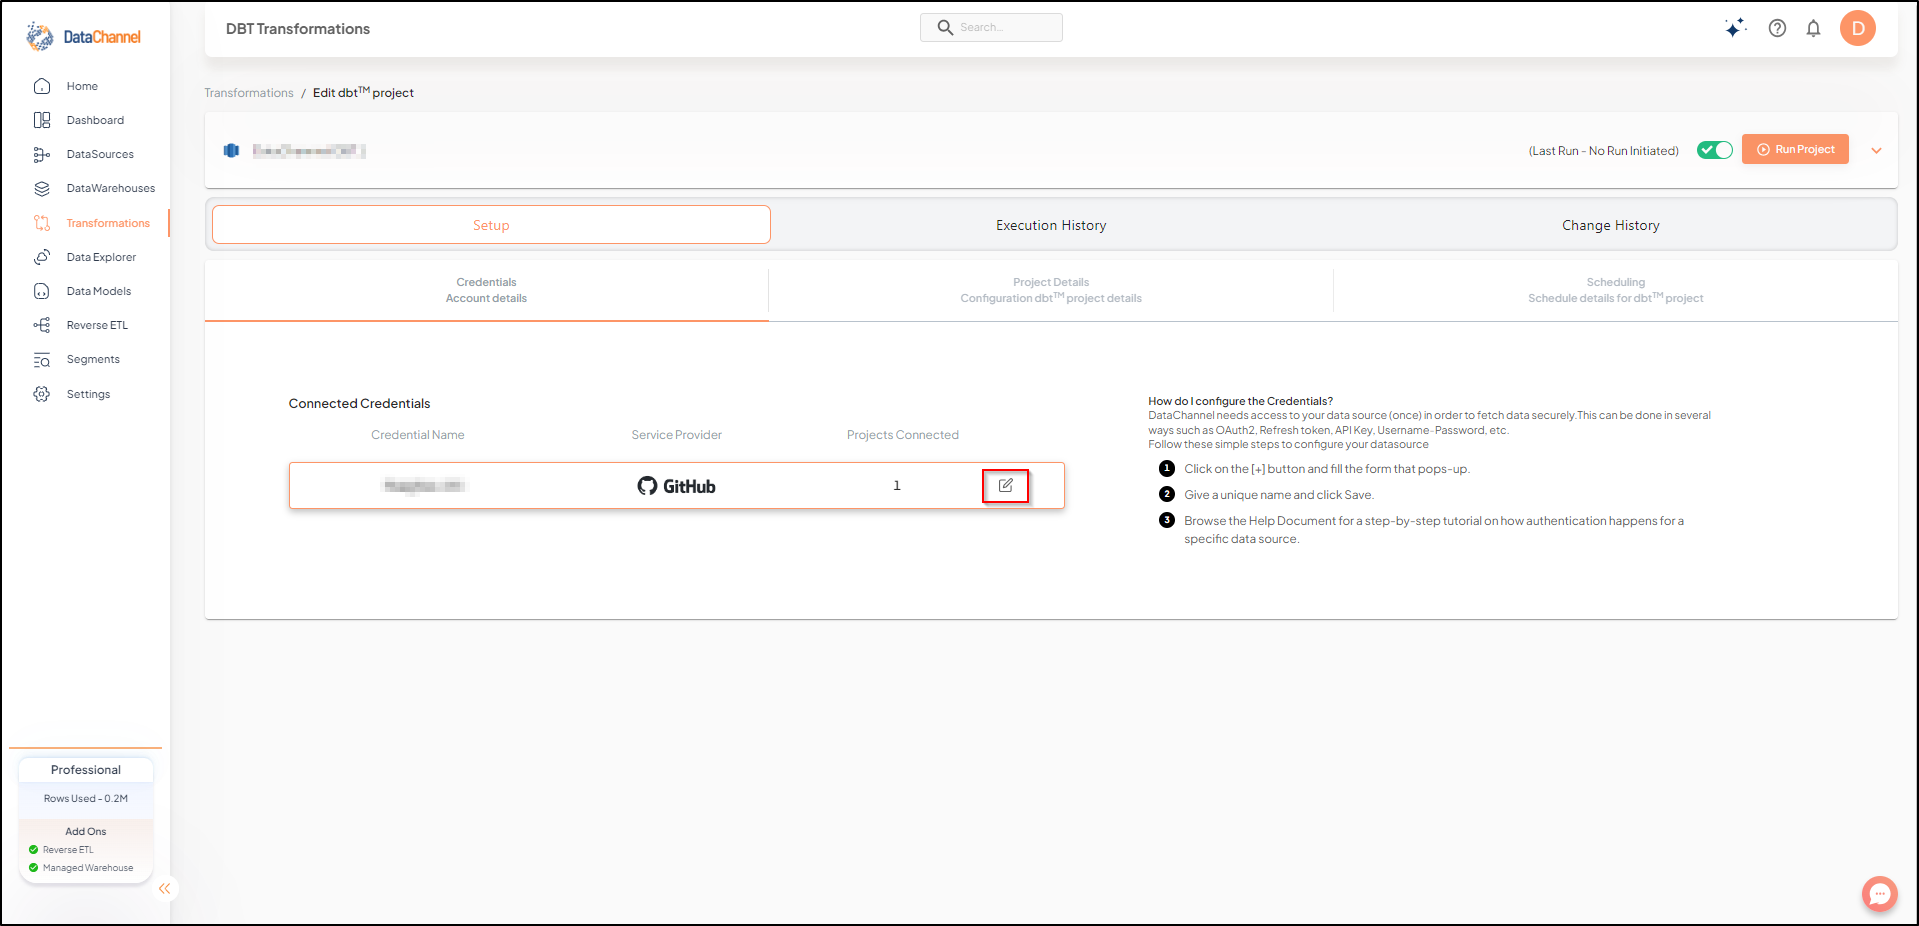
Clicking on the Edit icon will redirect you to the following ‘Edit dbt™ project’ screen. You will notice that the screen is divided into three side-by-side tabs namely, ‘Setup’, ‘Execution History’ and ‘Change History’. You will also be able to view ‘Last Run’ Status to ascertain whether the previous run was successful.
-
The ‘Setup’ Tab is further subdivided into three sections:
-
The ‘Credentials’ section shows your connected GitHub account and allows you to edit the credentials using the Edit icon.
-
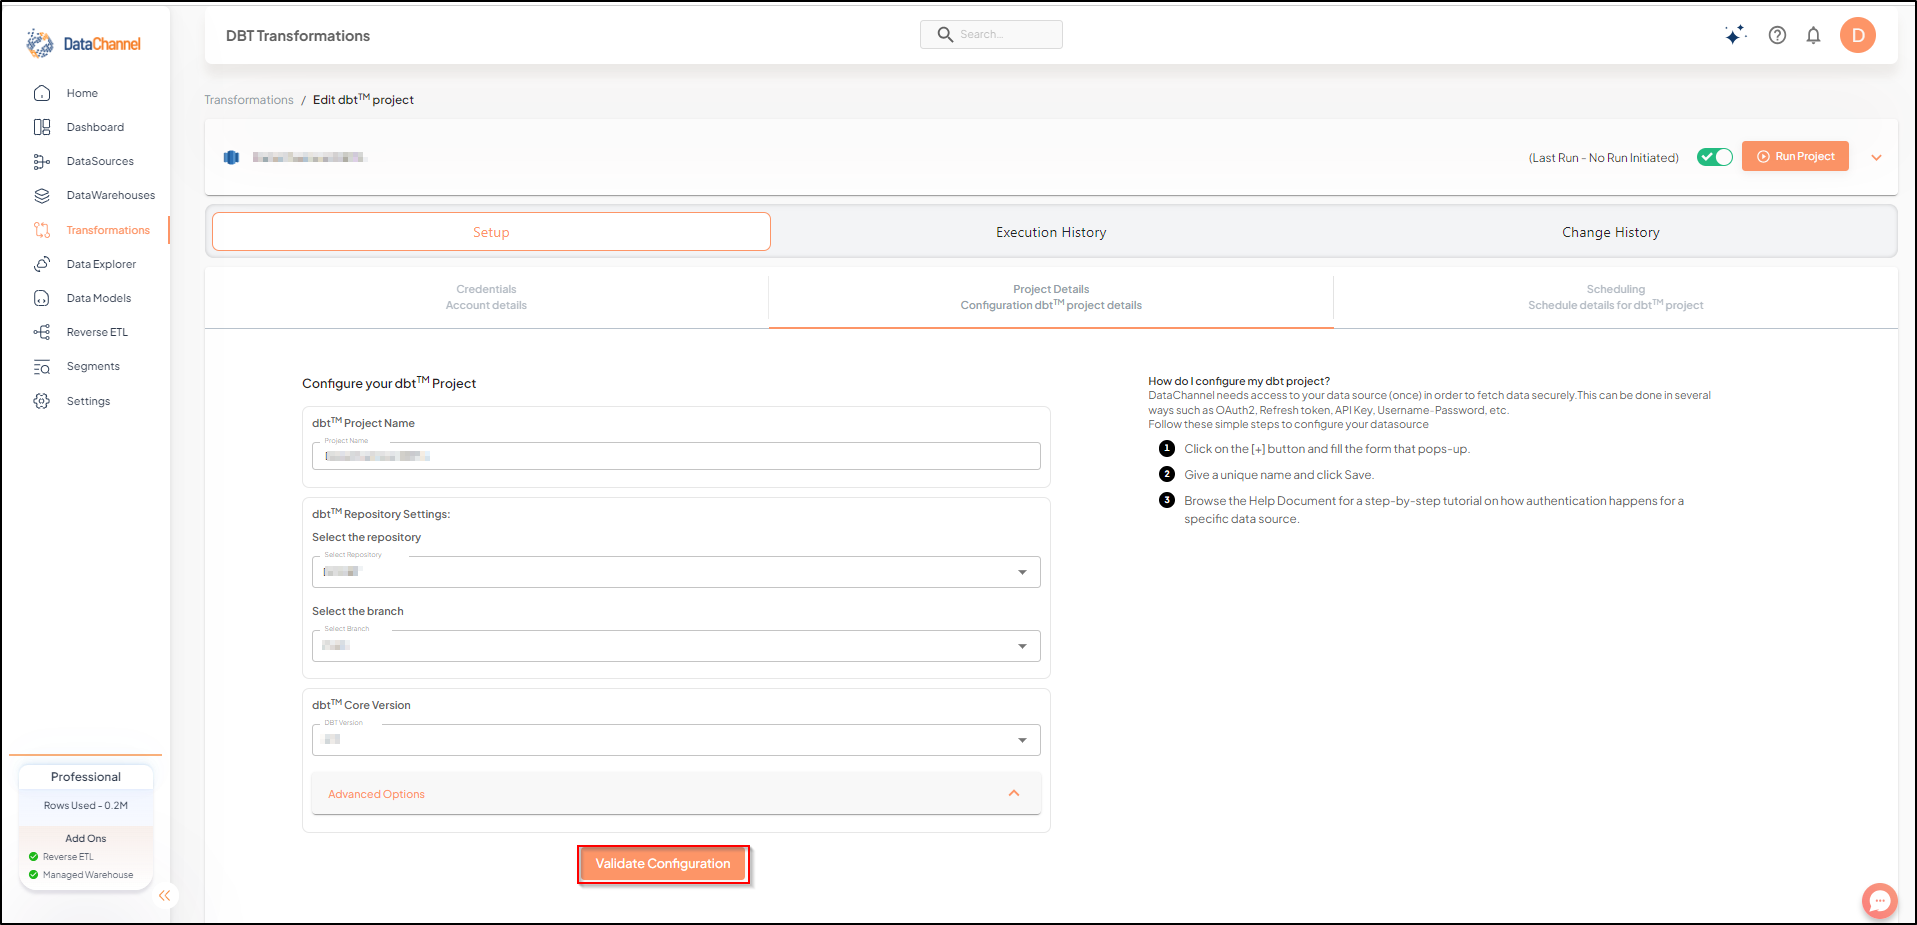
The ‘Project Details’ section shows your Configured dbt™ project details and allows you to change your dbt™ repository, edit the project name, dbt™ core version and the associated Github branch. Once you have made the changes, you can click on Validate Configuration to test your dbt™ project.
-
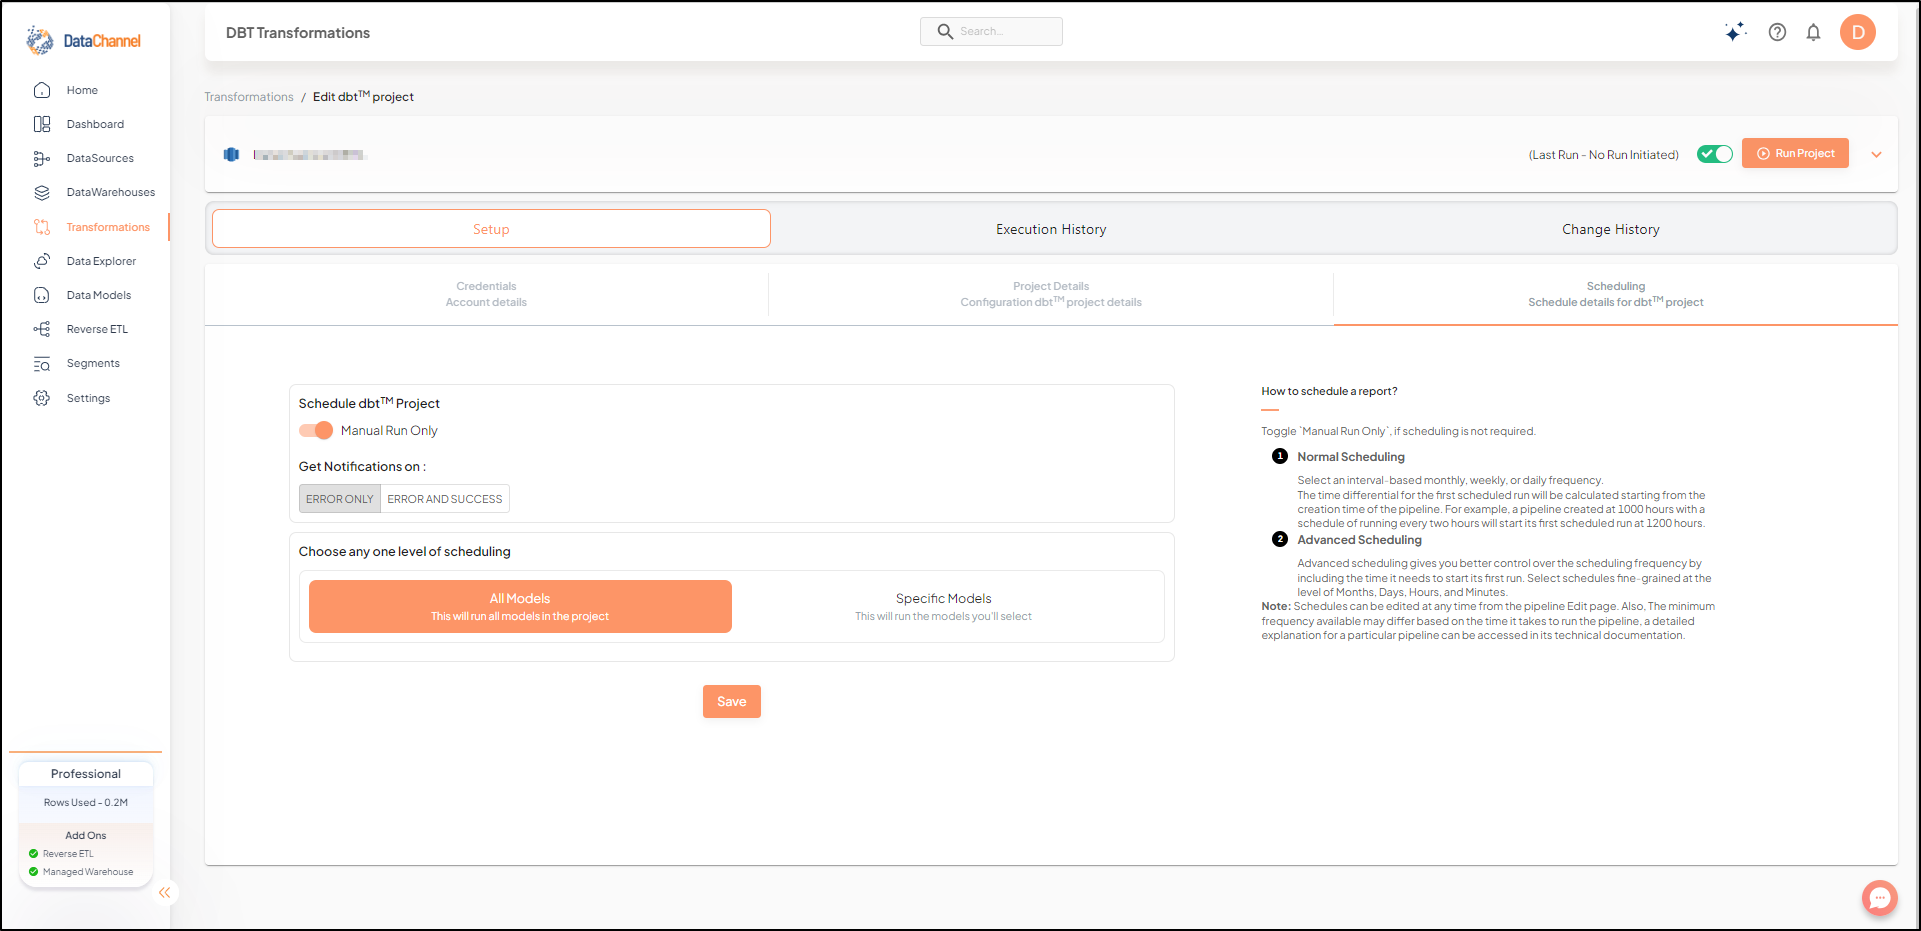
The ‘Scheduling’ section shows the details regarding scheduling of your configured dbt™ project and allows you to change the schedule for existing models. Do be mindful to click the Save button if you have made changes to scheduling for any of the models.
-
-
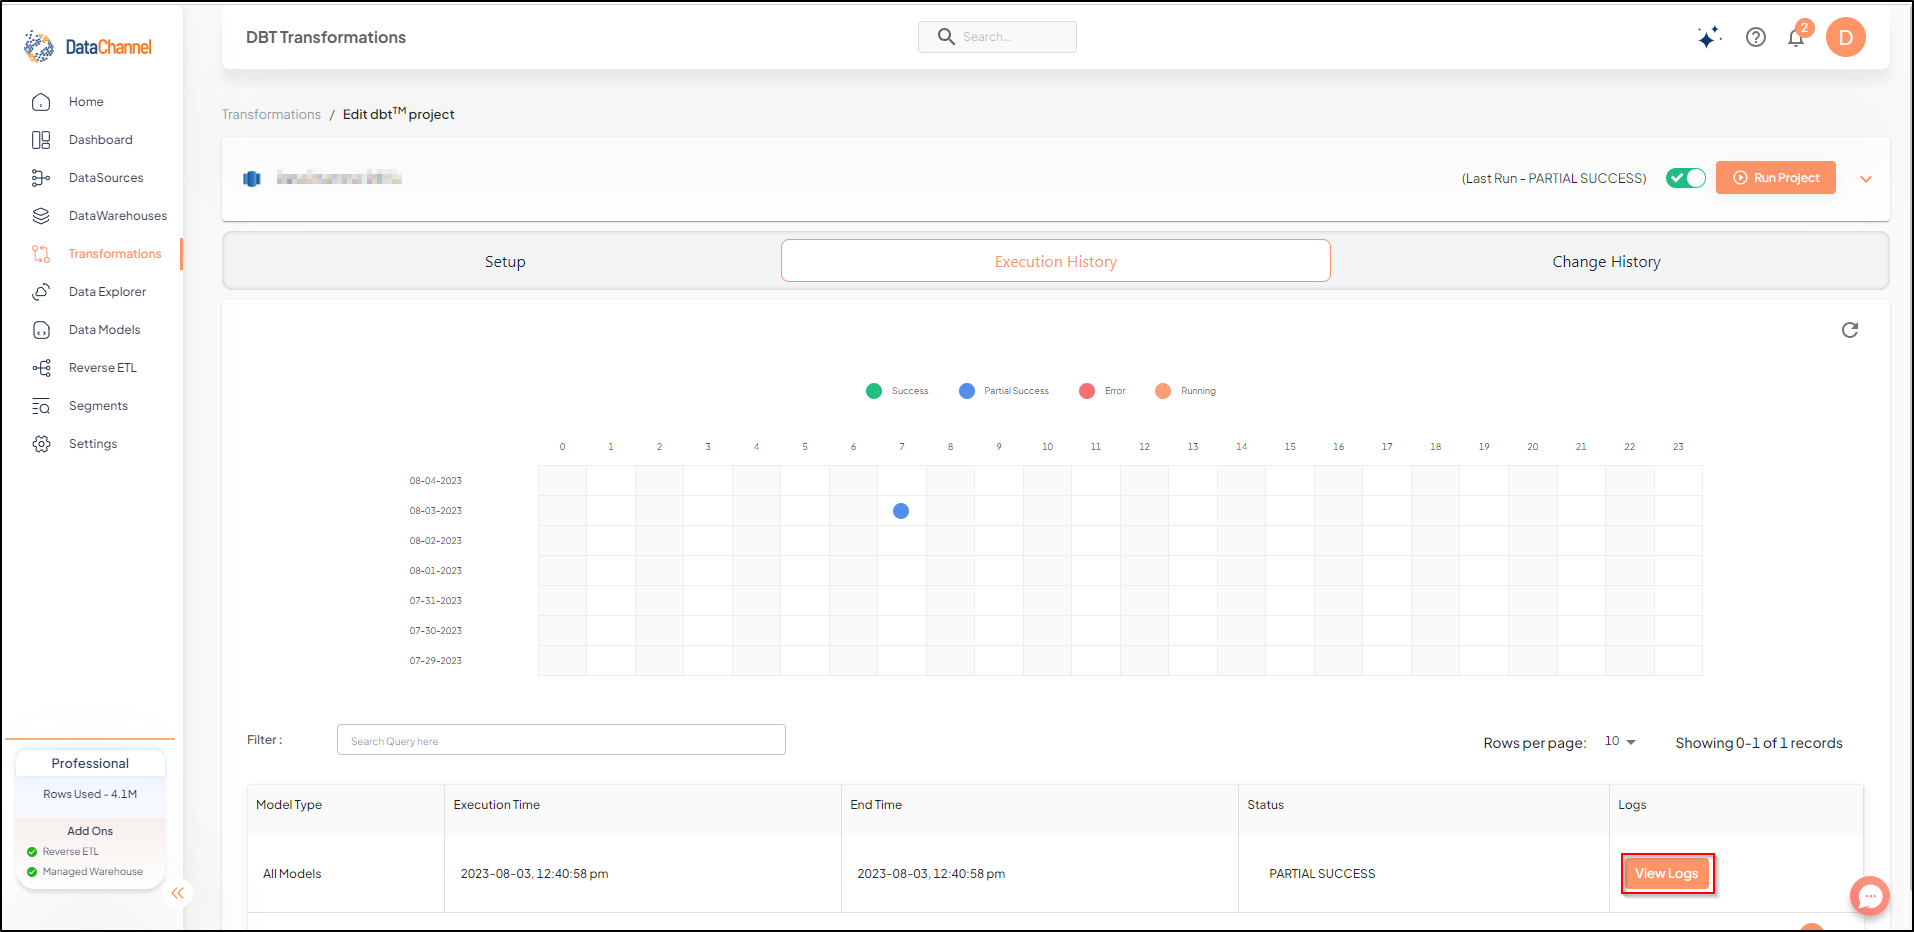
The ‘Execution History’ Tab displays the execution details of the configured dbt™Core project/ models in reverse chronological order in a tabular format. You can view the status of run from the ‘Status’ column. The rightmost column contains the link to view logs for the particular run.
-
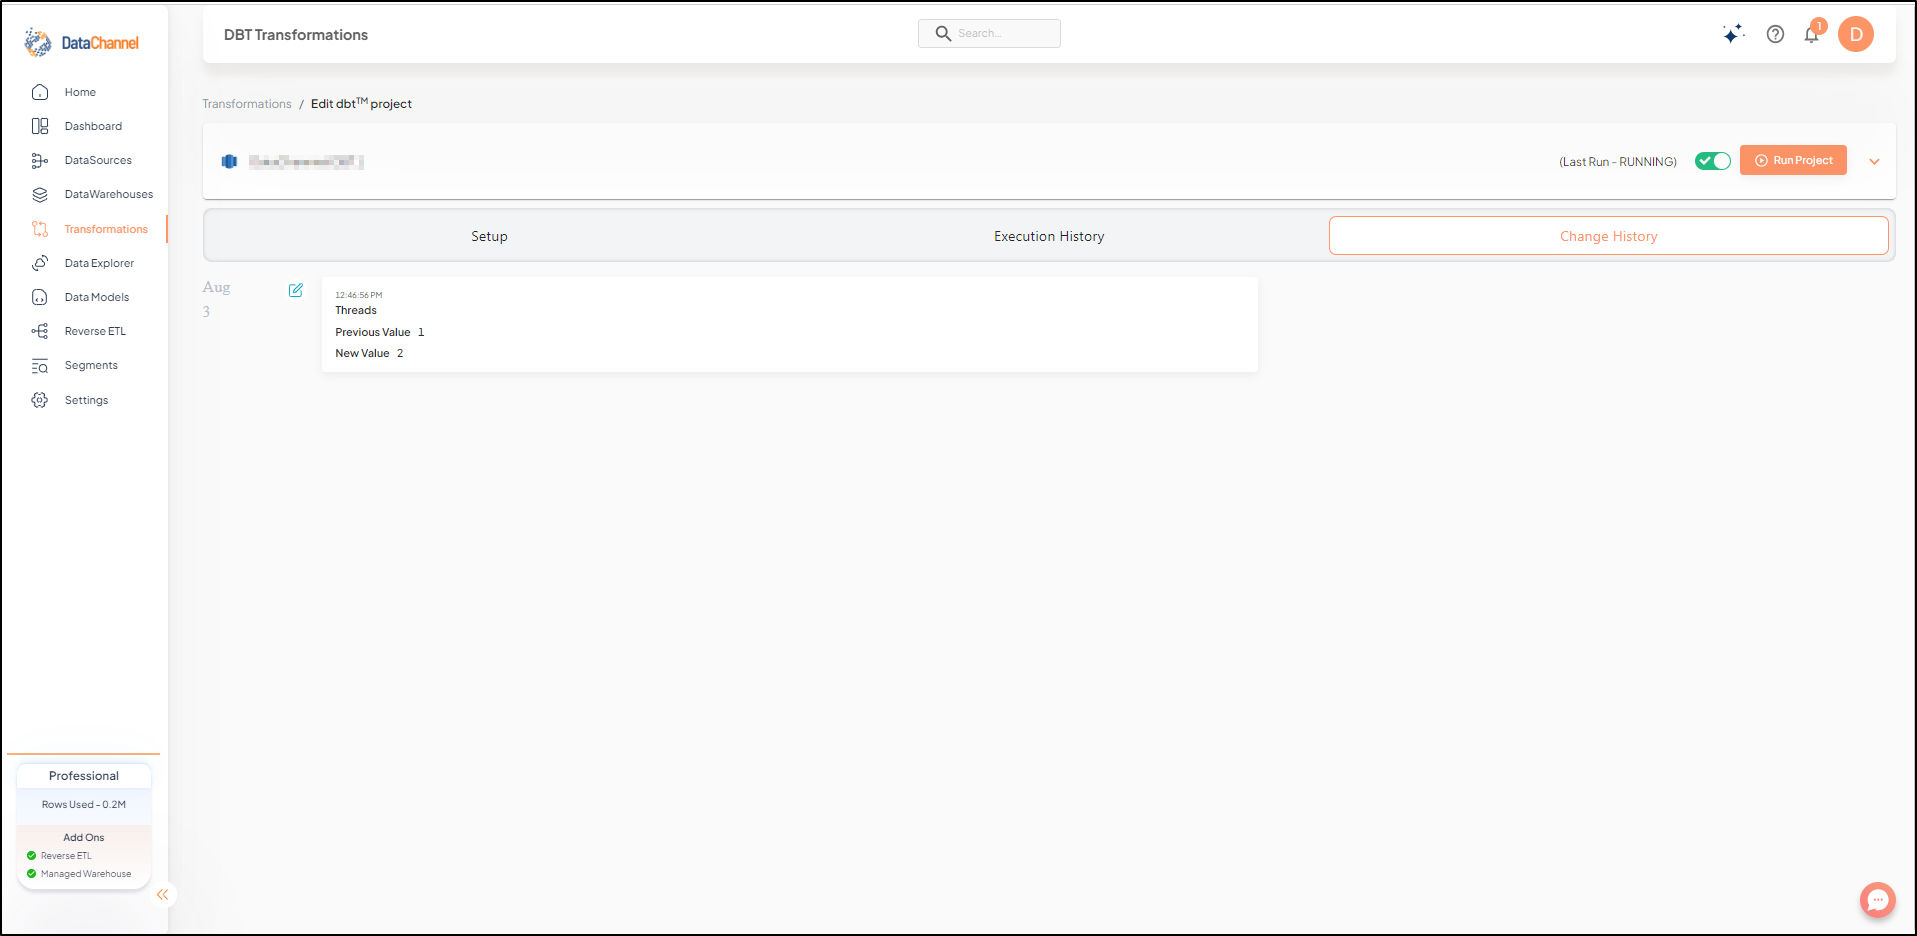
The ‘Change History’ Tab displays the details of changes made to the configuration/scheduling of your dbt™Core project/ models in reverse chronological order.
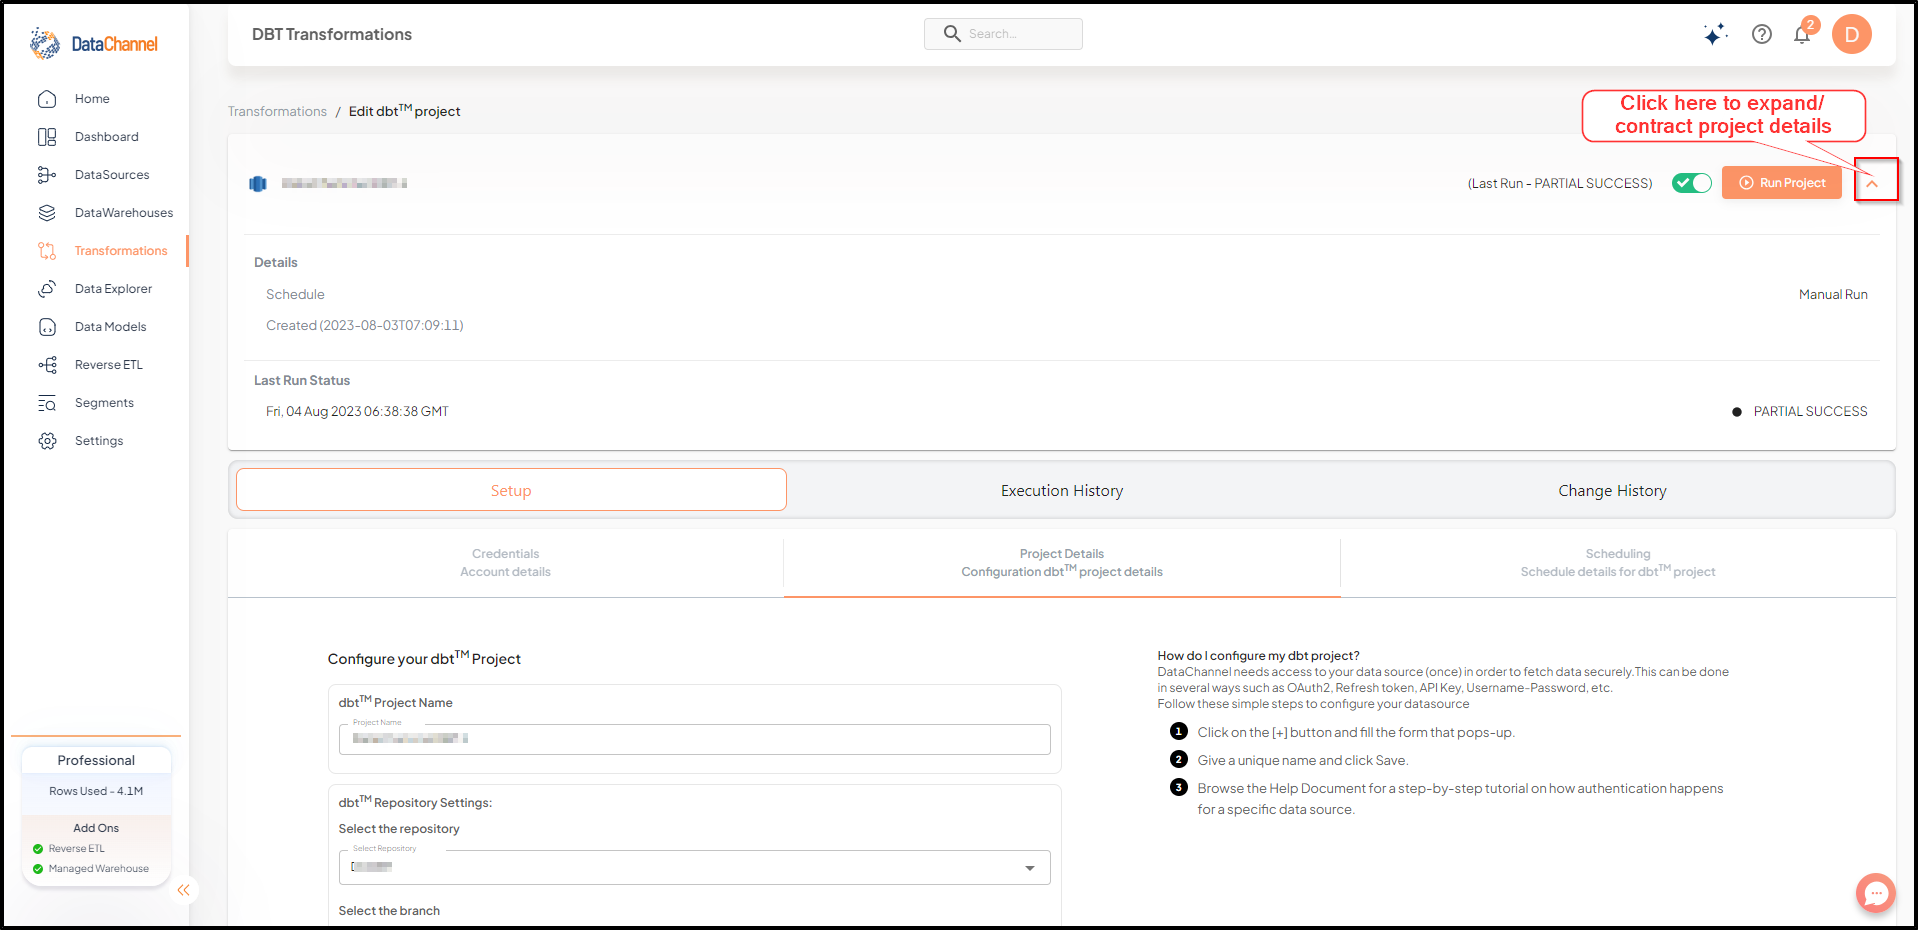
Quick snapshot your dbt™Core Project Details
Clicking on the Arrow icon near the top right corner ( in the ‘Edit dbt™ project’ screen) allows you to collapse / expand the accordion at any time to view your dbt™Core Project Details. Clicking on this icon provides the details about scheduling of the dbt™Core Project and the status of last run.
| dbt™Core is a trademark of dbt Labs, Inc. All rights therein are reserved to dbt Labs, Inc. DataChannel is not a product or service of or endorsed by dbt Labs, Inc. |
Still have Questions?
We’ll be happy to help you with any questions you might have! Send us an email at info@datachannel.co.
Subscribe to our Newsletter for latest updates at DataChannel.