Pre Setup Guide - NetSuite Analytics
This guide walks you through the steps required to connect to NetSuite’s SuiteAnalytics Connect using ODBC. It includes pre-requisites, driver setup, credential generation, and connection configuration using a BI/SQL tool:
Pre-Requisites
-
A NetSuite account with an active role that has Admin Permissions
-
SuiteAnalytics Connect is enabled for your NetSuite account (check with your NetSuite admin).
-
Your NetSuite Account ID, Role ID, User credentials, & Host.
Step 1: Confirm Access to SuiteAnalytics Connect
-
Log in to NetSuite.
-
Navigate to:
Setup → Company → Enable Features → Analytics tab. -
Ensure
SuiteAnalytics Connectis enabled. -
Under
Setup → Users/Roles → Manage Roles, ensure your role has the following permissions. -
Connect:
-
SuiteAnalytics Workbook (optional but helpful).
-
Full or View access to required records/tables.
-
Step 2: Setup the Integrator Role
-
Navigate to:
Setup → Users/Roles. -
Create a new role using the following screenshots:
-
Go to
Role Setup → Generaland note down the Role ID.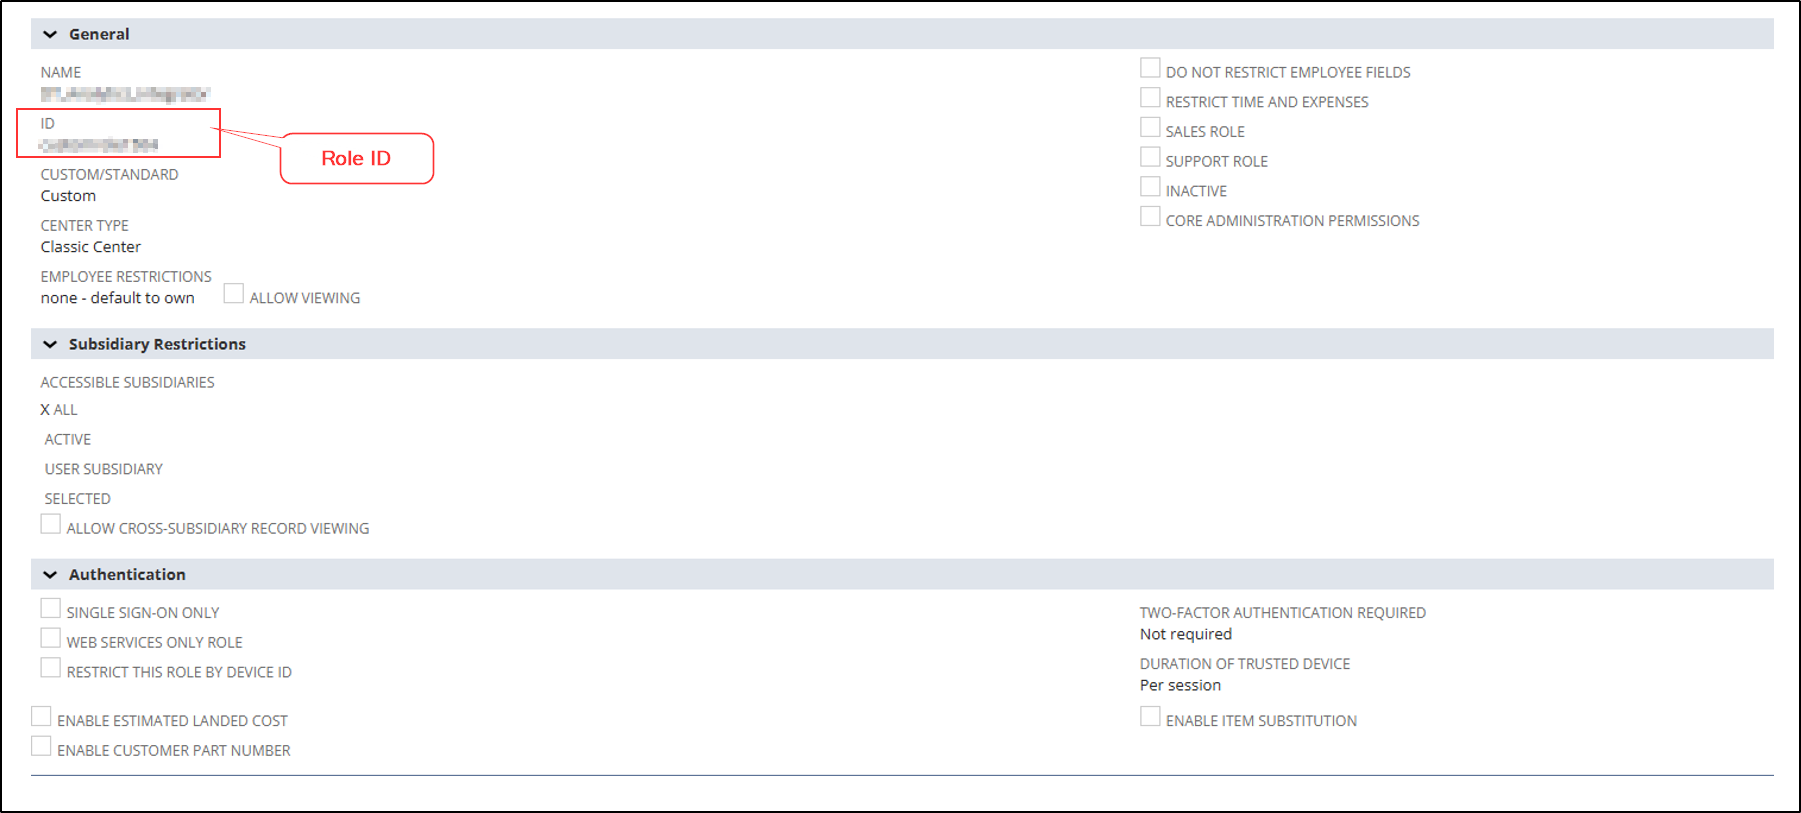
-
Go to
Role Setup → Permissions → Transactionsand grant the following permissions as indicated in the screen.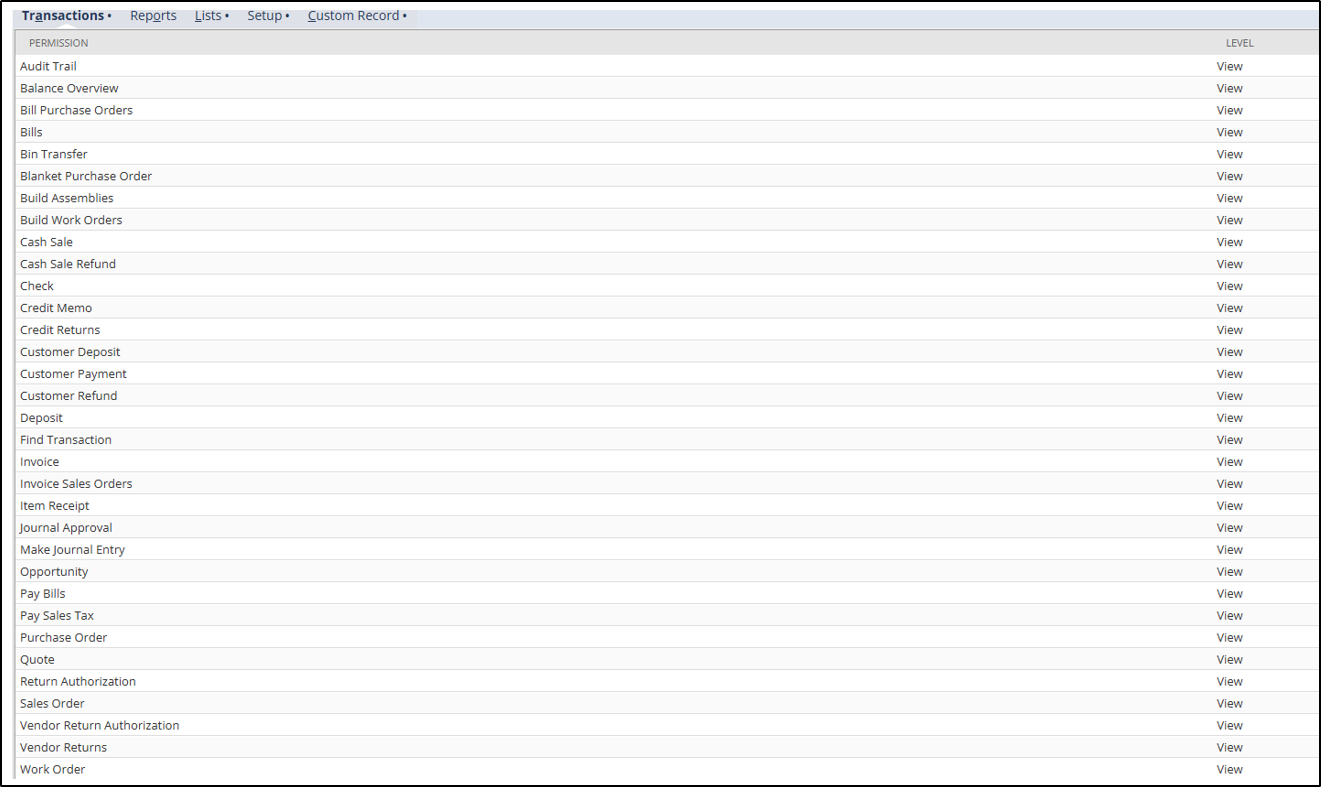
-
Go to
Role Setup → Permissions → Listsand grant the following permissions as indicated in the screen.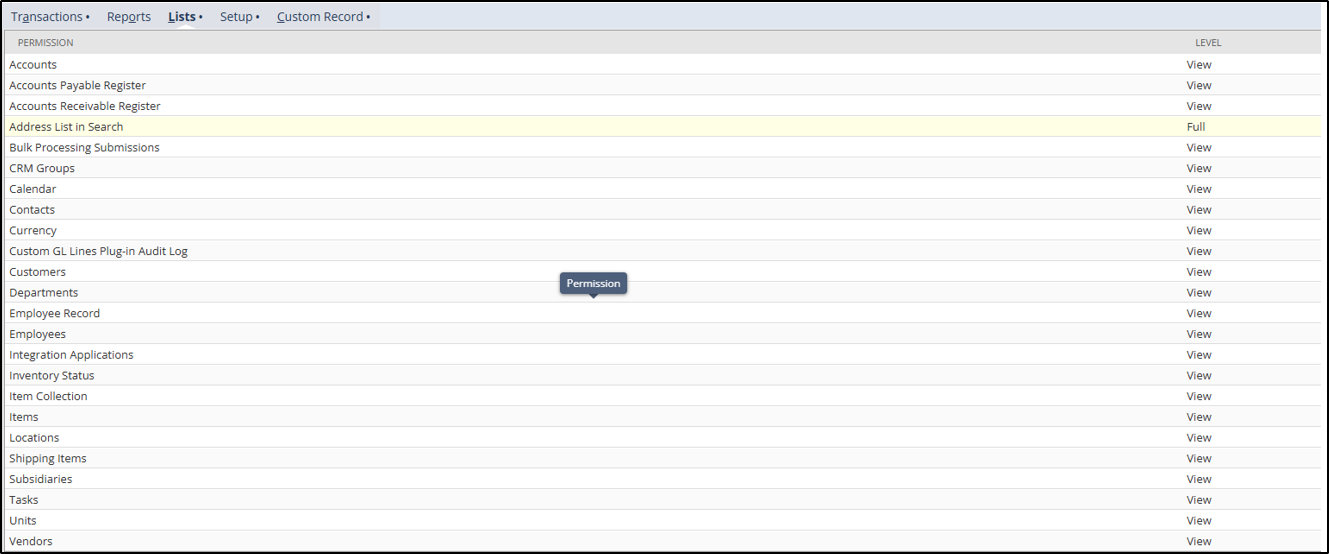
-
Go to
Role Setup → Permissions → Setupand grant the following permissions as indicated in the screen.
-
Step 3: Grant the Integrator Role to DT User
-
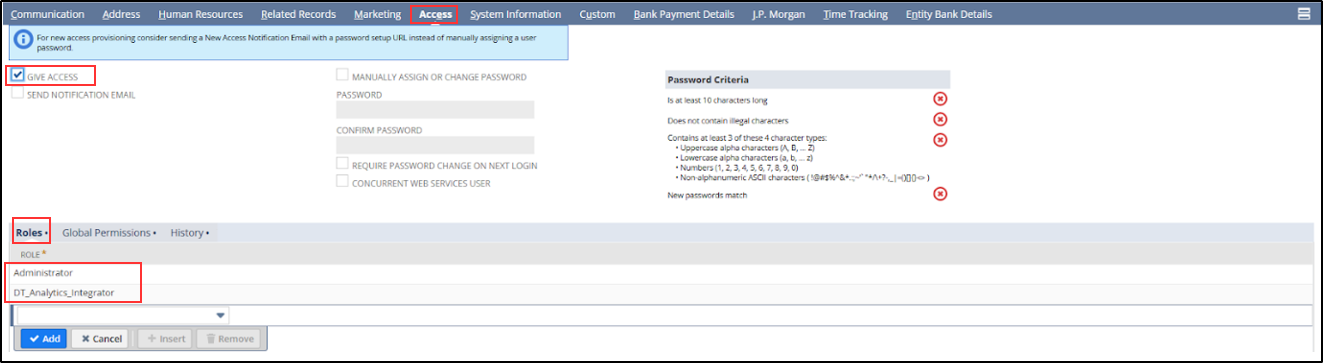
Go to
• Setup → Users/Roles → Manage User. -
Select the DC User (analytics@companydomain.com).
-
Go to the Access tab and assign the Integrator Role created.
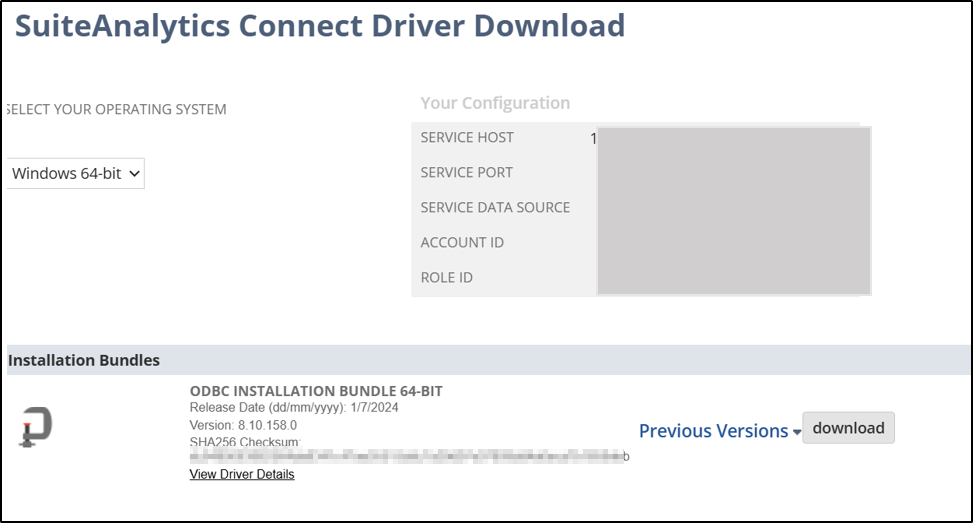
Step 4: Take note of credentials
For successful integration, DC will need the following:
-
On the dashboard (Welcome page) ,scroll down to the left corner.
-
Select
Setup Suite Analytics Connect`.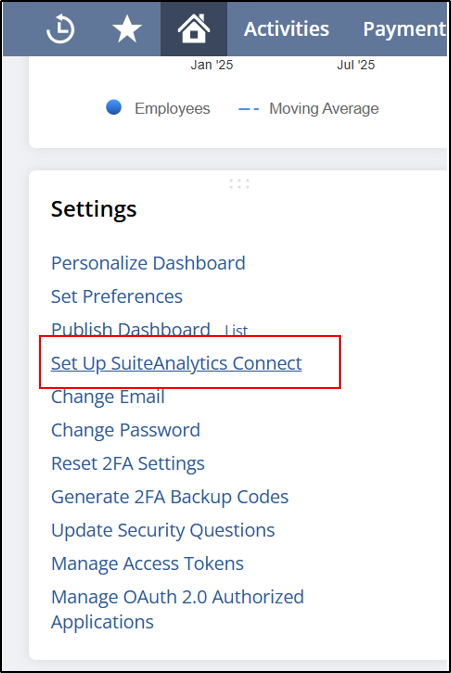
Still have Questions?
We’ll be happy to help you with any questions you might have! Send us an email at info@datachannel.co.
Subscribe to our Newsletter for latest updates at DataChannel.