Exploring the User Interface
Settings
Overview
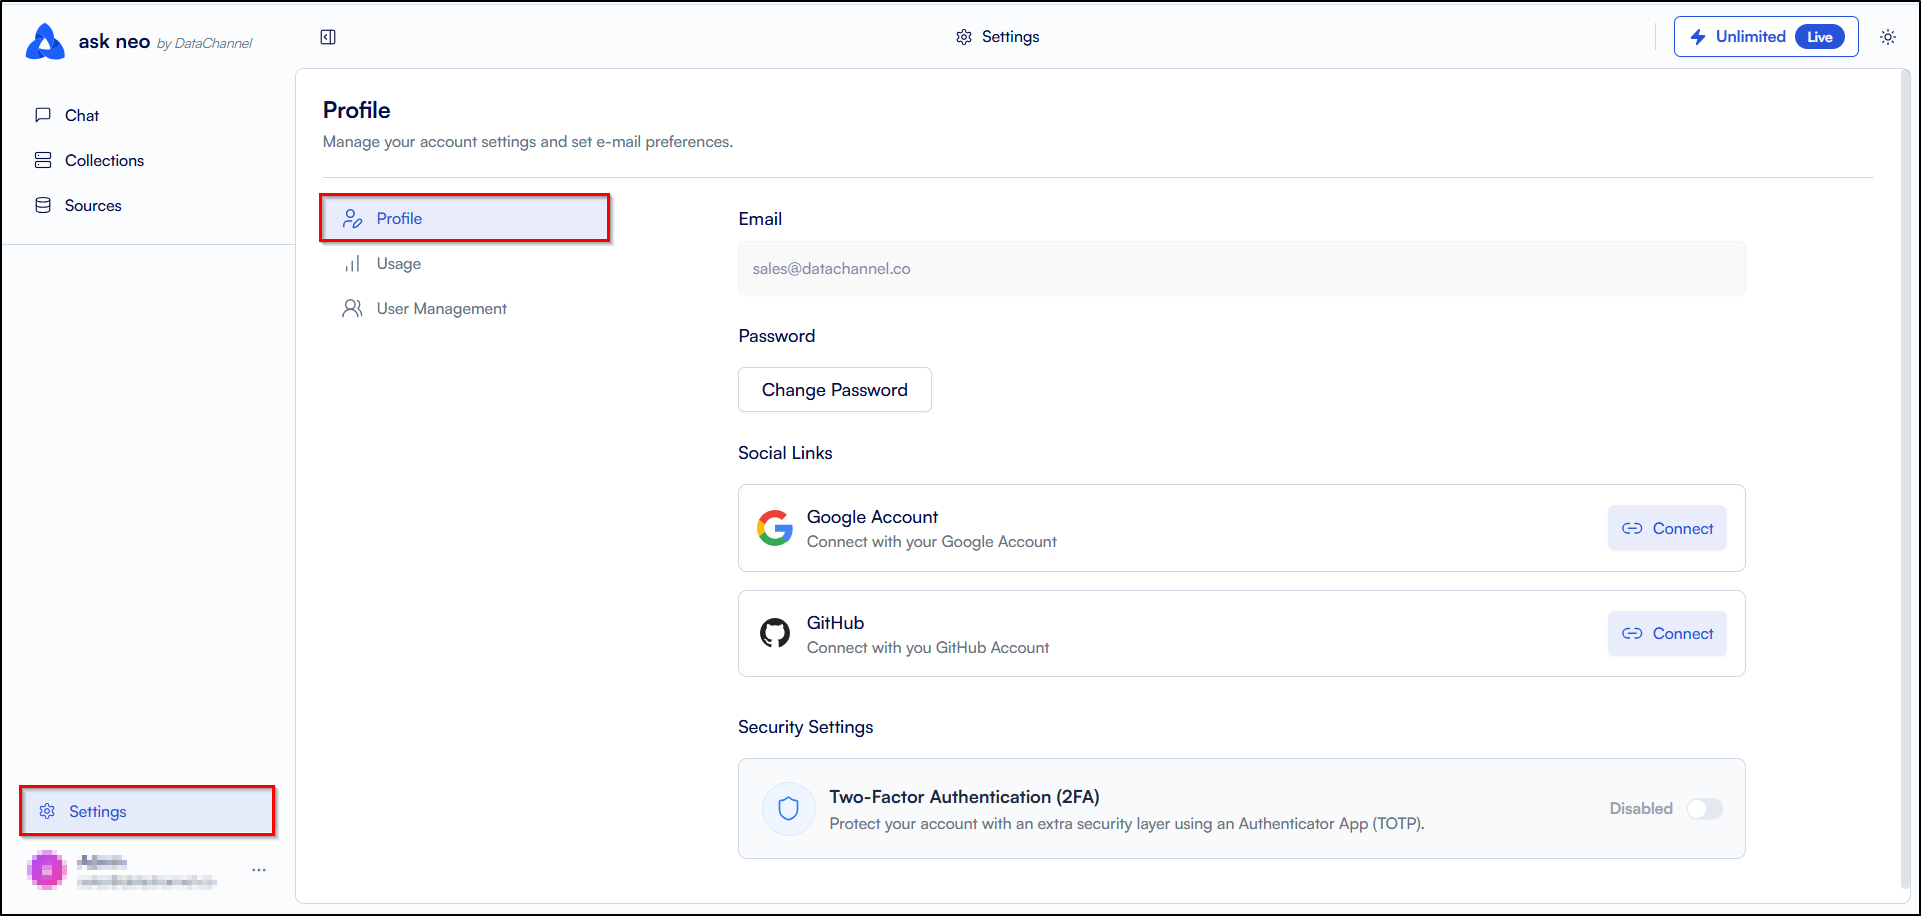
This section will help you to get familiar with the layout on the Settings page of the Neo platform. You can access the settings page by clicking on the Settings Tab which is at the bottom of the sidebar, just above the Profile tab. The Settings Tab allows you to view your profile, track your usage and limits, and manage user permissions.
View Profile
-
You can access the settings page by clicking on the Settings Tab which is at the bottom of the sidebar, just above the Profile tab.
-
Click on the Profile tab to view your profile details on the main UI screen.
-
You can view your email address and can change the password.
-
Connect your Google and Github account to your Neo account to login using those accounts. You can also disconnect the connected accounts if you want to login using your email address and password.
-
Enable two-factor authentication to add an additional layer of security to your account. You can enable or disable the two-factor authentication by clicking on the toggle icon. It is disabled by default.
User Usage Summary
-
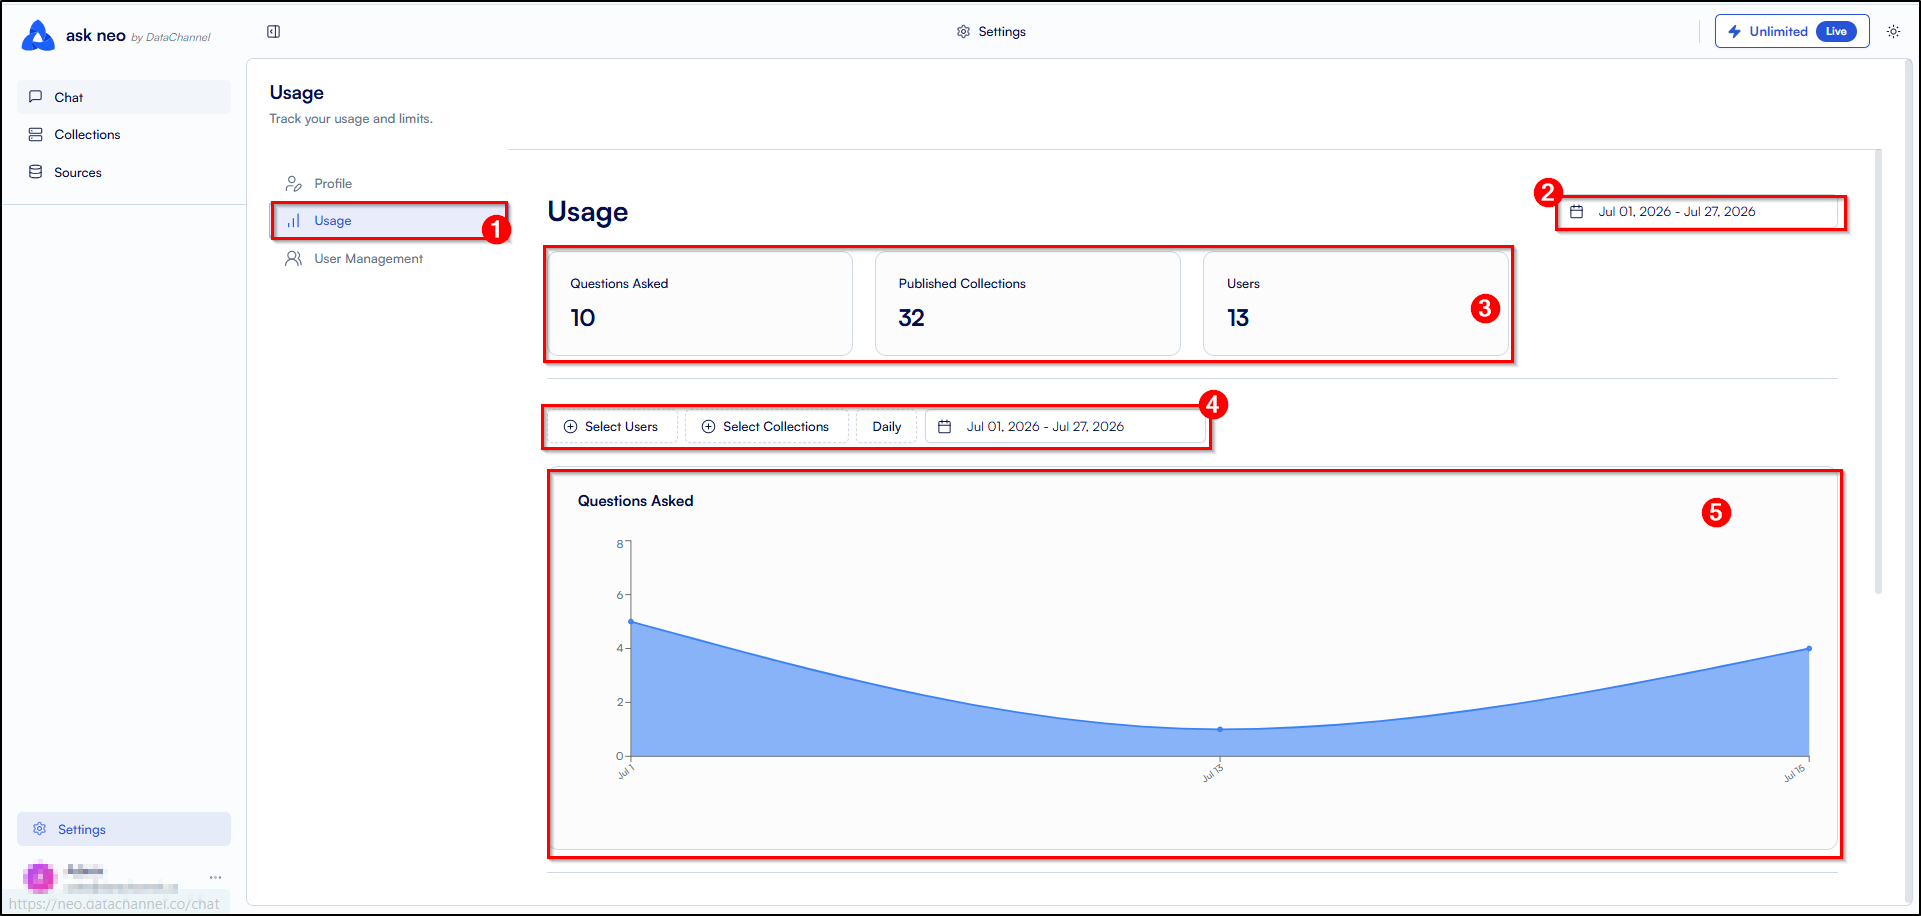
Click the Usage button. It will open the Data Usage Analytics page where you can view the summary of your usage and limits.
-
The top right corner of the Usage Analytics card has a filter option which allows you to filter the usage by selecting a custom date range.
-
It will give you the number of questions asked, number of published collections, and number of users added to your Neo account.
-
You can also filter the usage by selecting the specific users and specific collections.
-
Next, you can find graphical metrics for total questions asked as per the selected date range, users, and collections.
-
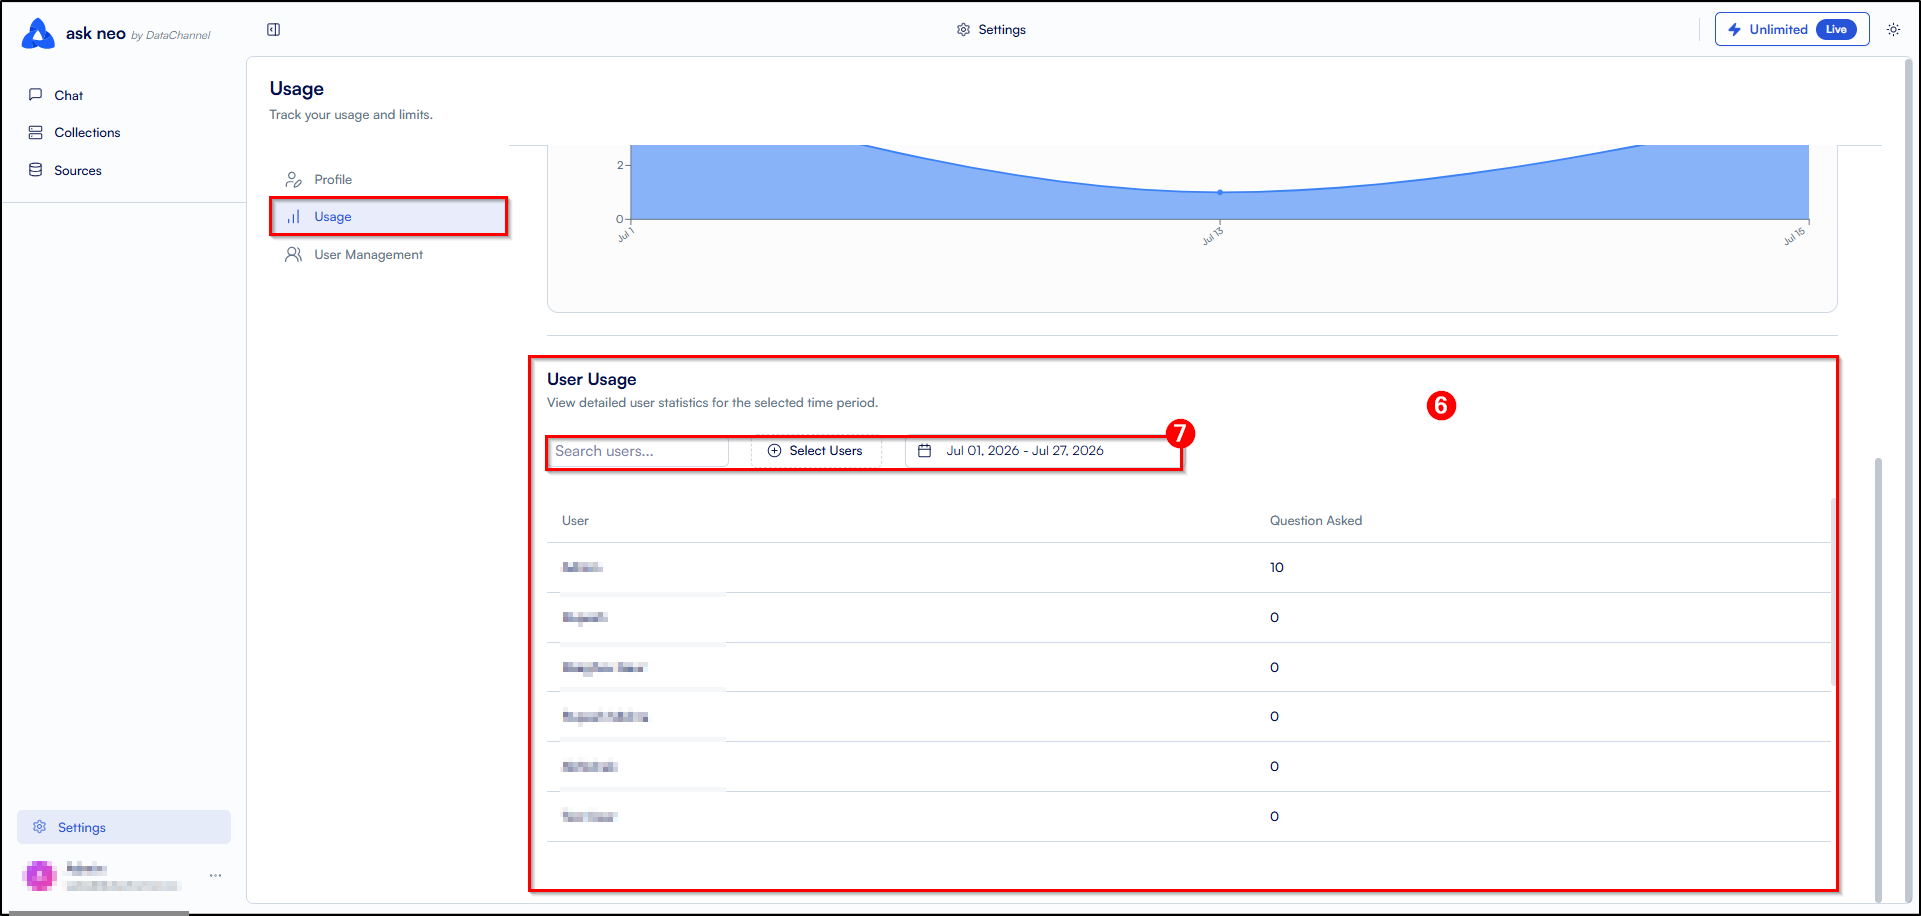
At the bottom of the page, you can also view detailed user statistics for the selected time period.
-
Search the user or select the specific users to get the usage for a specific time period.
Manage Users
-
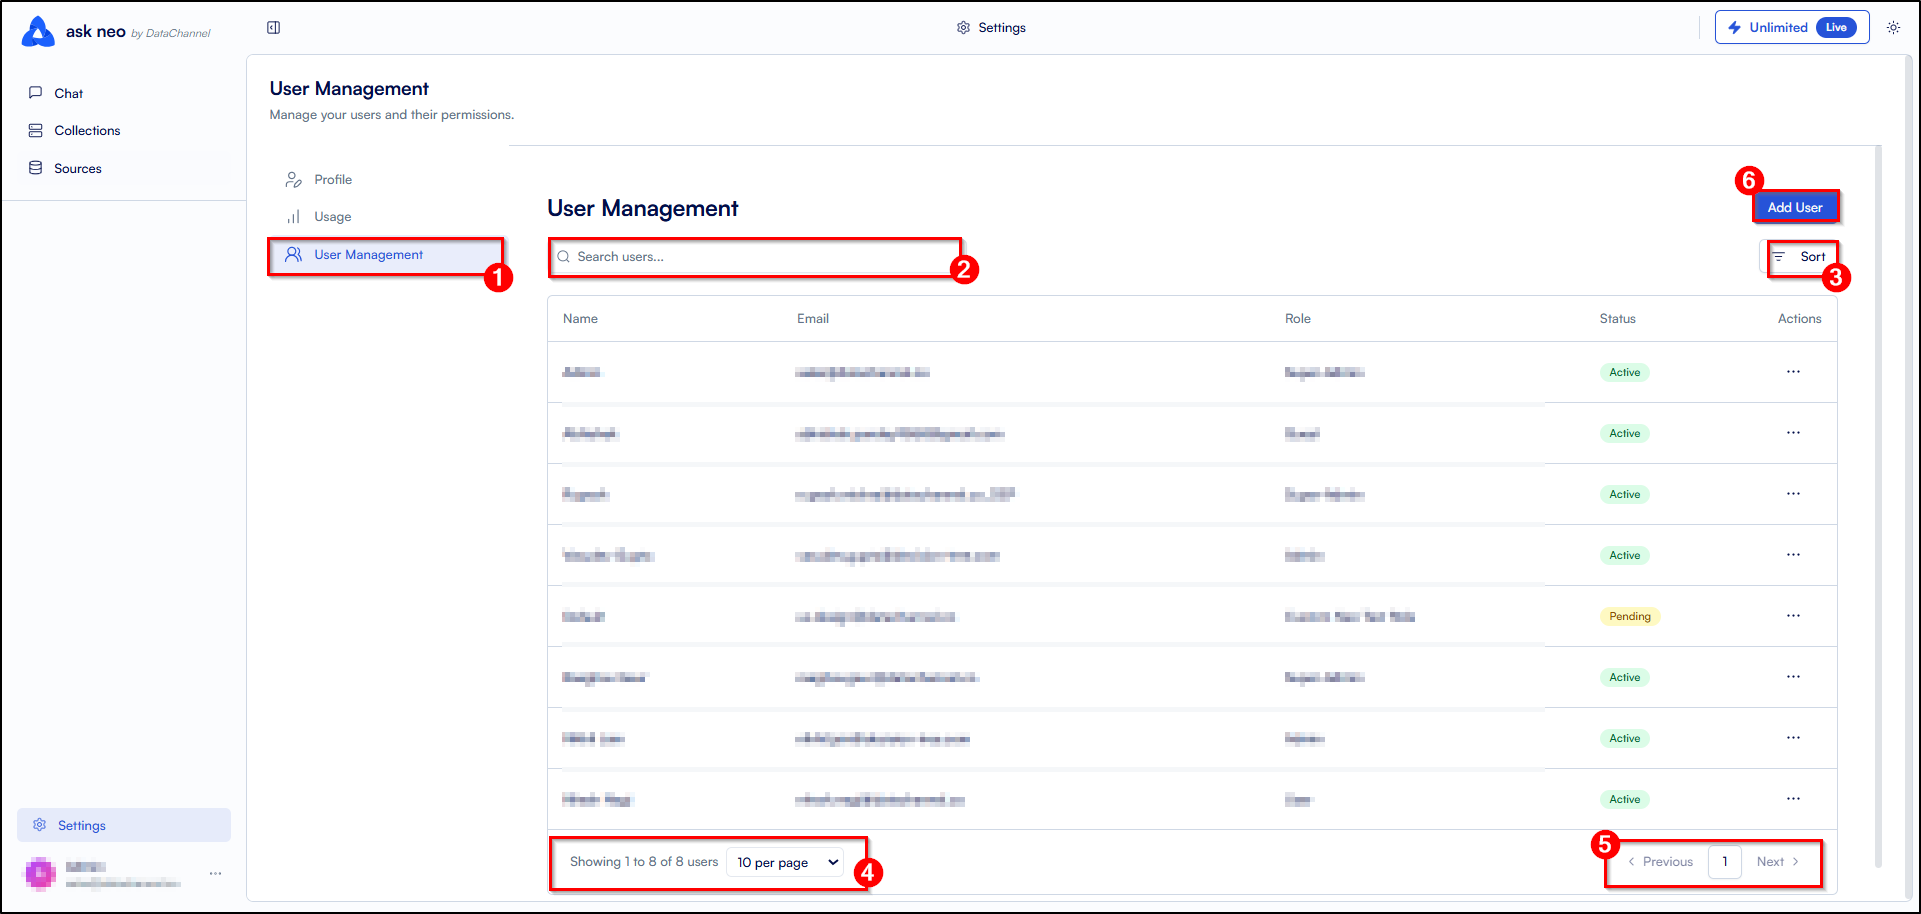
Click the User Management button.
-
The search box allows you to quickly find a specific User added by you.
-
The sort dropdown allows you to quickly sort the Users added by you either by name or email alphabetically.
-
Change the number of users displayed on the current page by selecting the number from the dropdown.
-
Navigate between different pages of the Users list pane through the Next and Previous buttons on the bottom right corner of the pane.
-
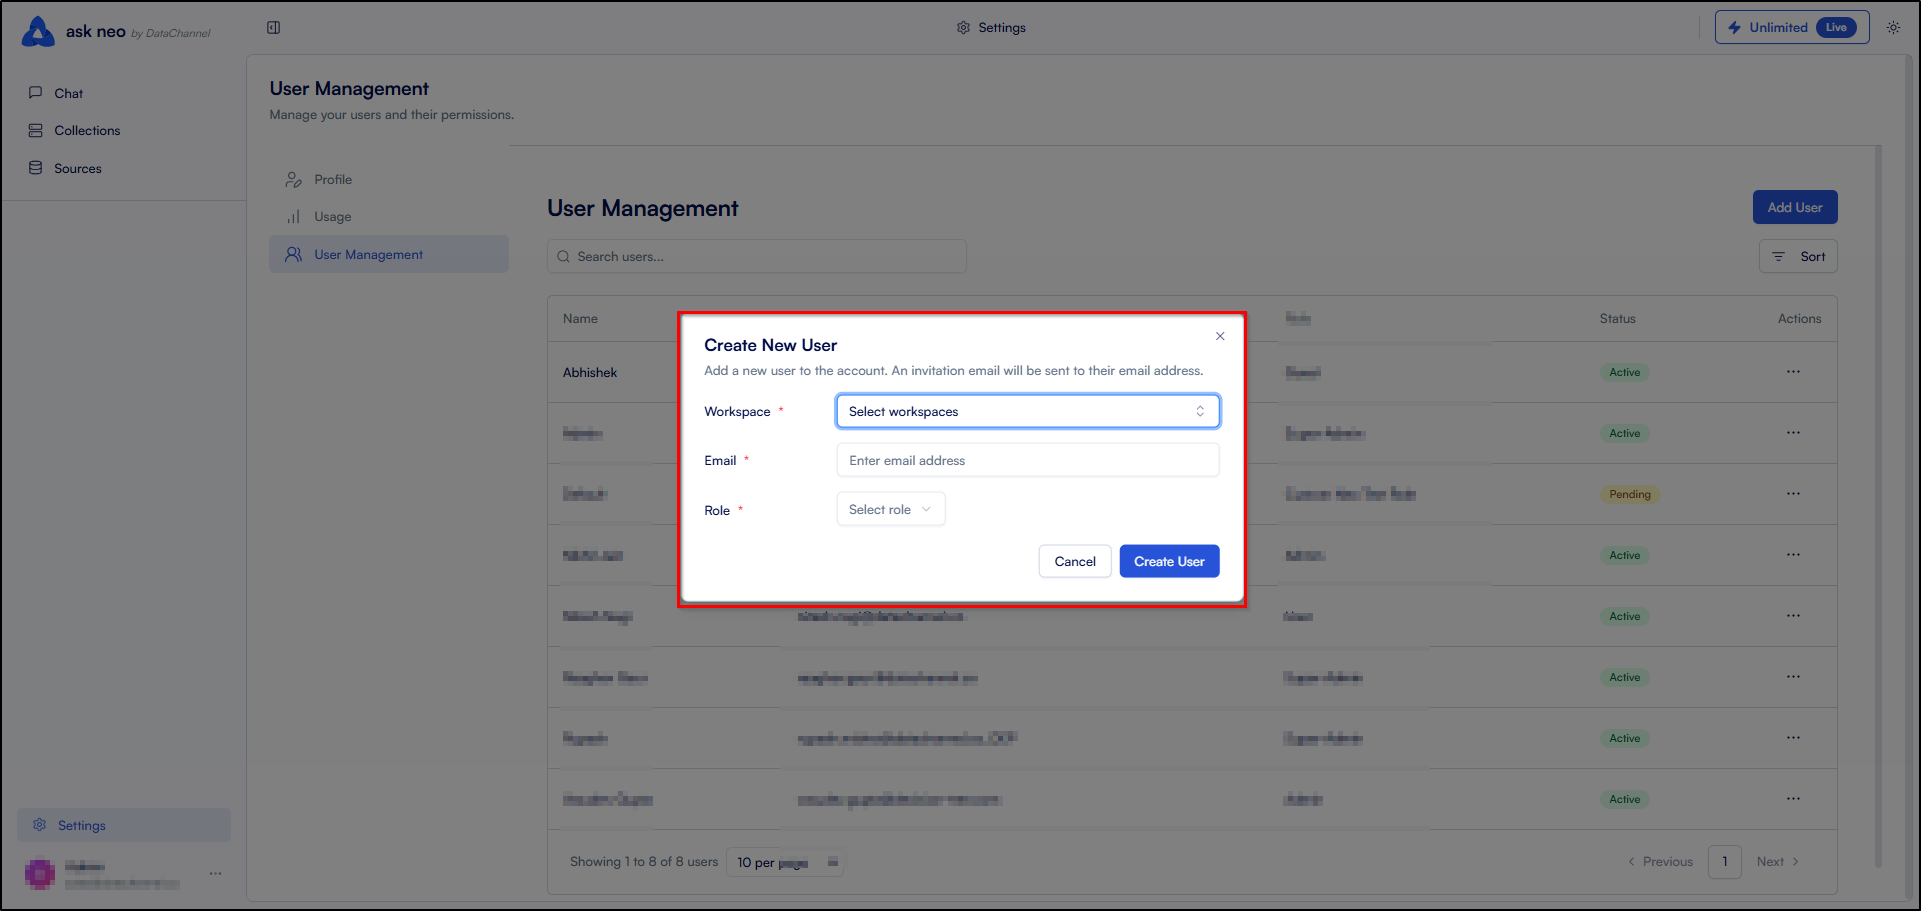
Add a new user by clicking on the Add User button on the top right corner of the Main UI Screen. It will open a modal where you can select the workspace, email address and role of the new user.
-
At last, click on the Create User button to add the new user to your Neo account.
Still have Questions?
We’ll be happy to help you with any questions you might have! Send us an email at info@datachannel.co.
Subscribe to our Newsletter for latest updates at DataChannel.