Exploring the User Interface
Collections
Overview
This section will help you to get familiar with the layout on the Collections tab of the Neo platform. You can access the Collections by clicking on the Collections menu which is the second tab on the sidebar, right below the Chat tab.
-
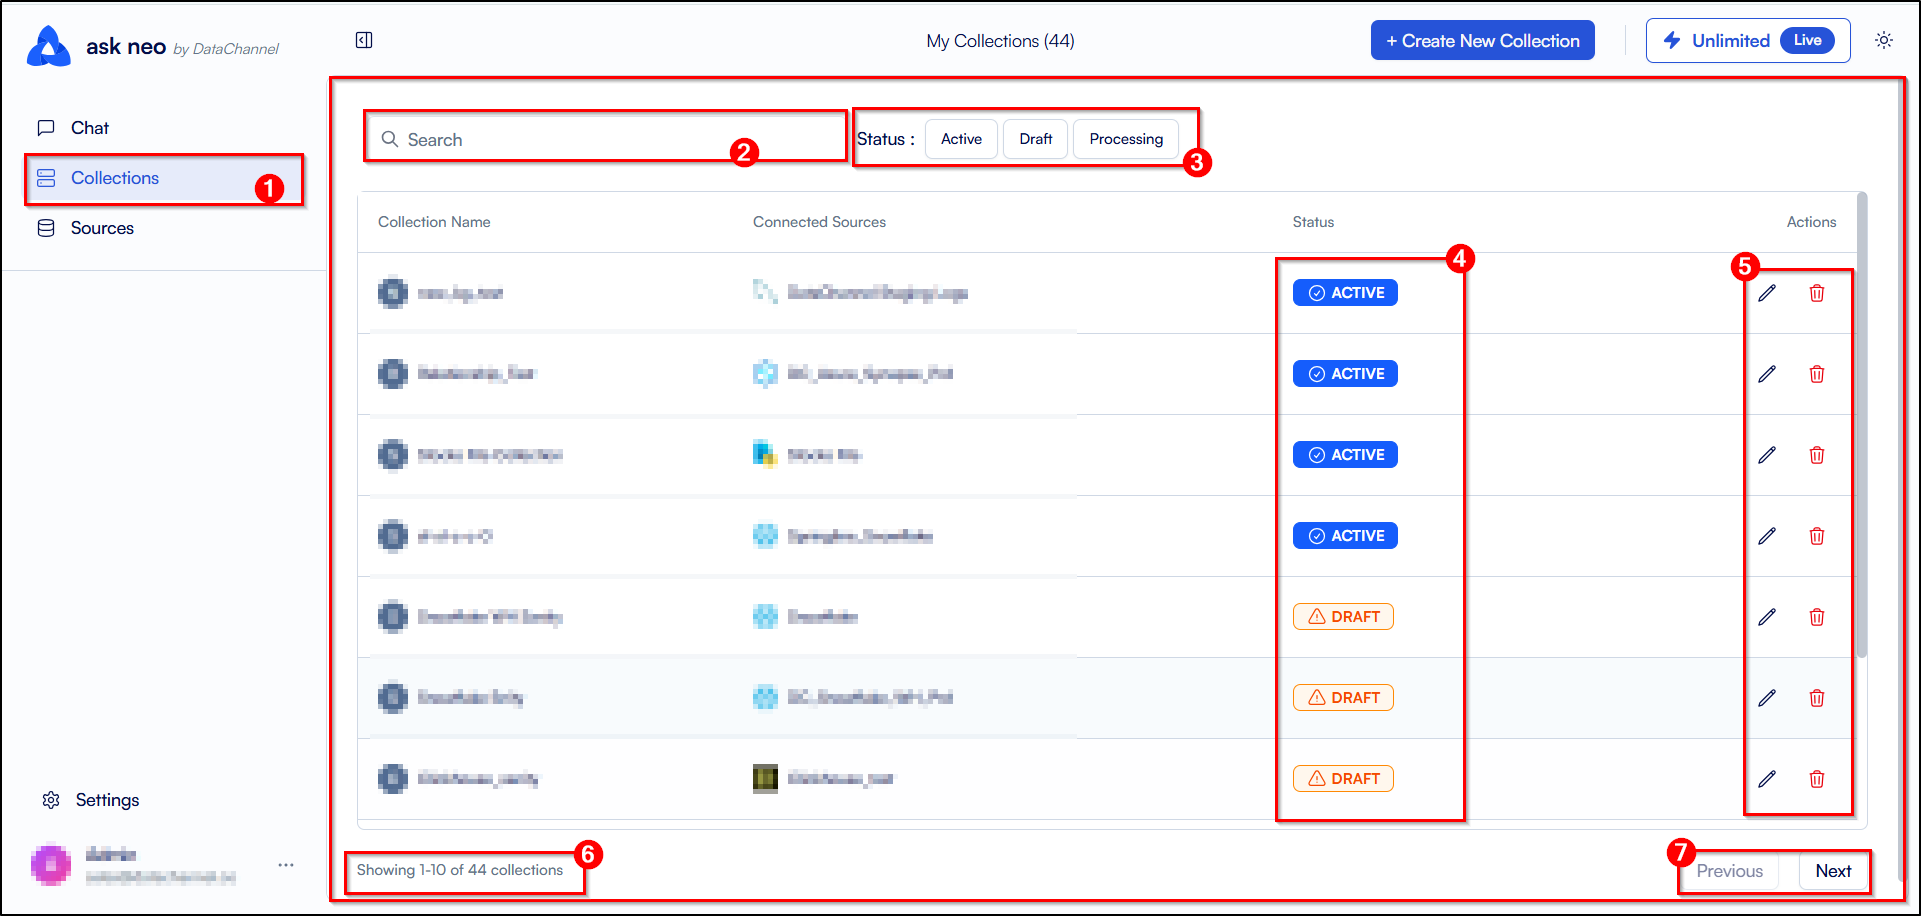
Access the Collections tab by clicking on the Collections tab in the sidebar. Once there, you’ll notice that the Main UI screen on the Collections tab displays the list of all the collections added by you along with an option to create a new collection.
-
At the top of the main UI screen, you will be able to view the Search Box which allows you to search for a specific collection from the list of collections added by you.
-
You also have a Status filter option next to the search box to filter the collections based on their status. You can choose from the following status options: Active, Draft, and Processing.
-
Below the Search Box and Status filter, you will be able to view the list of all the collections added by you. Each collection card displays the name of the collection and the source and the status of that collection.
-
The right most column is the Actions column which displays the option to edit or delete the collection. Clicking on the edit icon allows you to edit the collection and clicking on the delete icon allows you to delete the collection.
-
The bottom left corner displays the total number of collections shown on the current page and the total number of collections added by you.
-
You can navigate between different pages of the collections list through the Previous and Next buttons on the bottom right corner of the main UI screen.
Edit Collection
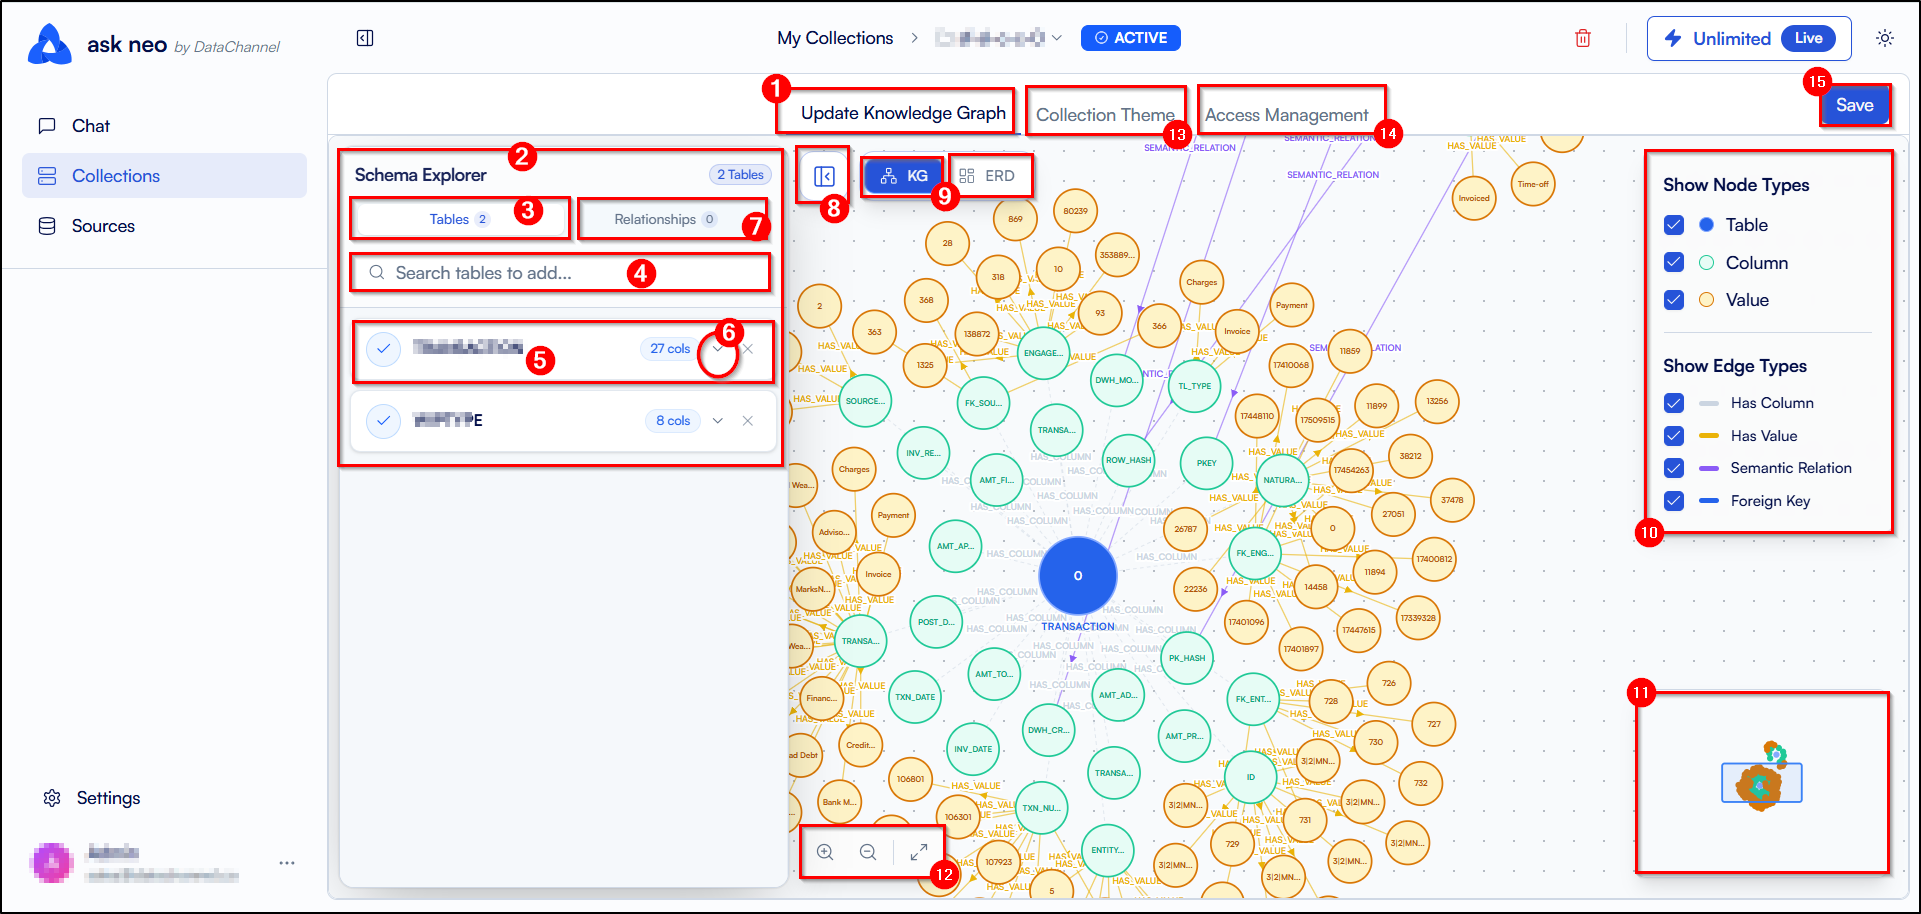
Select the collection you want to edit by clicking on it or click on the edit icon in the Actions column. This will open up the Edit Collection page where you can update the knowledge graph, change the collection theme, and configure the access management settings.
-
First, you have the option to update the knowledge graph of the collection at the top of the main UI screen.
-
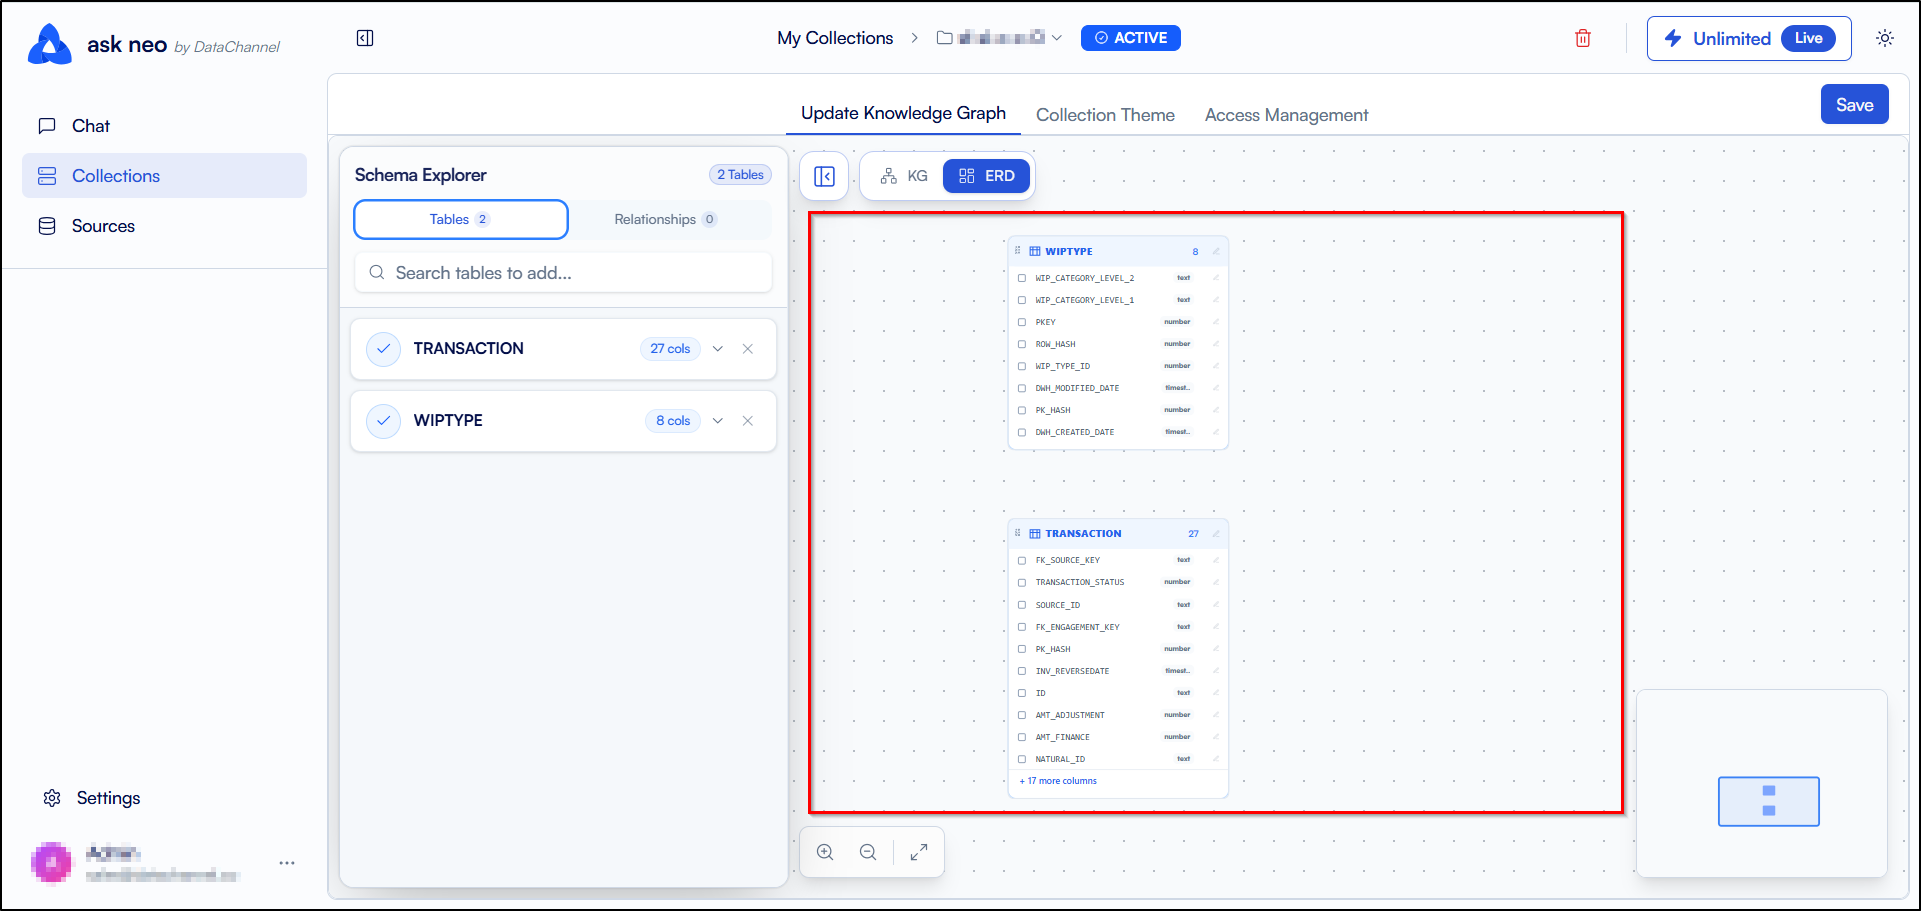
It will open a schema explorer on the left side of the screen where you can view the existing tables and columns in the collection. You can also add new tables and columns to the collection. You can also view and add the relationships between the tables in the collection.
-
Next, you have the Tables button which opens a list of all the tables added in the collection.
-
Below, you have the search box which allows you to search for and add a specific table from the list of tables in the collection.
-
Each table card displays the name of the table and the number of columns in that table.
-
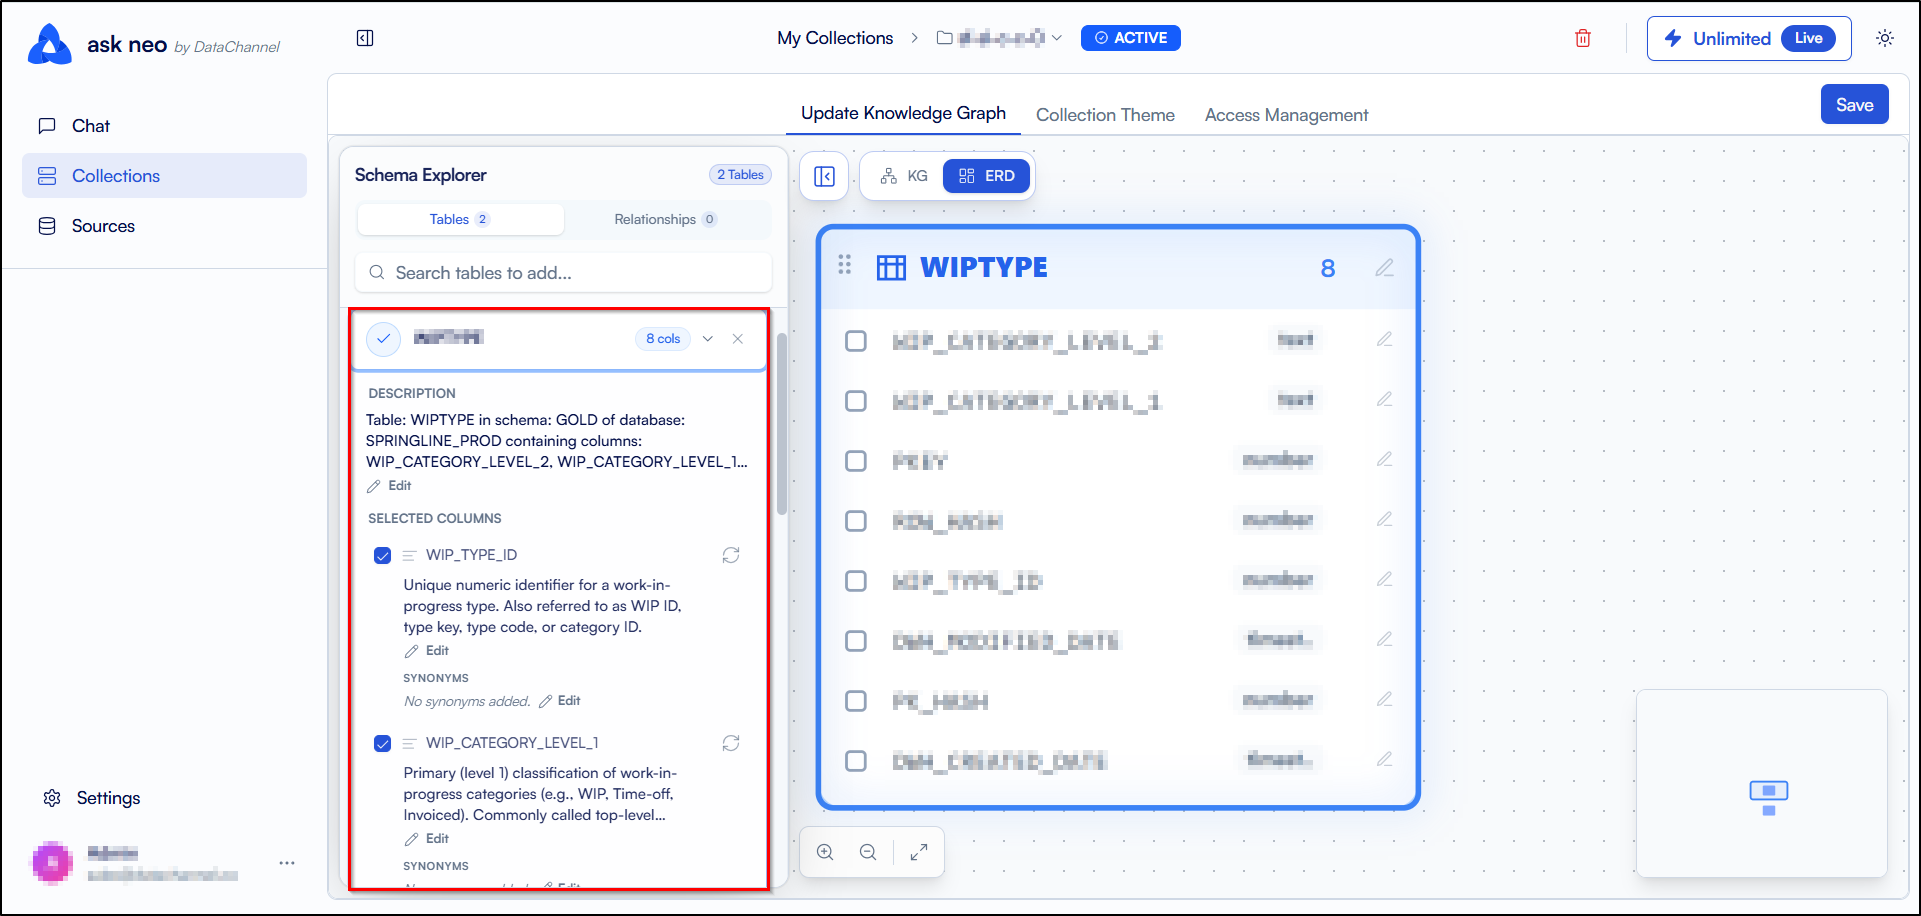
Each table card also has a dropdown icon which displays the description of the table and the list of selected columns in that table.
-
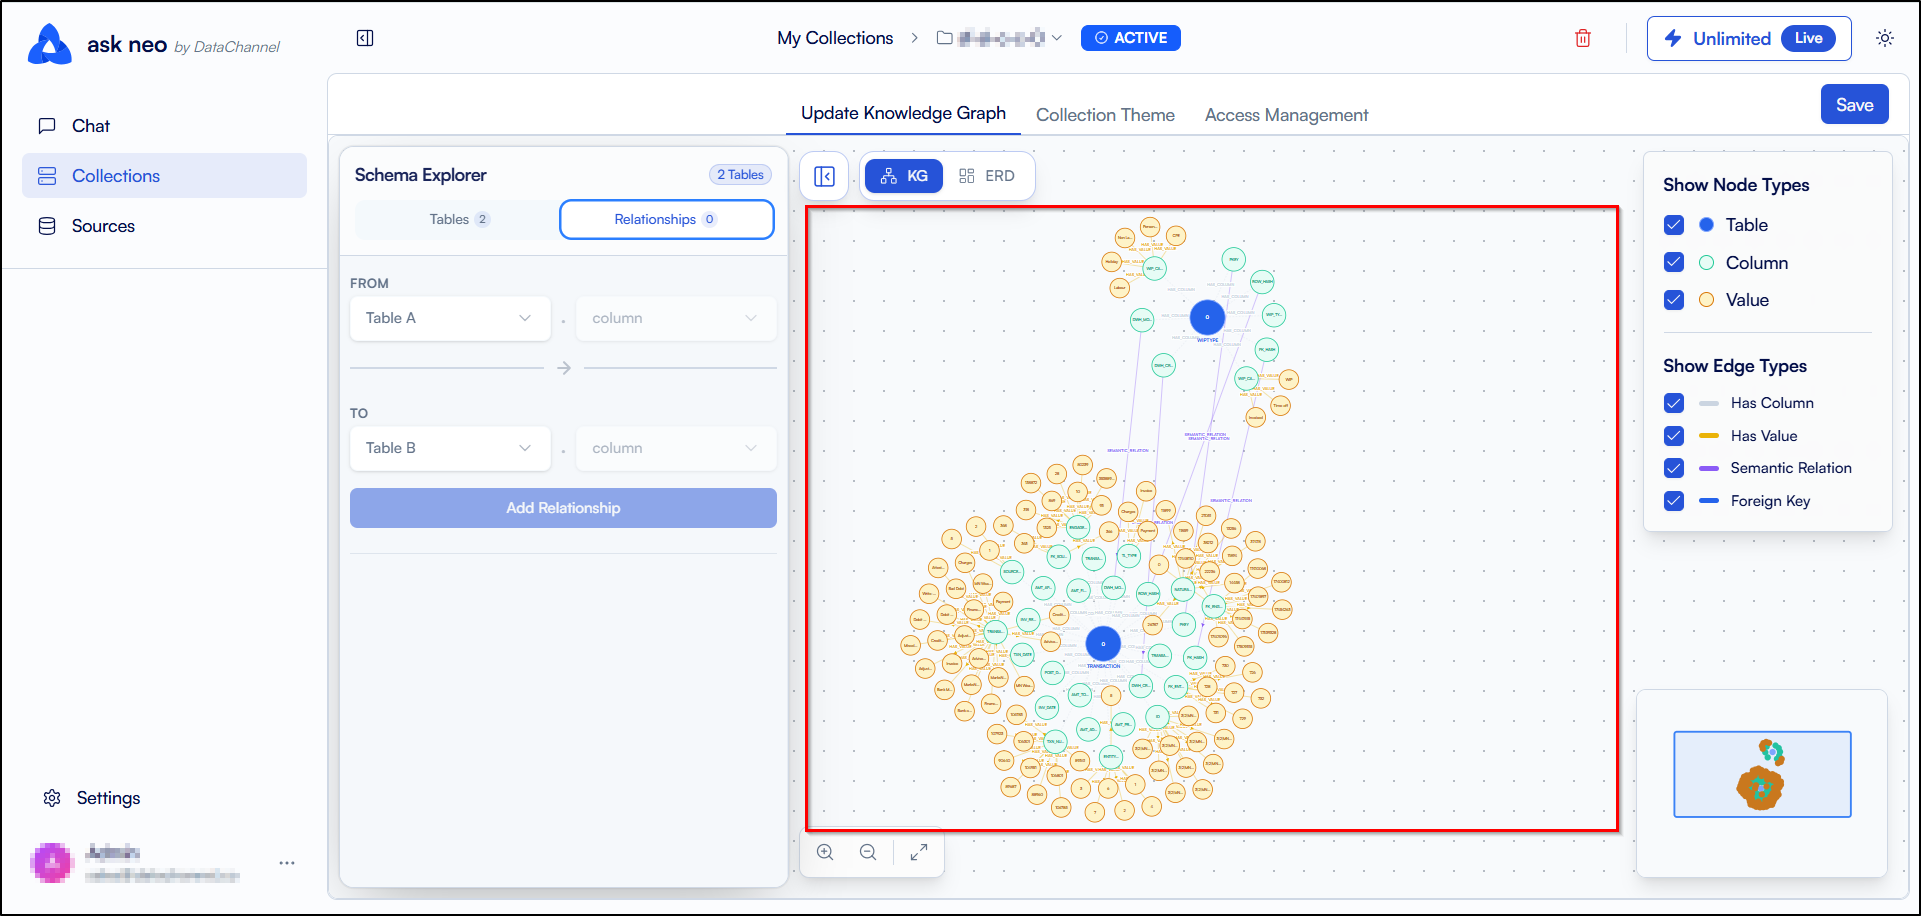
Select Relationship in the Schema explorer to add relationships between the columns of different tables in the collection. You can click on the Add Relationship button to add a new relationship between the columns of different tables in the collection.
-
Click on the toggle icon to open or close the schema explorer.
-
You can view the Knowledge Graph or Entity Relationship Diagram (ERD) of the collection by choosing one of the options.
-
The "Show node types" and "Show edge types" options allow you to view the different types of nodes and edges and their relationships among other nodes in the knowledge graph.
-
At the bottom left corner of the UI screen, you can view the top-down and left-right view of the entire canvas of the knowledge graph. It allows you to view the entire knowledge graph in a single view.
-
You can also zoom in and zoom out of the knowledge graph using the zoom in and zoom out buttons. Fit to view button allows you to fit the entire knowledge graph in the viewable area of the UI screen.
-
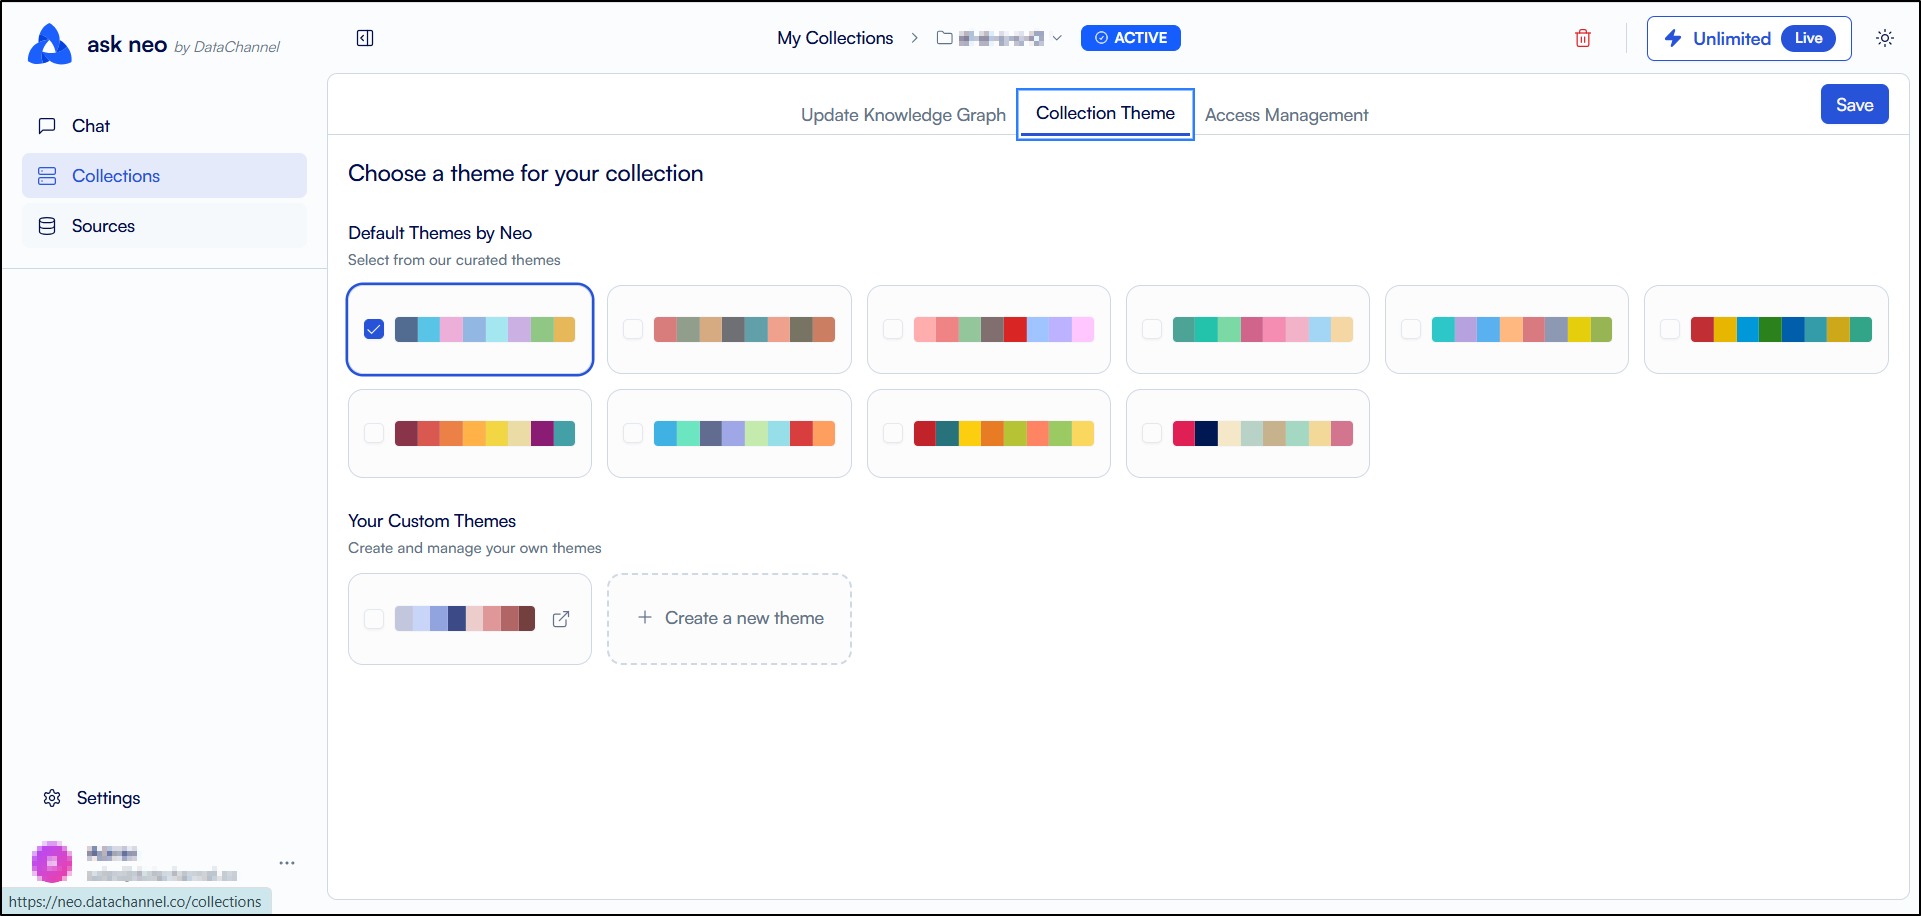
Next option that we have at the top of the screen is the Collection Theme button which allows you to change the theme of the collection. You can choose from the default theme of the Neo platform or can create your own custom theme for the collection.
-
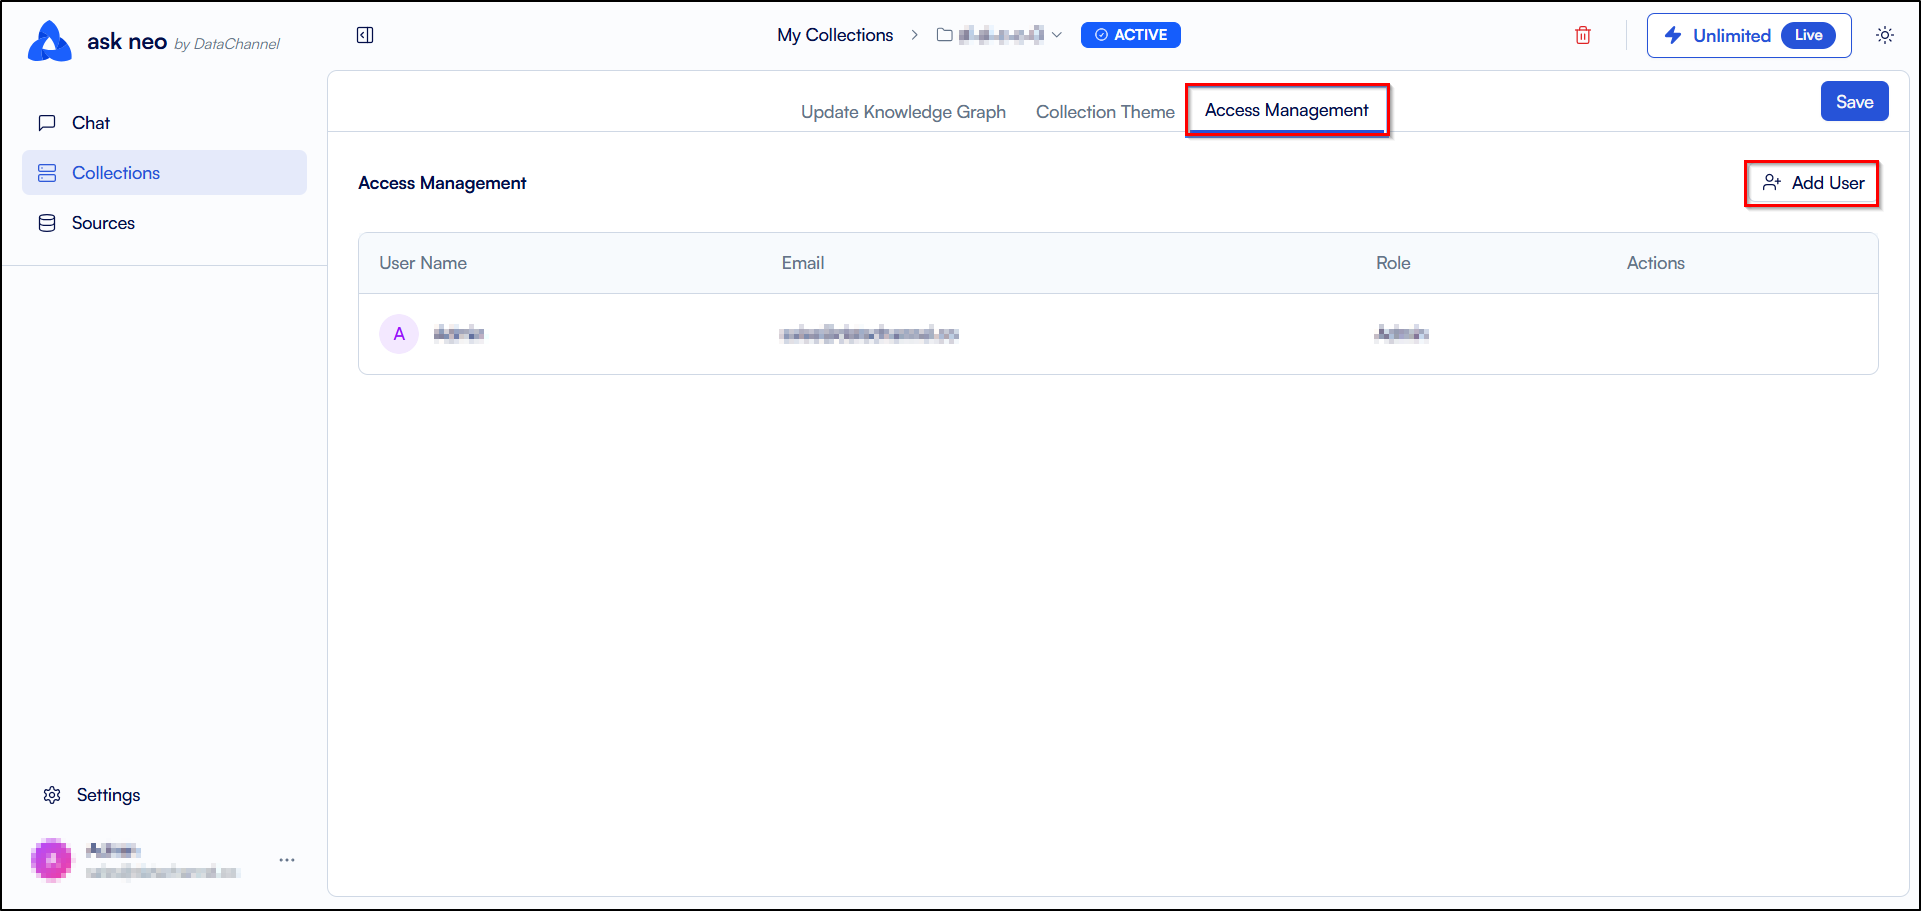
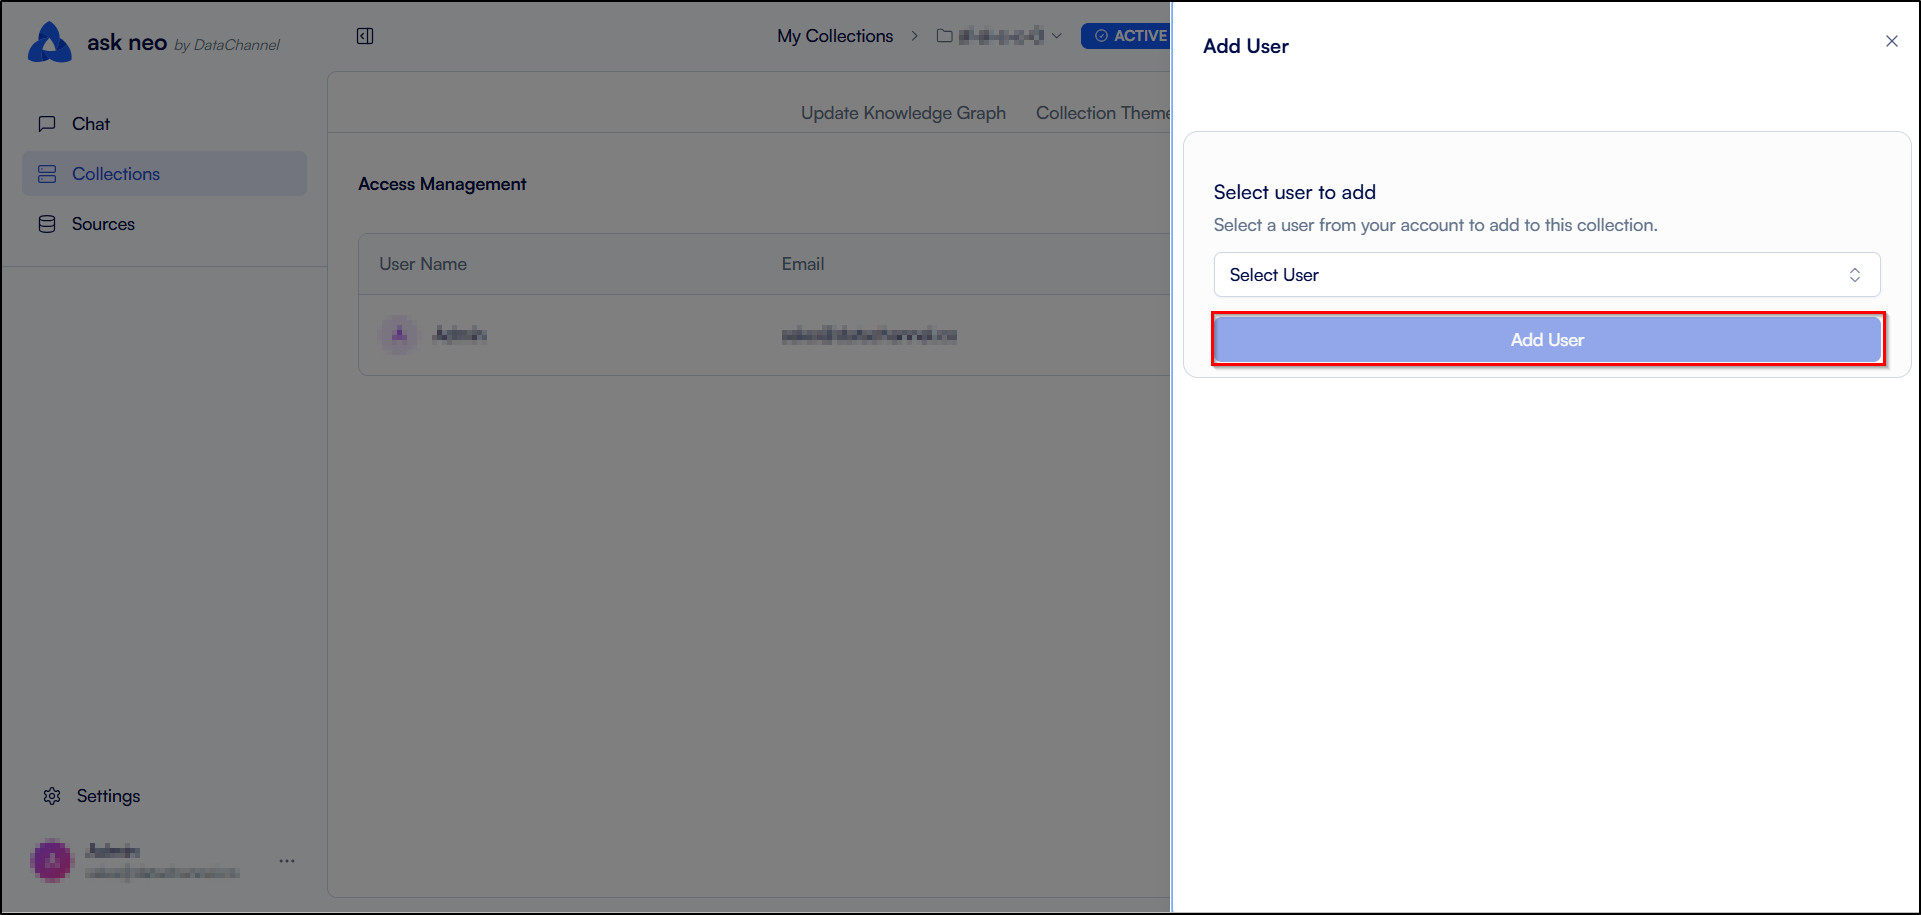
The last option that we have at the top of the screen is the Access Management button that allows you to add the users and manage their access to the collection. You can click on the Add User button to add a new user to the collection. It will open a card on the right side of the screen where you can select a user from your account to add to this collection.
-
At last, you can click on the Save button to save the changes made to the collection.
Still have Questions?
We’ll be happy to help you with any questions you might have! Send us an email at info@datachannel.co.
Subscribe to our Newsletter for latest updates at DataChannel.